

Here’s a $600 problem most people don’t even notice they have. LG and Samsung sell laundry pedestals for about $300 a machine, which gets you a hollow plastic box with one shallow drawer. One guy in a Southern California garage priced that out, closed the tab, and built something better in his own garage. Walk through it with me.
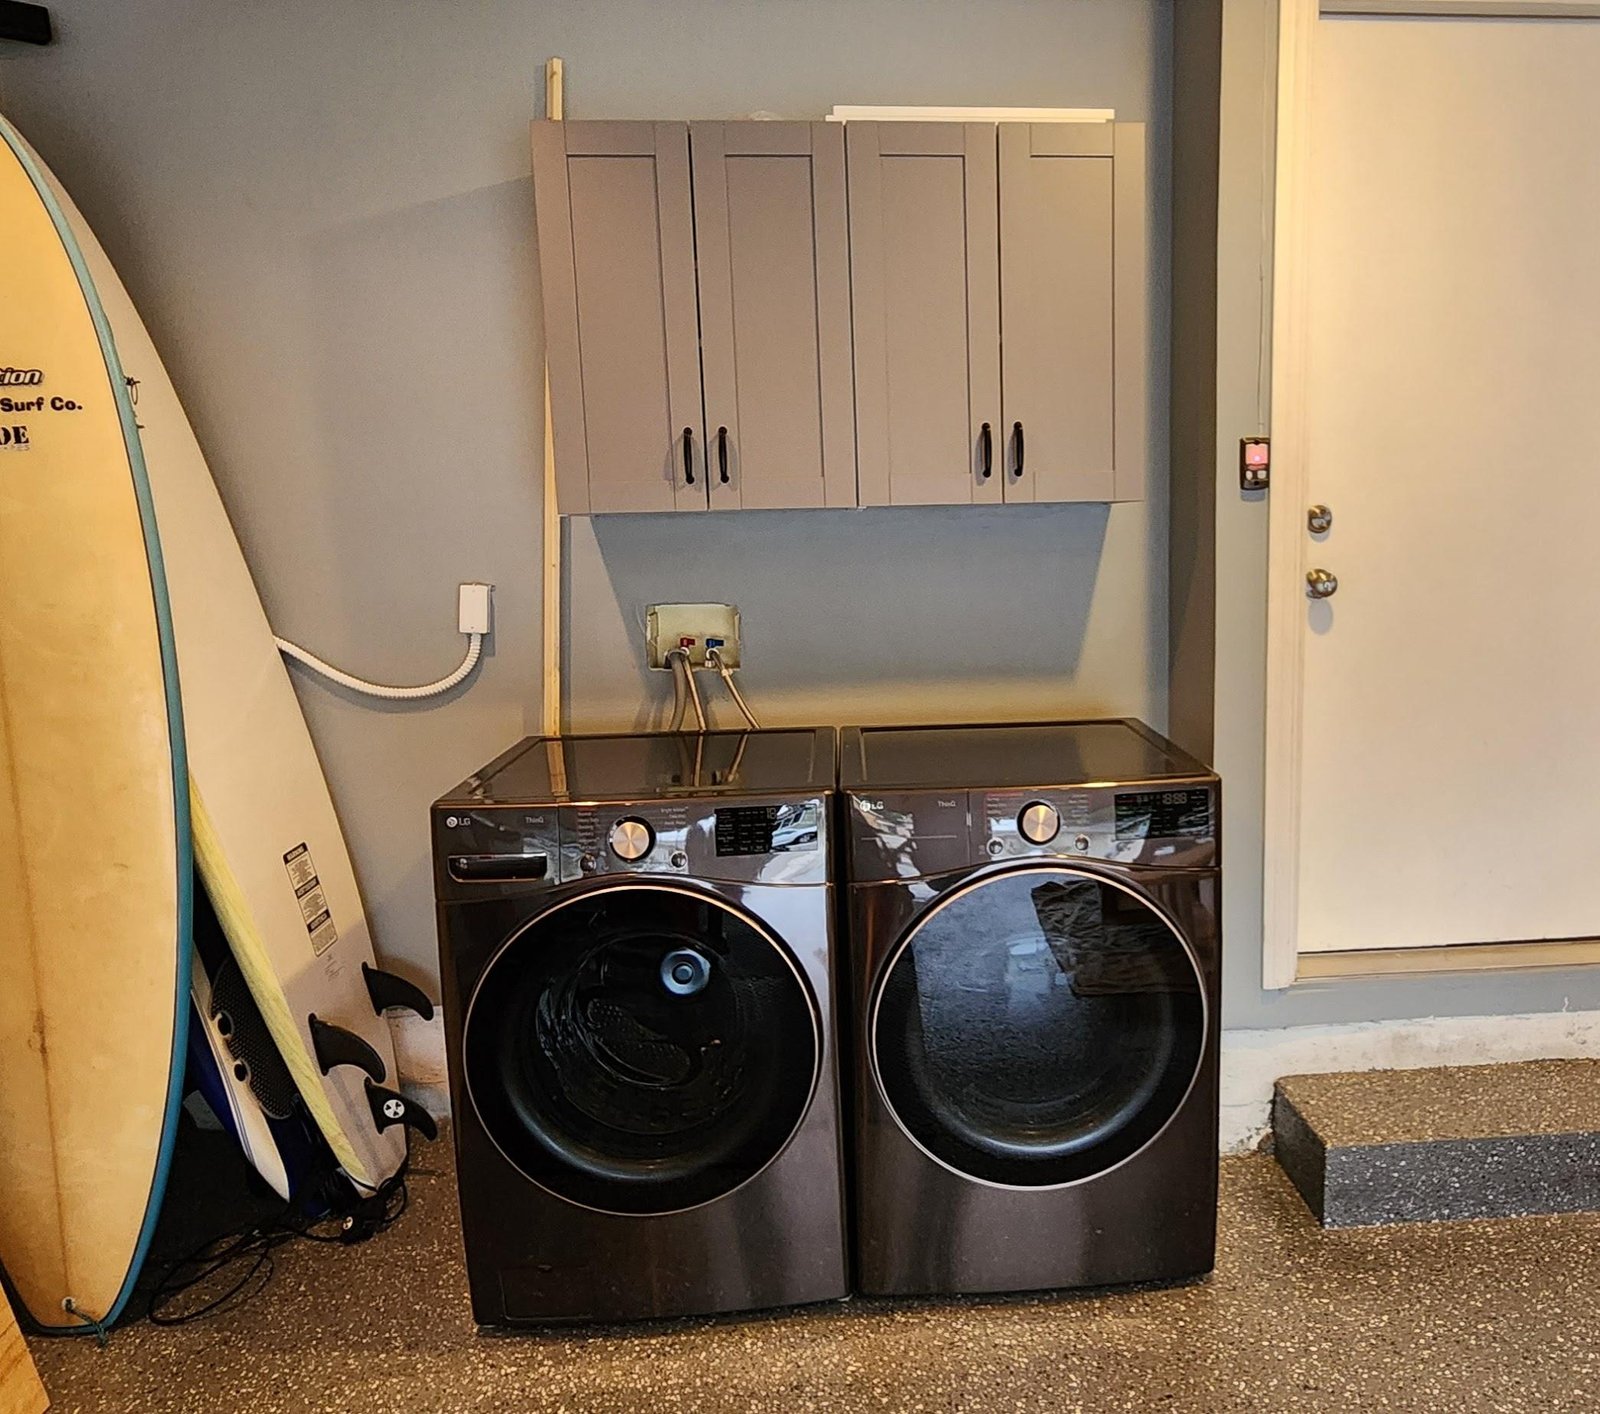
Two LGs on the concrete, a surfboard next to them, and the grey shaker cabinets haven’t even been hung yet. Every laundry day meant squatting to pull wet clothes out of a drum that sits a foot off the ground. Do that a few times a week for years and your back starts sending notes.
Factory pedestals from LG run roughly $300 (about €280) each. For a pair, that’s $600 of hollow plastic. He looked at that number and decided he could do better.
The problem with the $300 pedestal
The factory box isn’t bad, it’s just boring. It raises the machine about 15 inches (about 38 cm), gives you one shallow drawer, and matches your appliance in whatever color the brand picked. A custom cabinet could do three things it couldn’t: more storage, a better look, and real access to the hookups when something goes wrong.
Step one: a 2×4 frame on the workbench
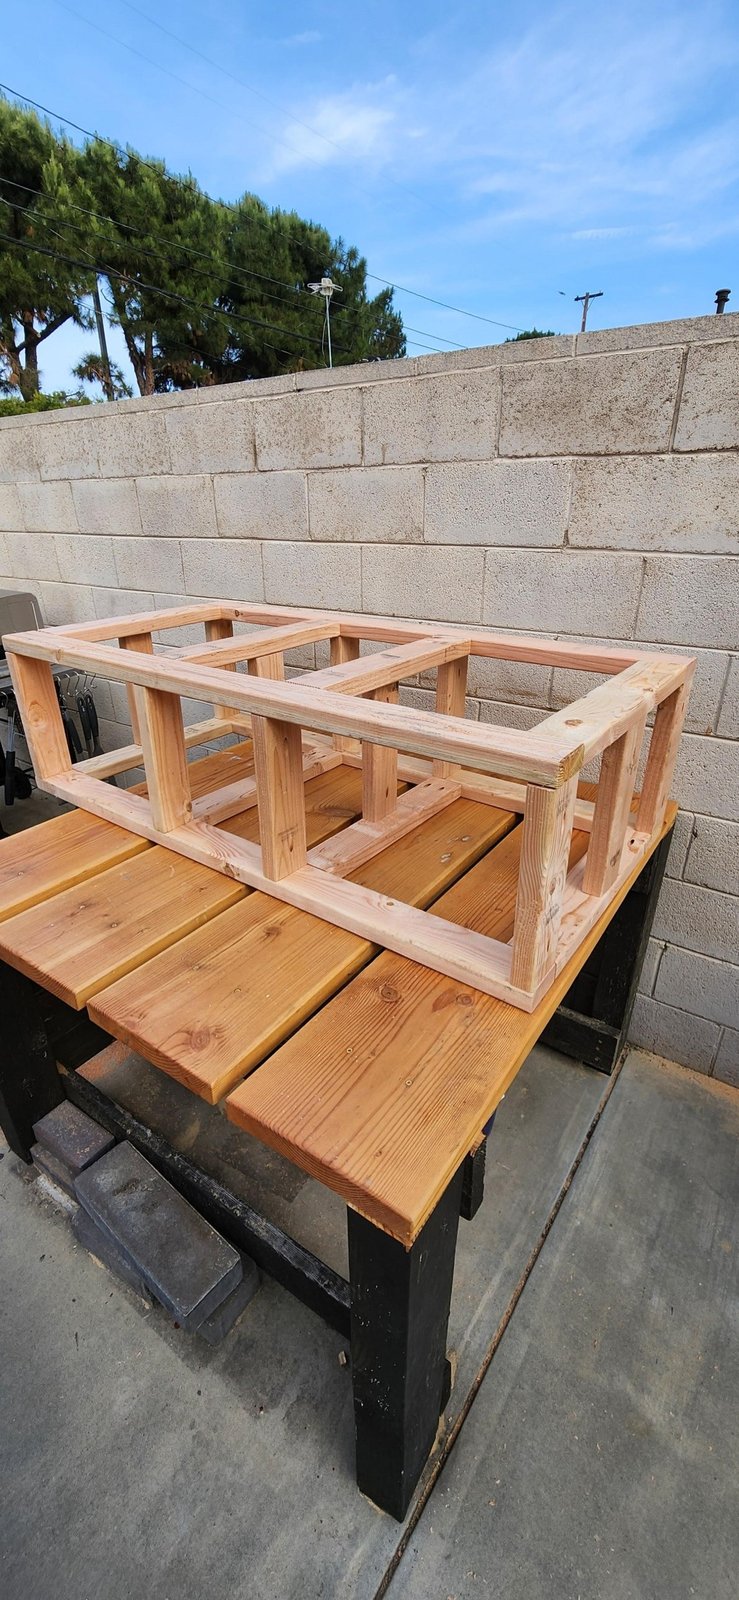
The skeleton. A plain 2×4 frame with internal supports breaking it into bays. Nothing fancy about the lumber. What makes it strong is how the joints go together.
Every joint uses pocket holes, which means the screws angle in through the inside face of the wood instead of straight into the end grain. Real difference when two machines are vibrating on top. The supports are also spread out so the load rides across the whole footprint, not just four corners.
Step two: wrapping the skeleton in plywood
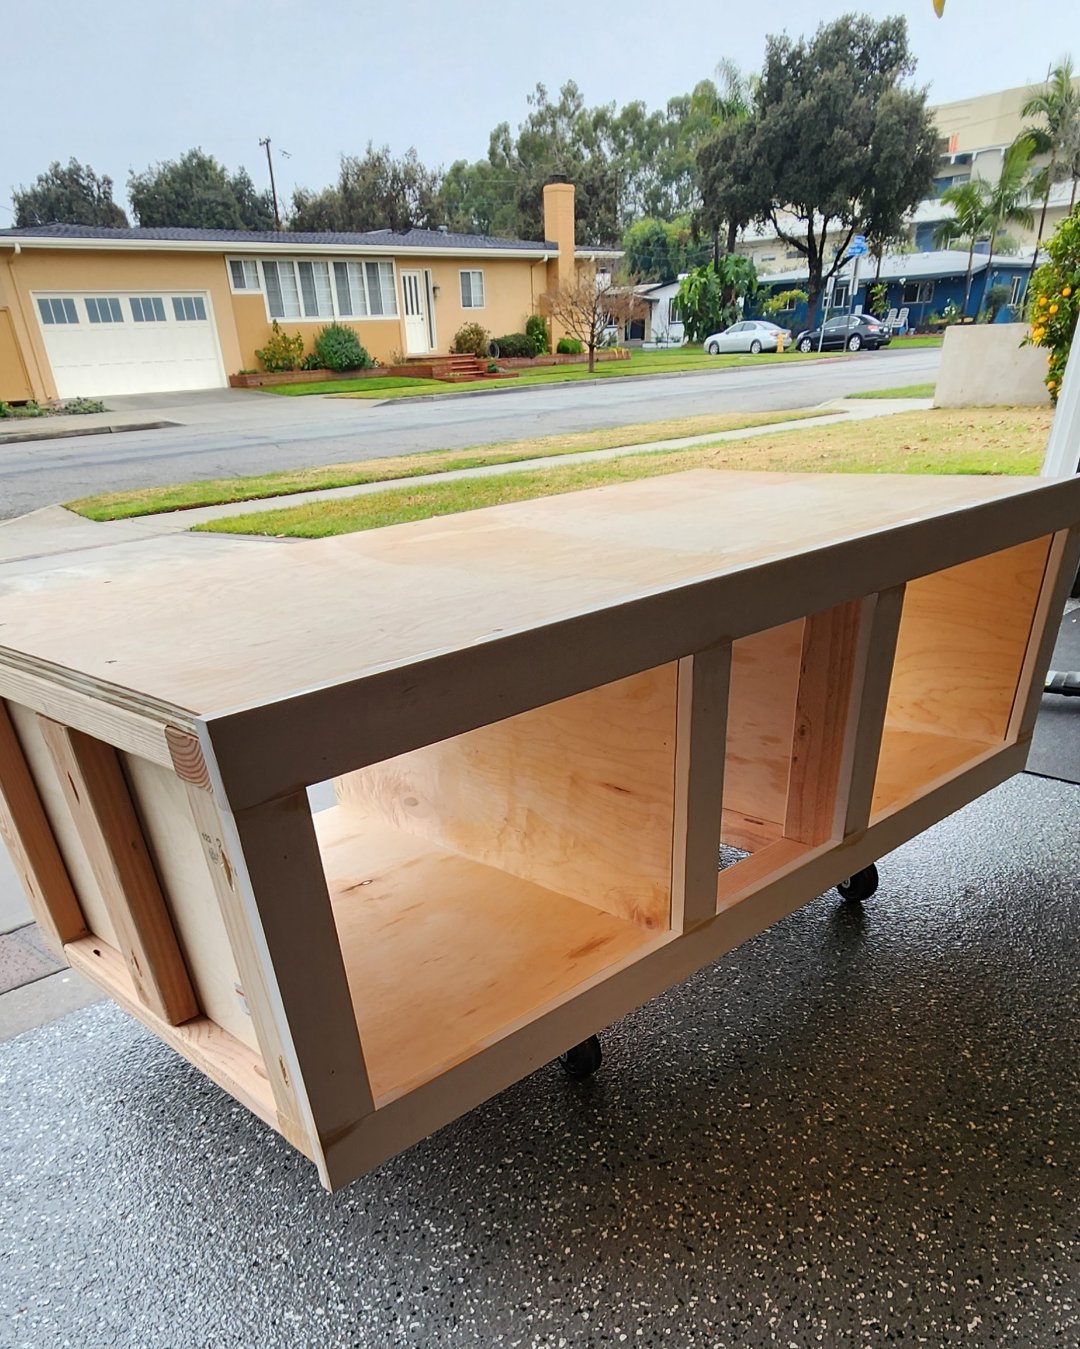
Now it starts to look like furniture. The 2×4 skeleton got wrapped in 3/4-inch (about 2 cm) plywood on the sides and top, with a flat face frame on the front. Two wide bays flank a narrower middle one, which is where the drawer eventually goes.
Those casters are temporary. They come off before the machines go on. For now they let him roll it around the garage without putting his back out a second time.
Step three: paint, and a small insurance policy
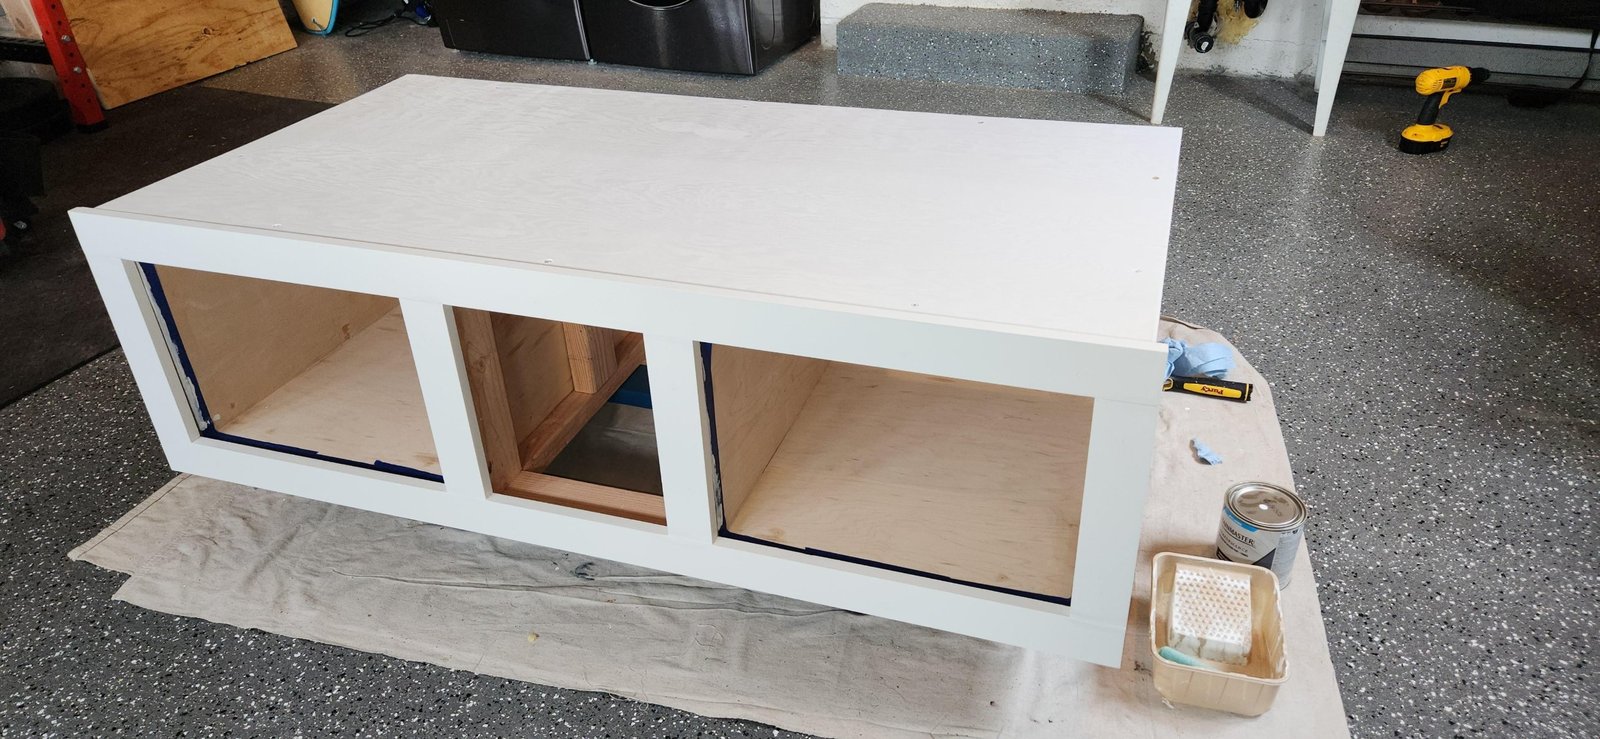
Painted bright white, with the plywood left raw inside the cubbies. The contrast between the clean face and the warm wood openings does the heavy lifting. It makes the whole thing read as built-in rather than empty.
The invisible move is on the base. He top-coated it with Spar Urethane, the same clear finish used on outdoor boat decks. If a machine ever leaks, the water sits on the finish for a while instead of quietly soaking in and rotting the wood from underneath.
The payoff: hidden drawer in the middle
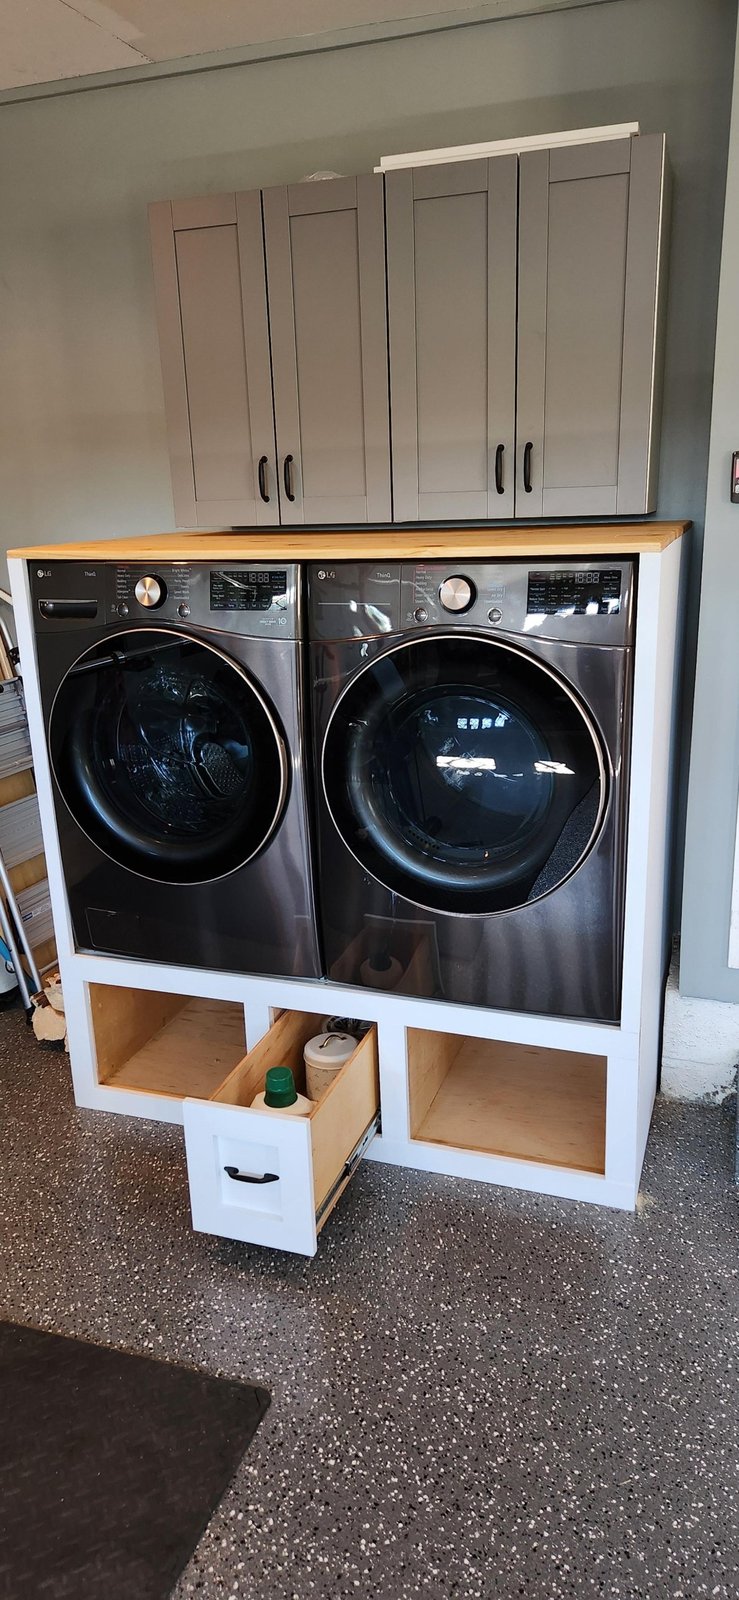
Here it is doing the job. Machines bolted down, warm butcher block counter across the top, and the panel in the middle that read as a solid face rolls out as a soft-close drawer. Detergent, dryer sheets, lidded canister, all tucked away. Easy to reach, hidden when closed.
The two outer cubbies stay open for taller stuff a drawer can’t fit: stain pens, a small basket, bulk bottles.
Drawer closed vs drawer open
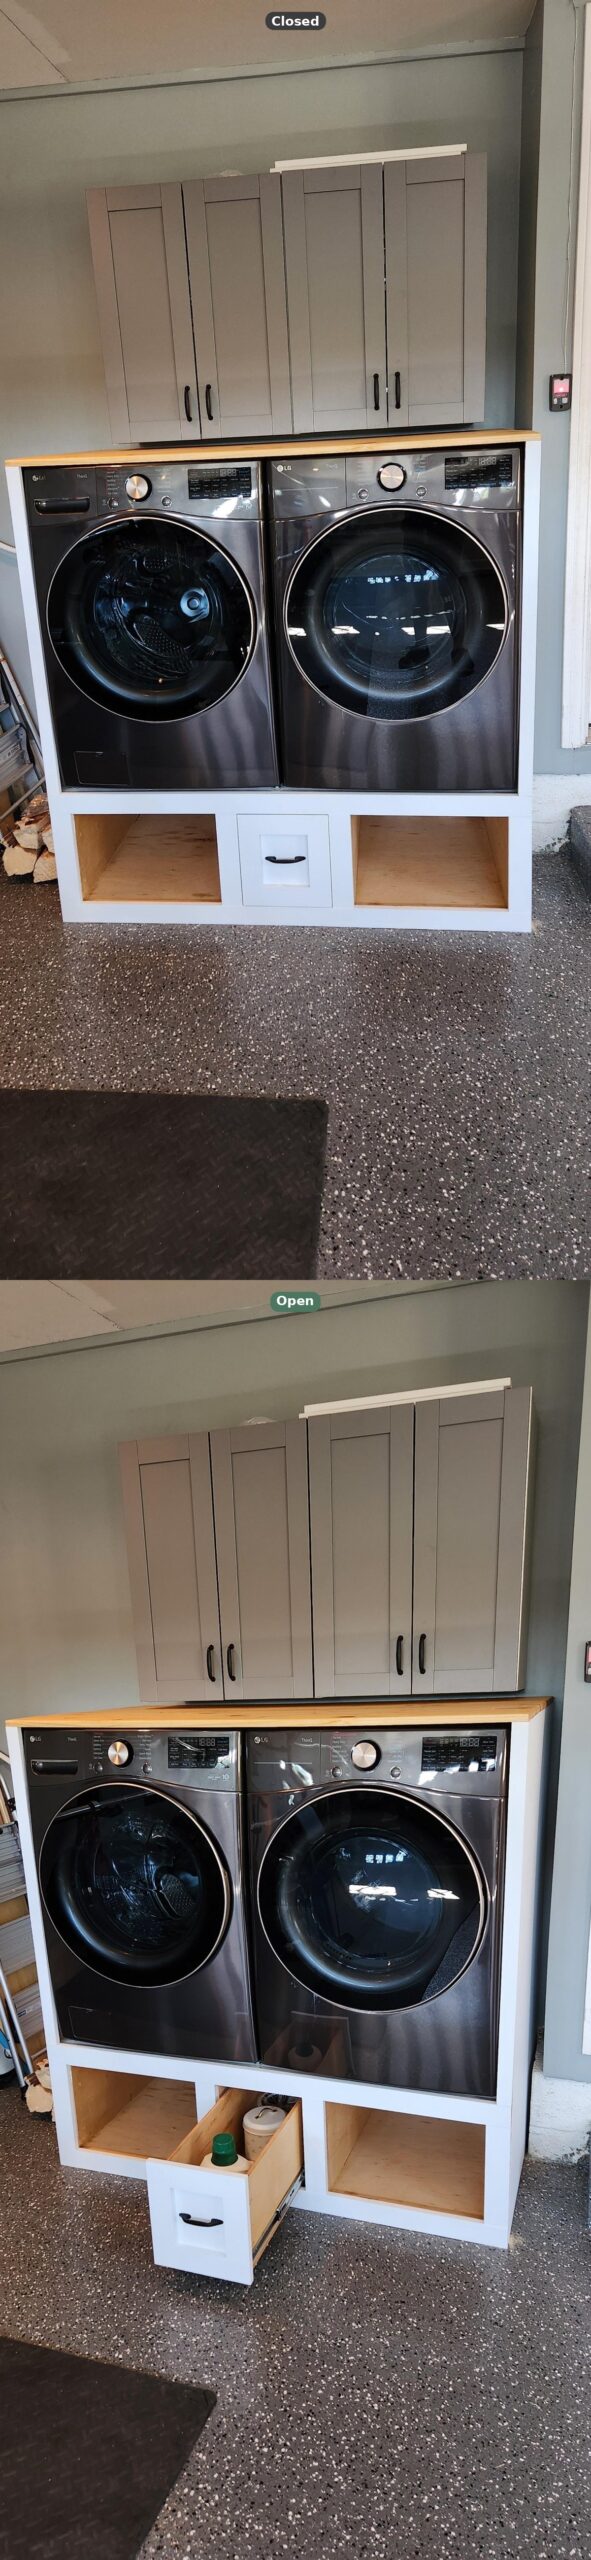
Closed, it reads as three clean bays. Open, it holds more than any factory pedestal drawer ever would. Same cabinet, two different storage modes, no hardware giving the trick away until you reach for the pull.
The serviceability move the appliance techs missed
Half the comments on the original Reddit post were worried about one thing: you’ve boxed your machines in. When they leak, when the washer dies, when the dryer needs a part, how does a tech get back there?
Pre-solved. The side panels come off with one screw on each side. The back stays wide open, so the water valves, the gas line, and the shutoff box are all still reachable. If a tech ever has to come out, the whole cabinet pulls apart in about five minutes with a screwdriver. Most DIY pedestals trap the machines inside a wooden coffin. This one doesn’t.
The finished view
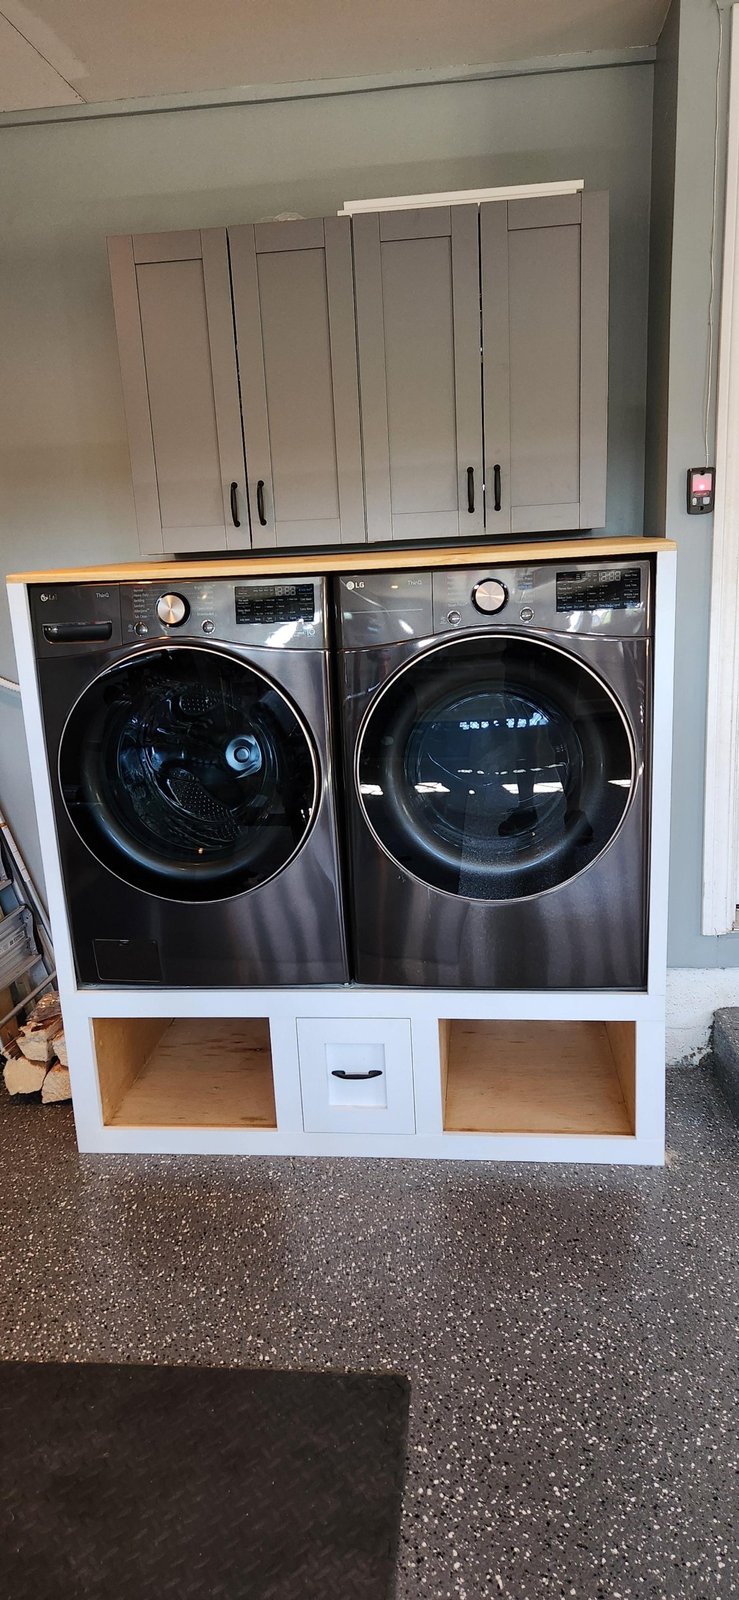
Machines at waist height. A counter that tells you where to fold or set a basket. The upper cabinets now look like part of a real laundry zone instead of boxes floating on a wall. Nothing about this room is bigger than before, but all of it works harder.
Same garage, same machines
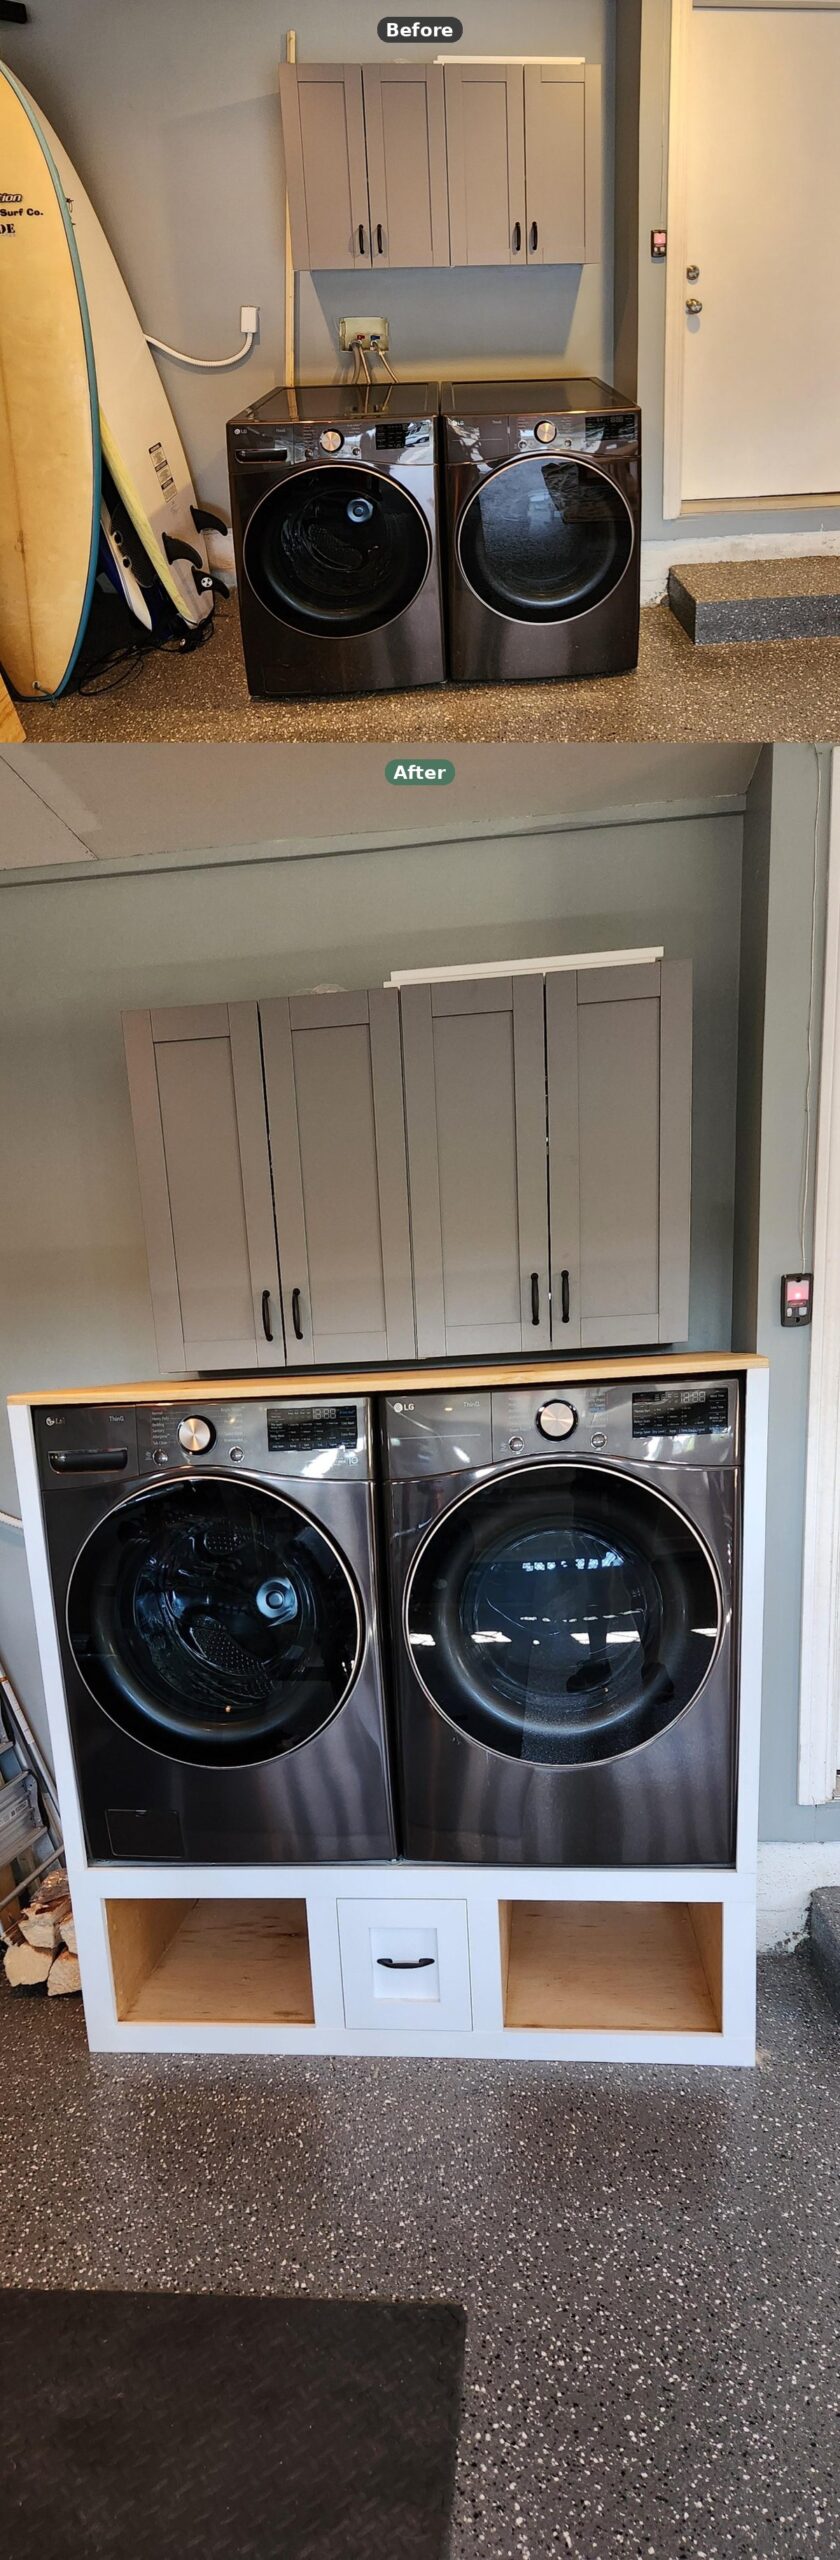
Same door frame on the right. Same cabinets, now properly hung. Same machines. What changed is everything in between, and most of it is one guy, some lumber, and a few weekends.
Why this build works
More useful storage, a look that fits the house, and service access that doesn’t disappear behind a wall. The cost was a fraction of what LG wanted. The bends he’s not going to do over the next decade add up too.
What would you build first with a free weekend and some 2x4s: this, or something that’s been quietly bugging you around your own house?