
If you’d seen this hallway last year, you’d have told them to gut it. Tired sprigged yellow walls. Heavy mahogany varnish. That no-colour cream on every door. The whole thing felt like a house that had given up.
They didn’t gut a single thing.
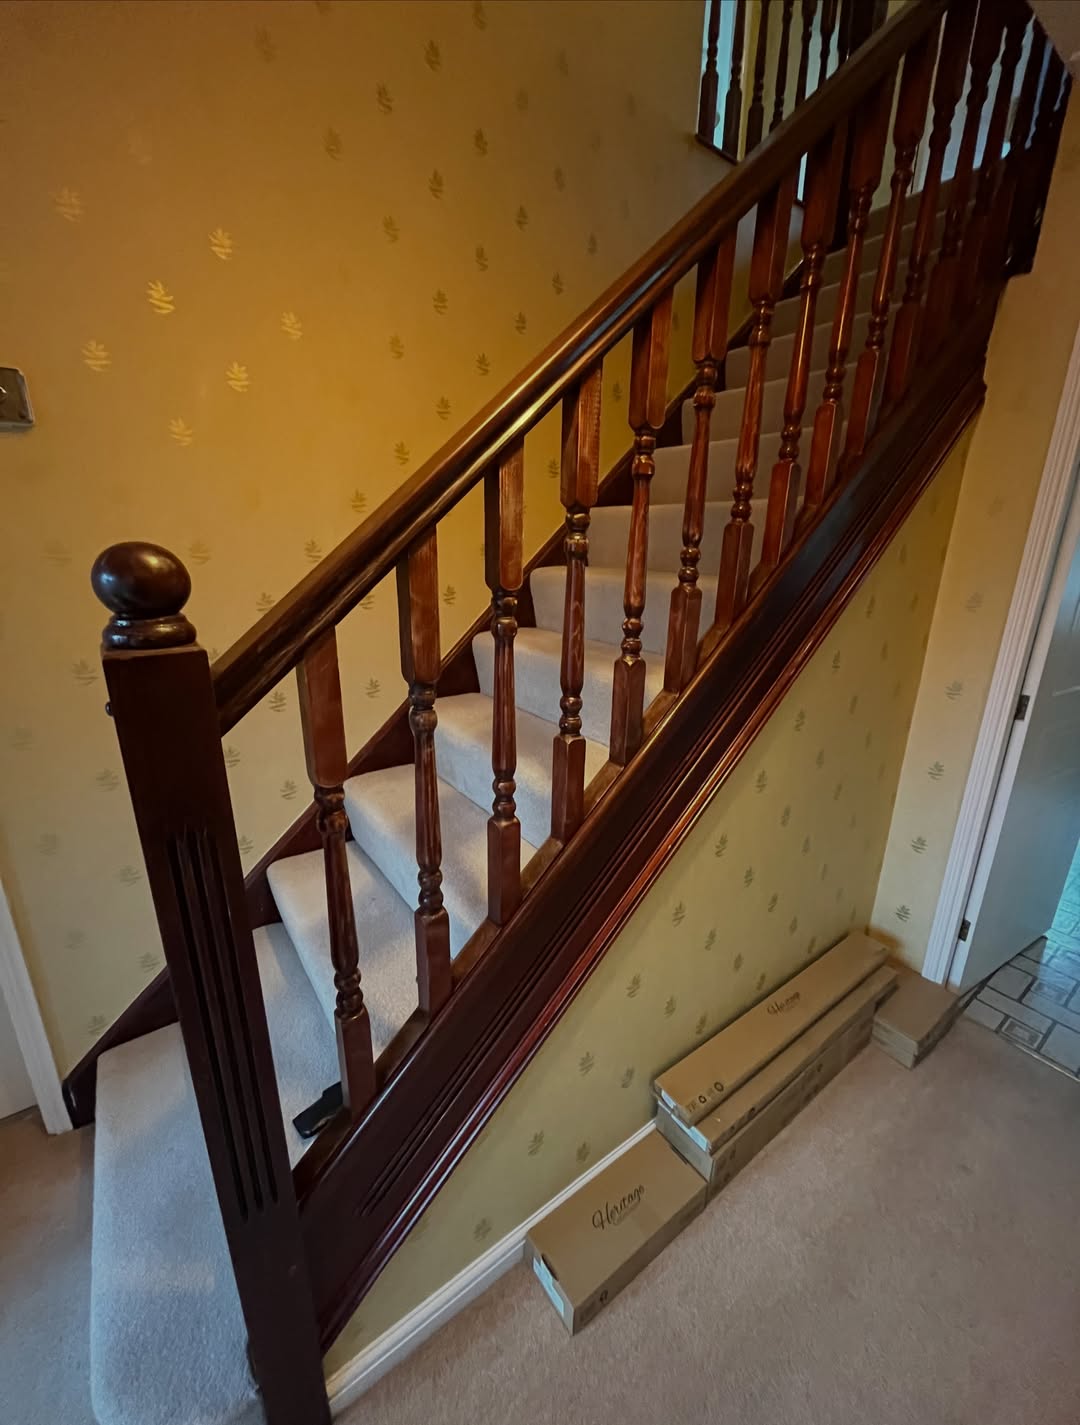
Same staircase, spindles, newel, doors, carpet, brass handles. The whole makeover is paint and masking tape. If you’ve been sitting on a quote to rip yours out, read this before you sign it.
The before was tired, not broken
The problem with hallways like this isn’t that anything’s broken. The banister is solid. The doors close. The wallpaper is clean. Every surface is just doing the same dim, warm, 1998 thing at once, and the whole hallway sinks into one mushy mood.
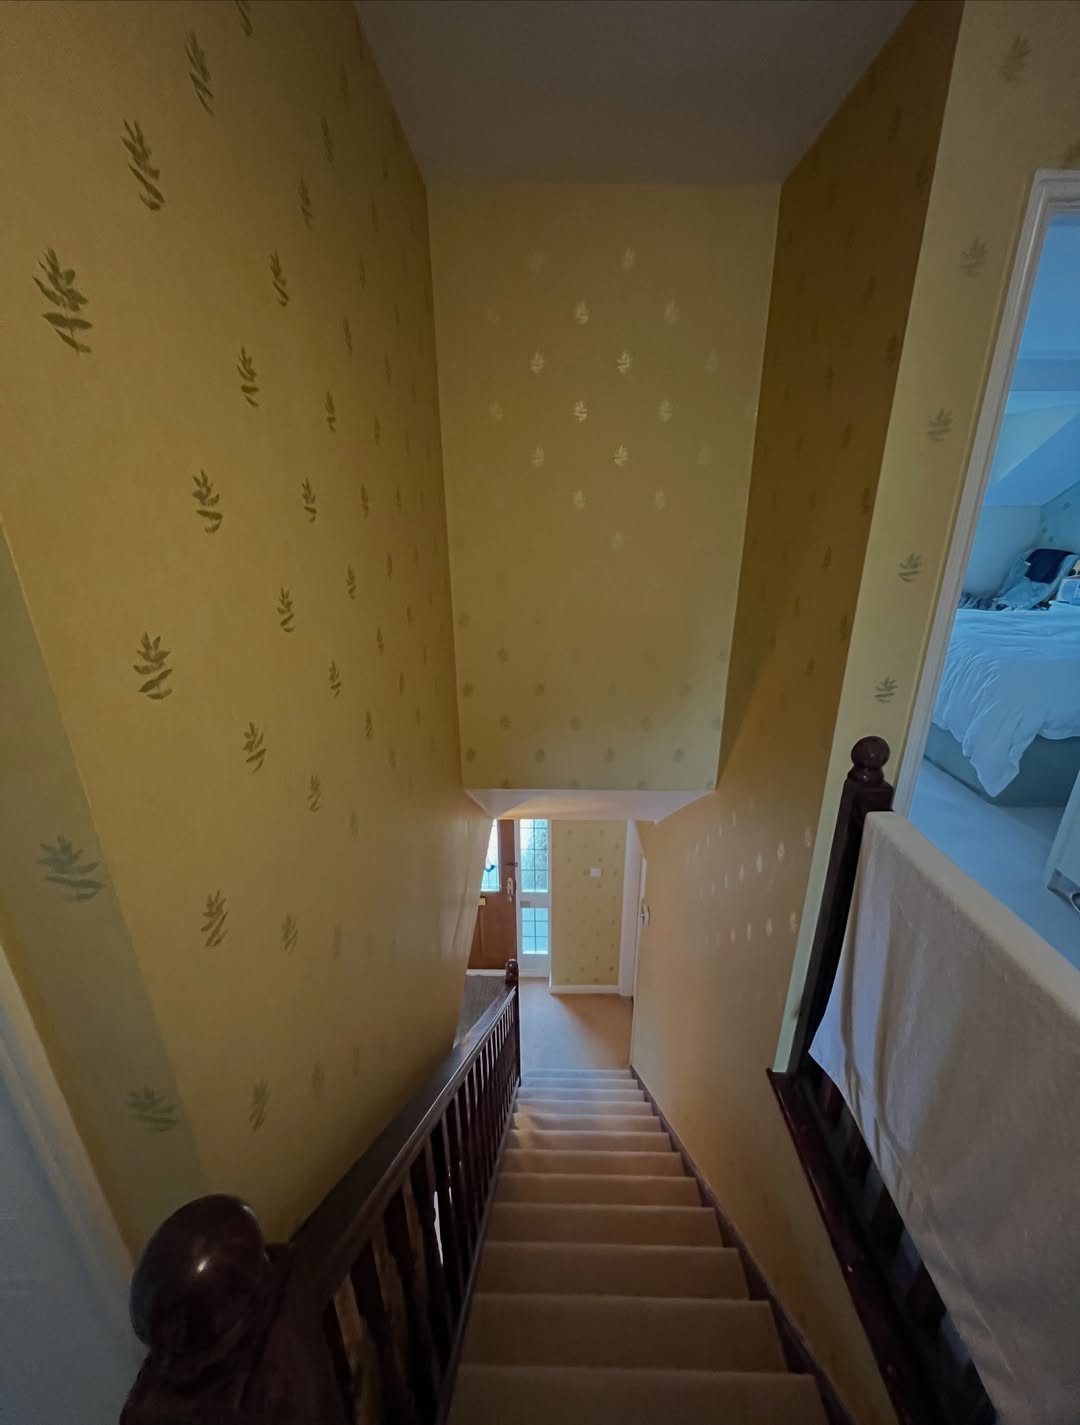
That tall wall is the one most people would cover in £120-a-roll designer wallpaper. Four rolls plus a decorator who can hang paper on a slope runs £800 to £1,200 before the woodwork is even touched. The painters skipped the roll entirely.
The banister was never the problem, the colour was
Here’s the trick missed on every dated-staircase post. The mahogany isn’t ugly. The turned spindles aren’t ugly. It’s the red-brown varnish tying everything into one heavy object. Break the colour, break the weight.
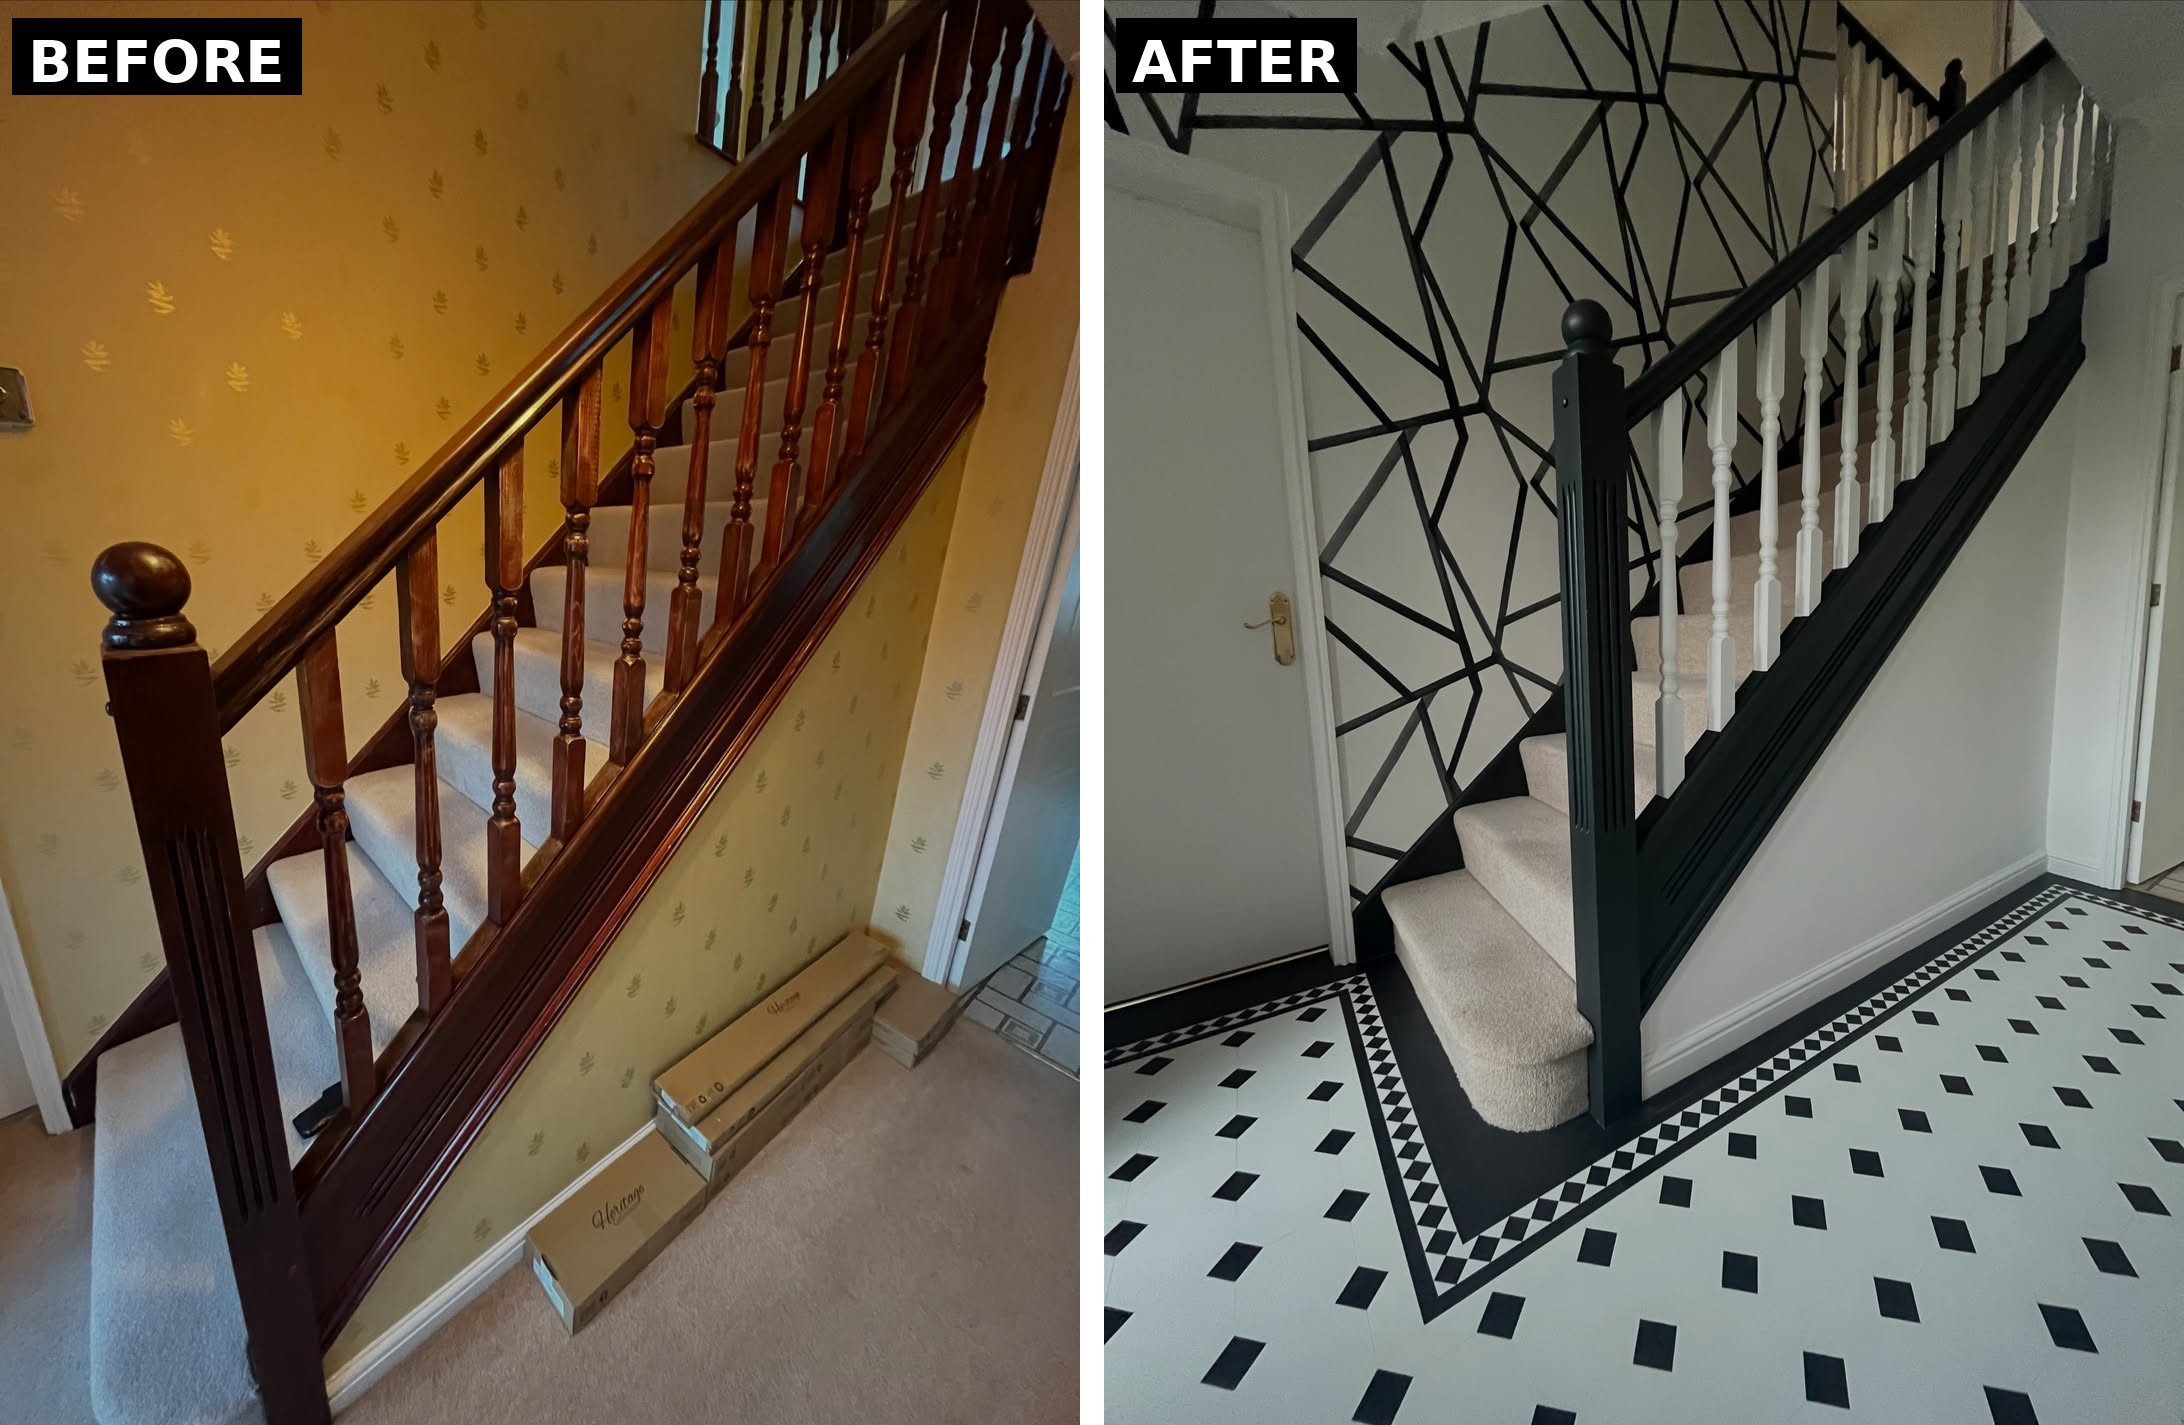
They sprayed the spindles flat white, then painted the handrail, newel, and stringer board matte black. Same wood underneath, cut into two visual pieces that never used to be separate.
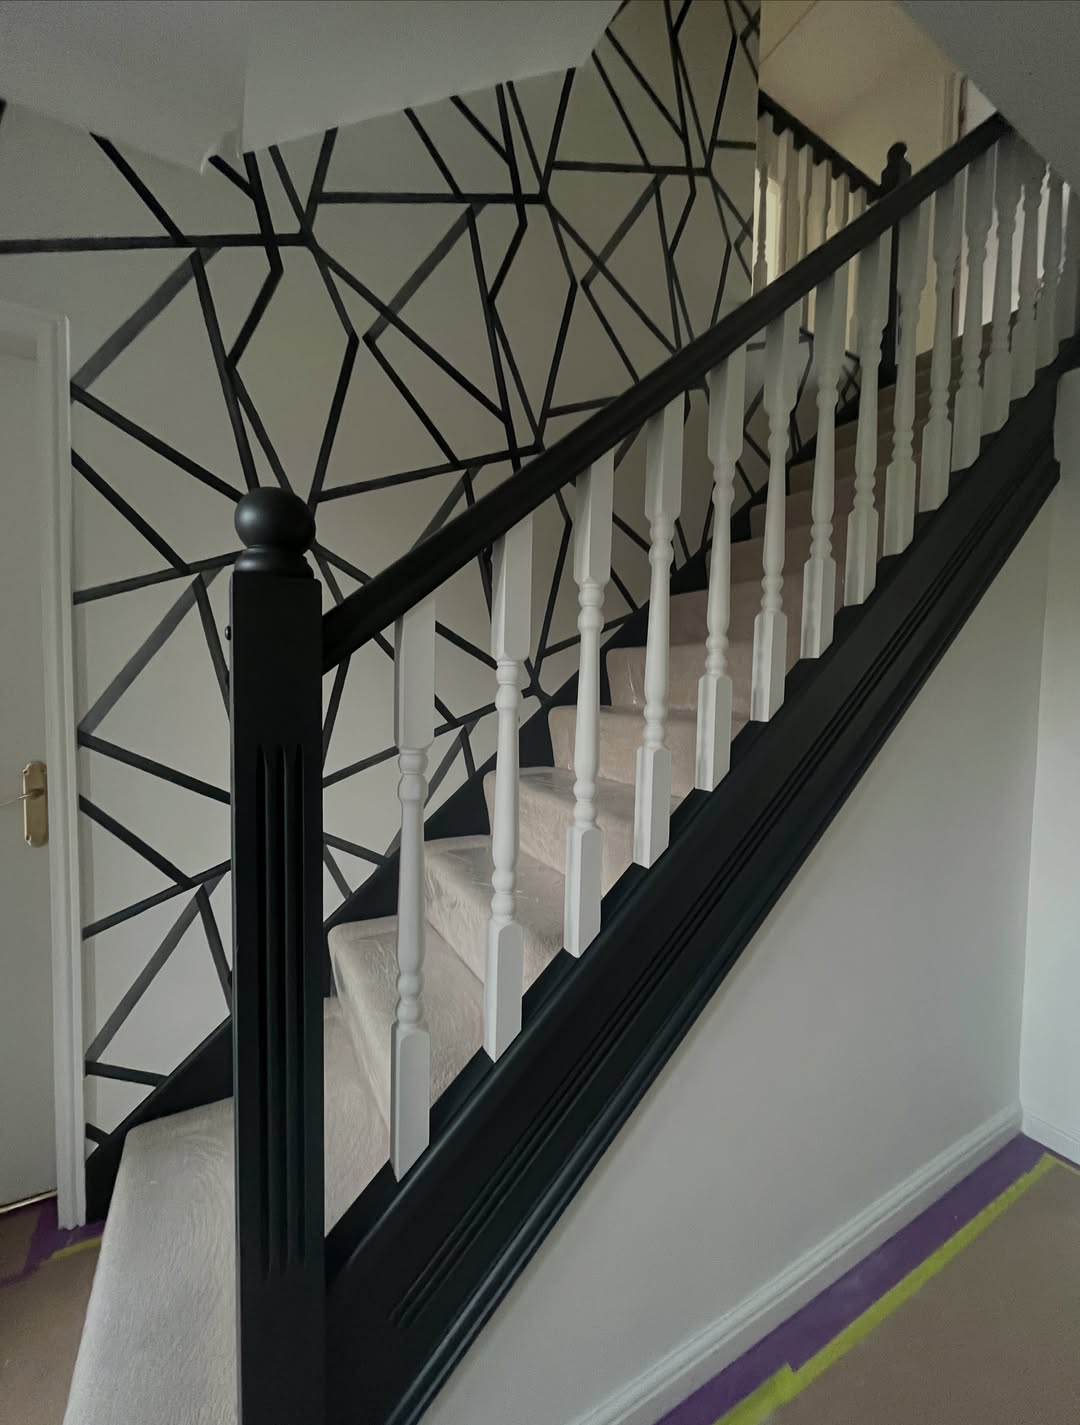
The white spindles step forward and almost float. The black rail recedes and acts like a frame. It reads as rhythm instead of weight, and nothing structural changed to get it.
A tip: brush marks on turned spindles are a dead giveaway for DIY. They sprayed them. If you can’t borrow a sprayer, taking them off and rolling them flat beats a brush in the corners.
The wallpaper isn’t wallpaper
Look closely at the feature wall climbing the stairs. No seams. No roll joins. No pattern repeat. That’s because there’s no paper on it.
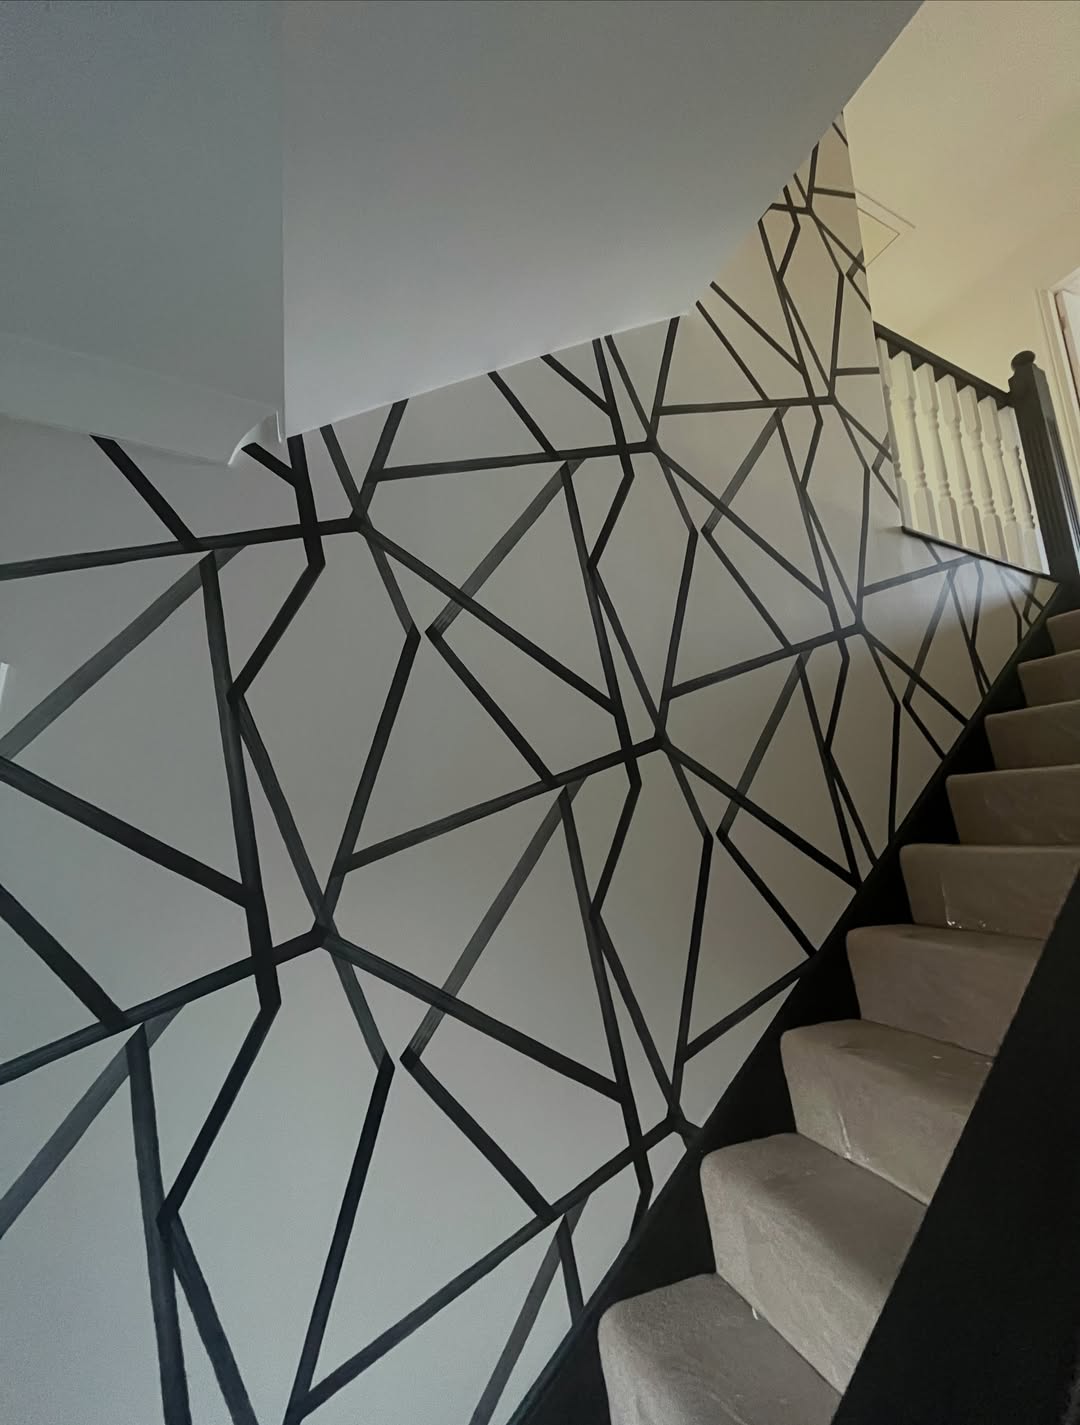
They laid a white base coat, taped the pattern on by hand with long strips of masking tape, pressed the edges down hard with a credit card so paint couldn’t bleed under, rolled black paint across the gaps, and peeled the tape while the paint was still slightly wet so the lines came away clean.
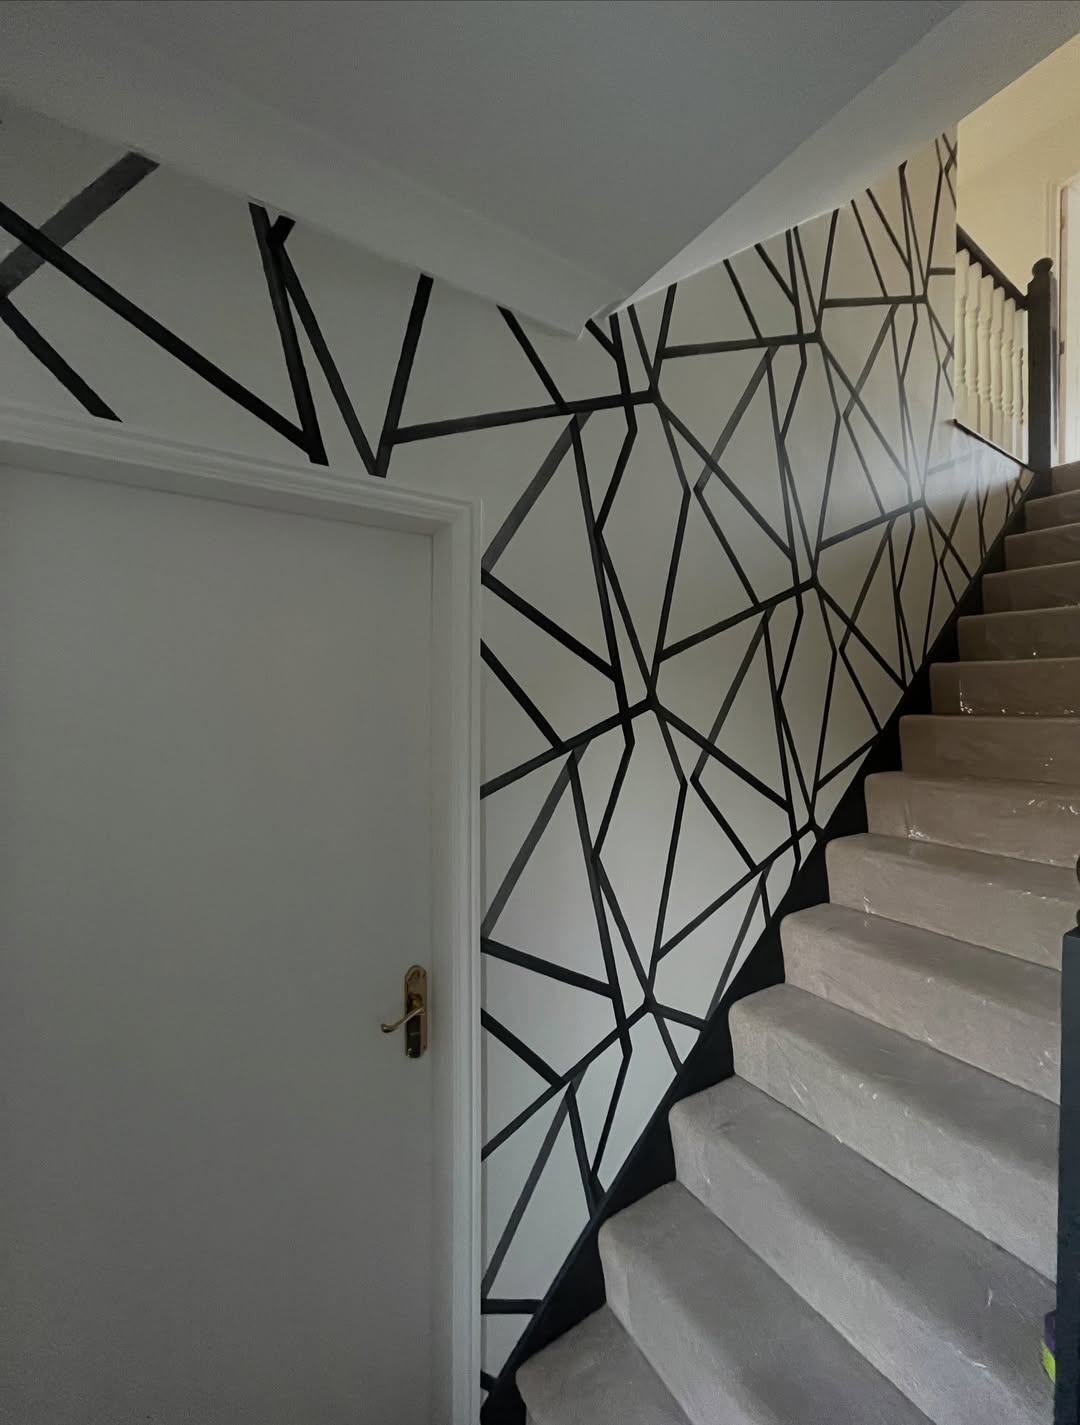
The hardest part isn’t painting. It’s deciding where every line goes before you start. Short anchor strips go up first, then longer strips connect them. Skip the anchors and the whole pattern skews toward one corner.
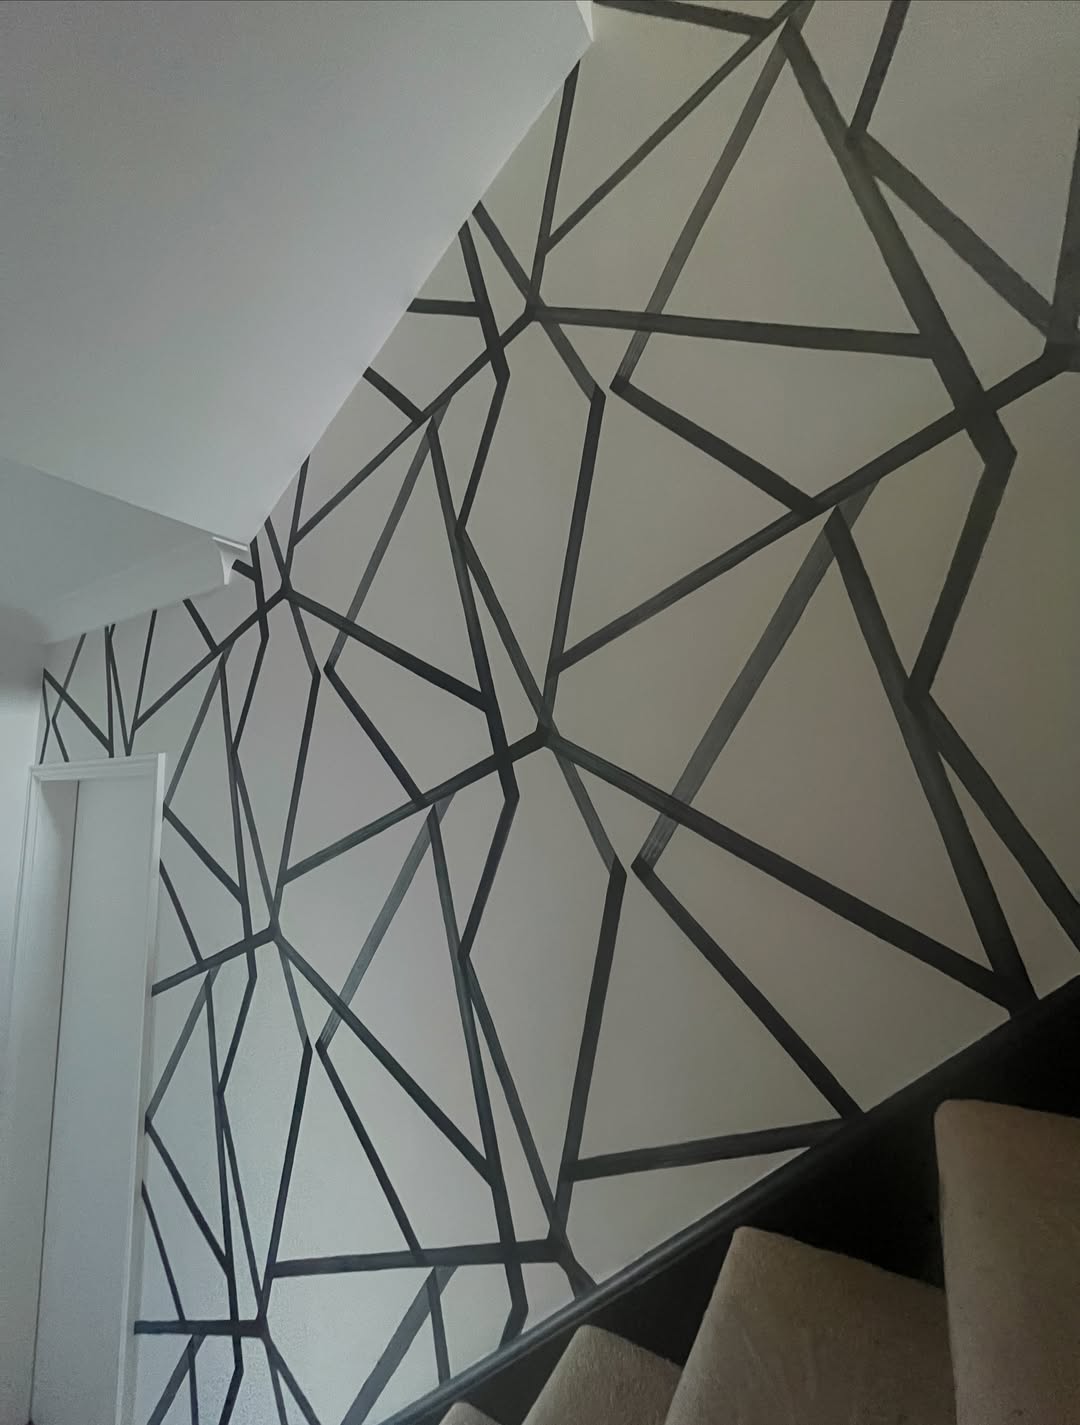
In softer landing light, the black reads almost charcoal, which keeps the wall from feeling too hard against the carpet. That’s matte black paint doing what matte does in low light.
Upstairs got the same treatment
The sprig wallpaper didn’t stop at the stairs. It carried through the upstairs hall too. That whole space got stripped to white walls, with the pattern appearing again on one wall per view, so the first floor feels tied together.
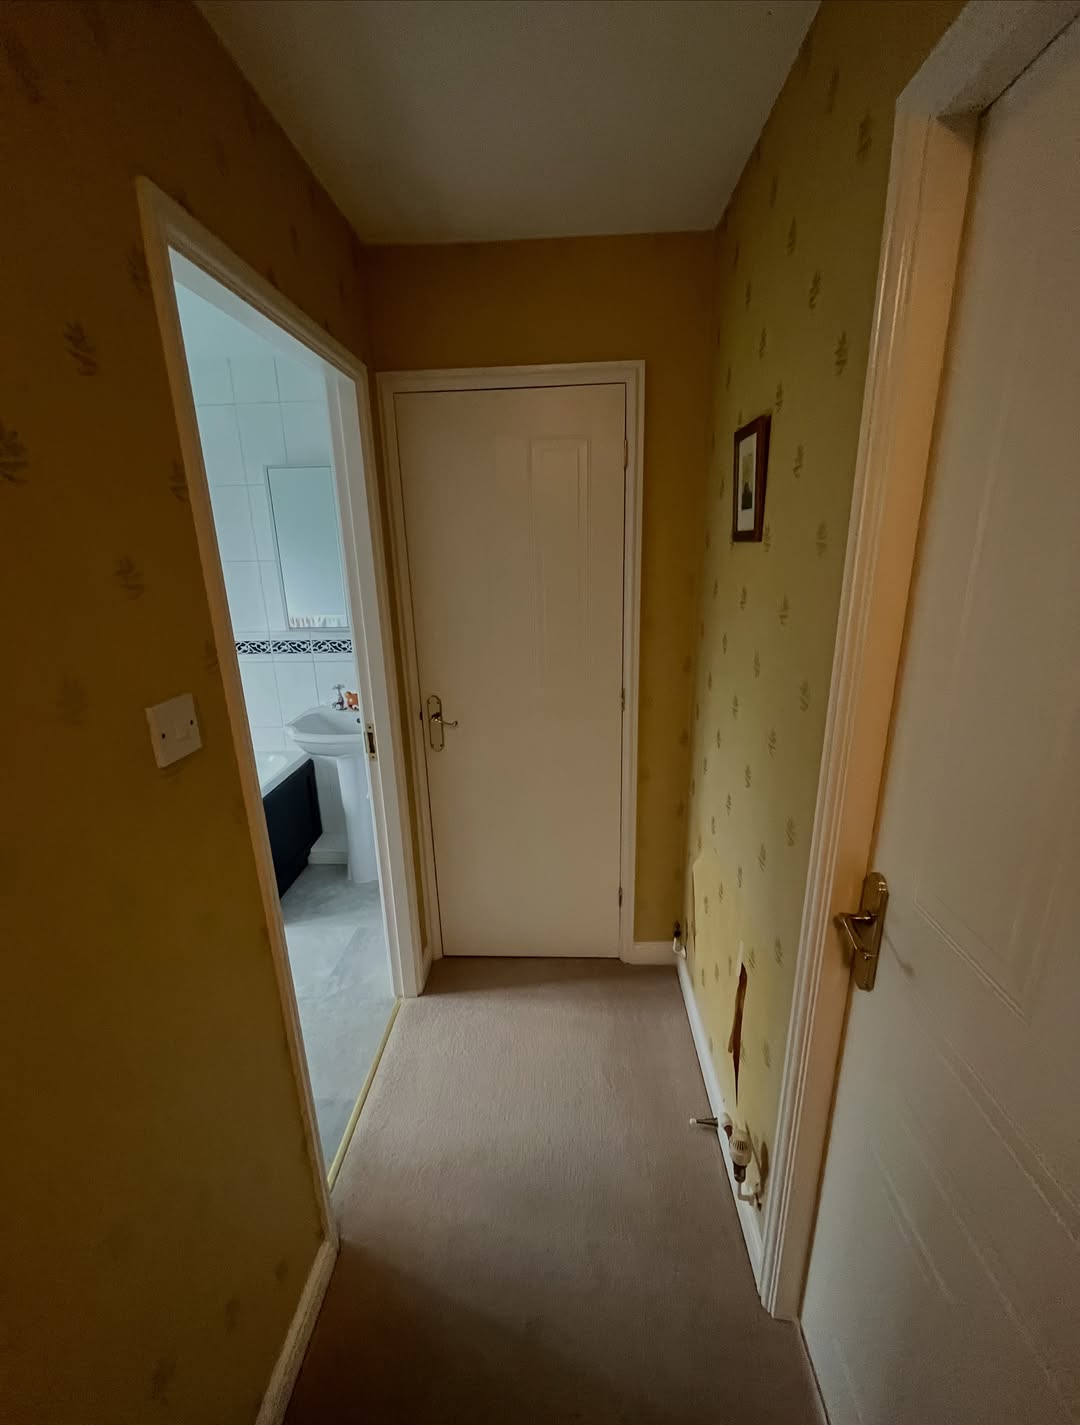
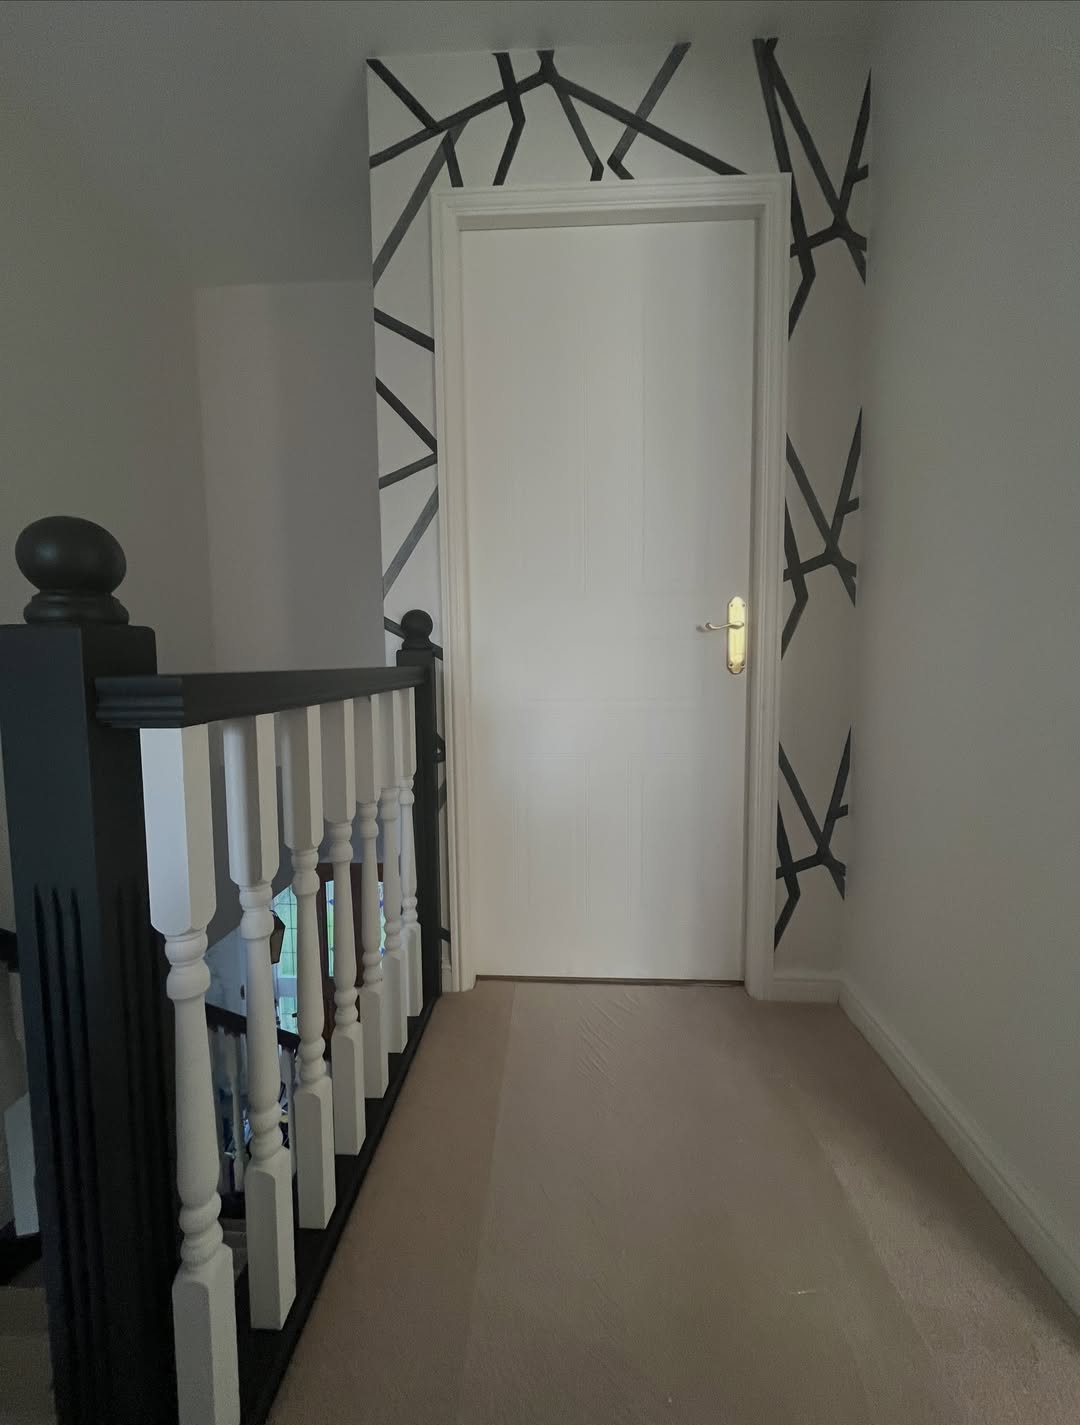
Same door, same brass handle, same frame. Just repainted bright white with the pattern drawn around it. The pattern stops where the plain wall starts, which keeps the landing from feeling tight.
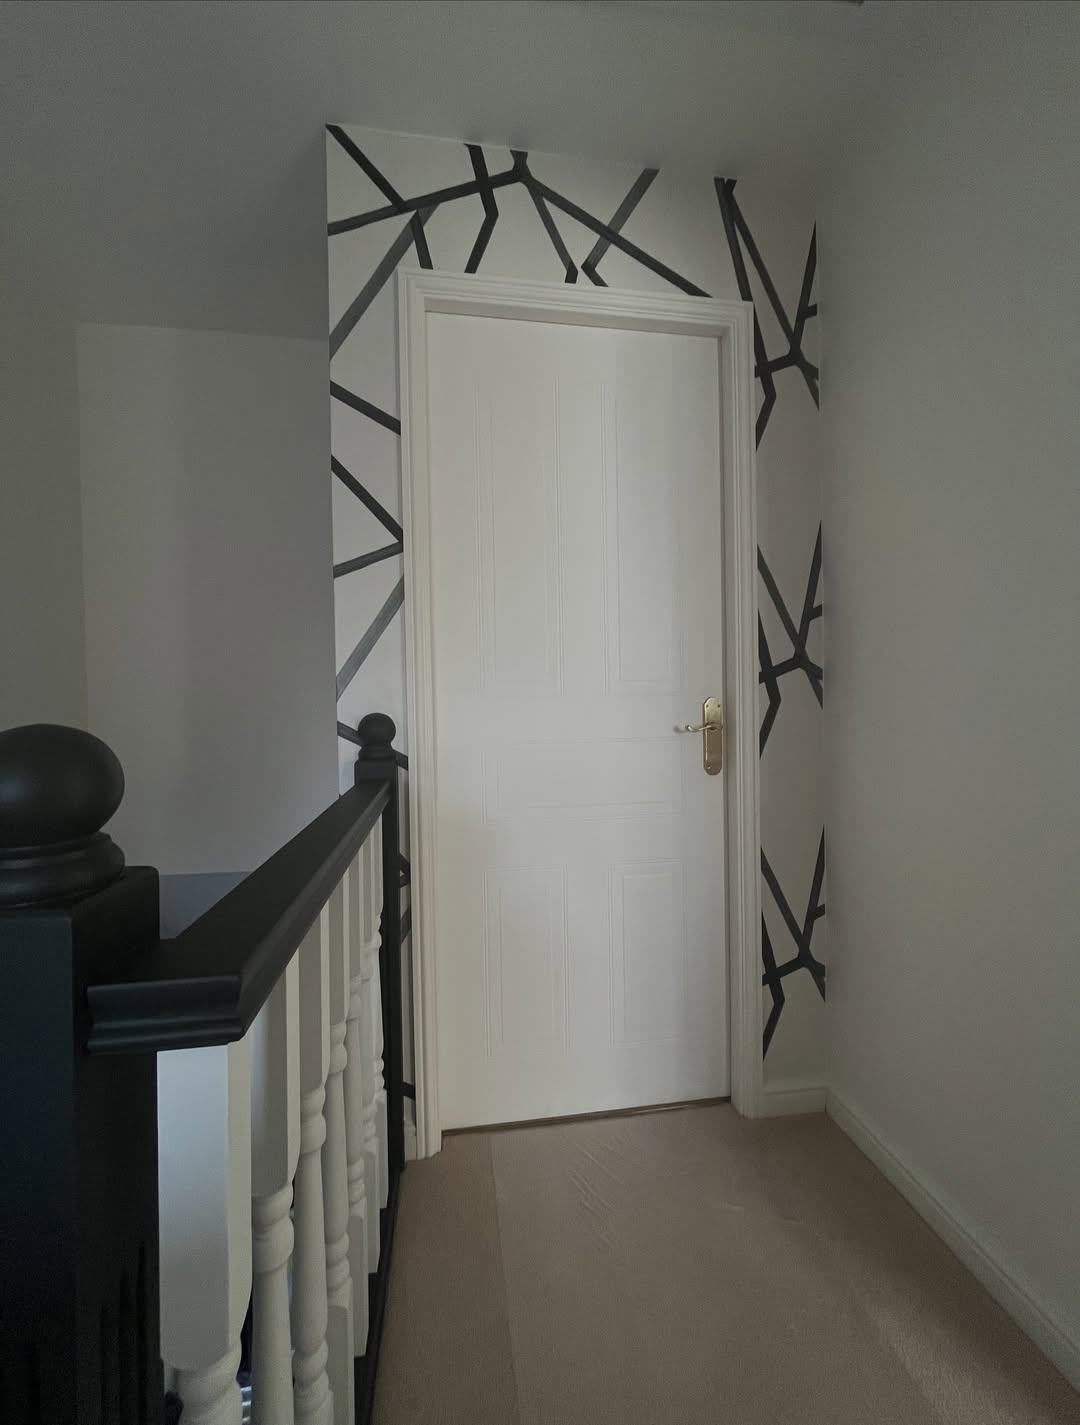
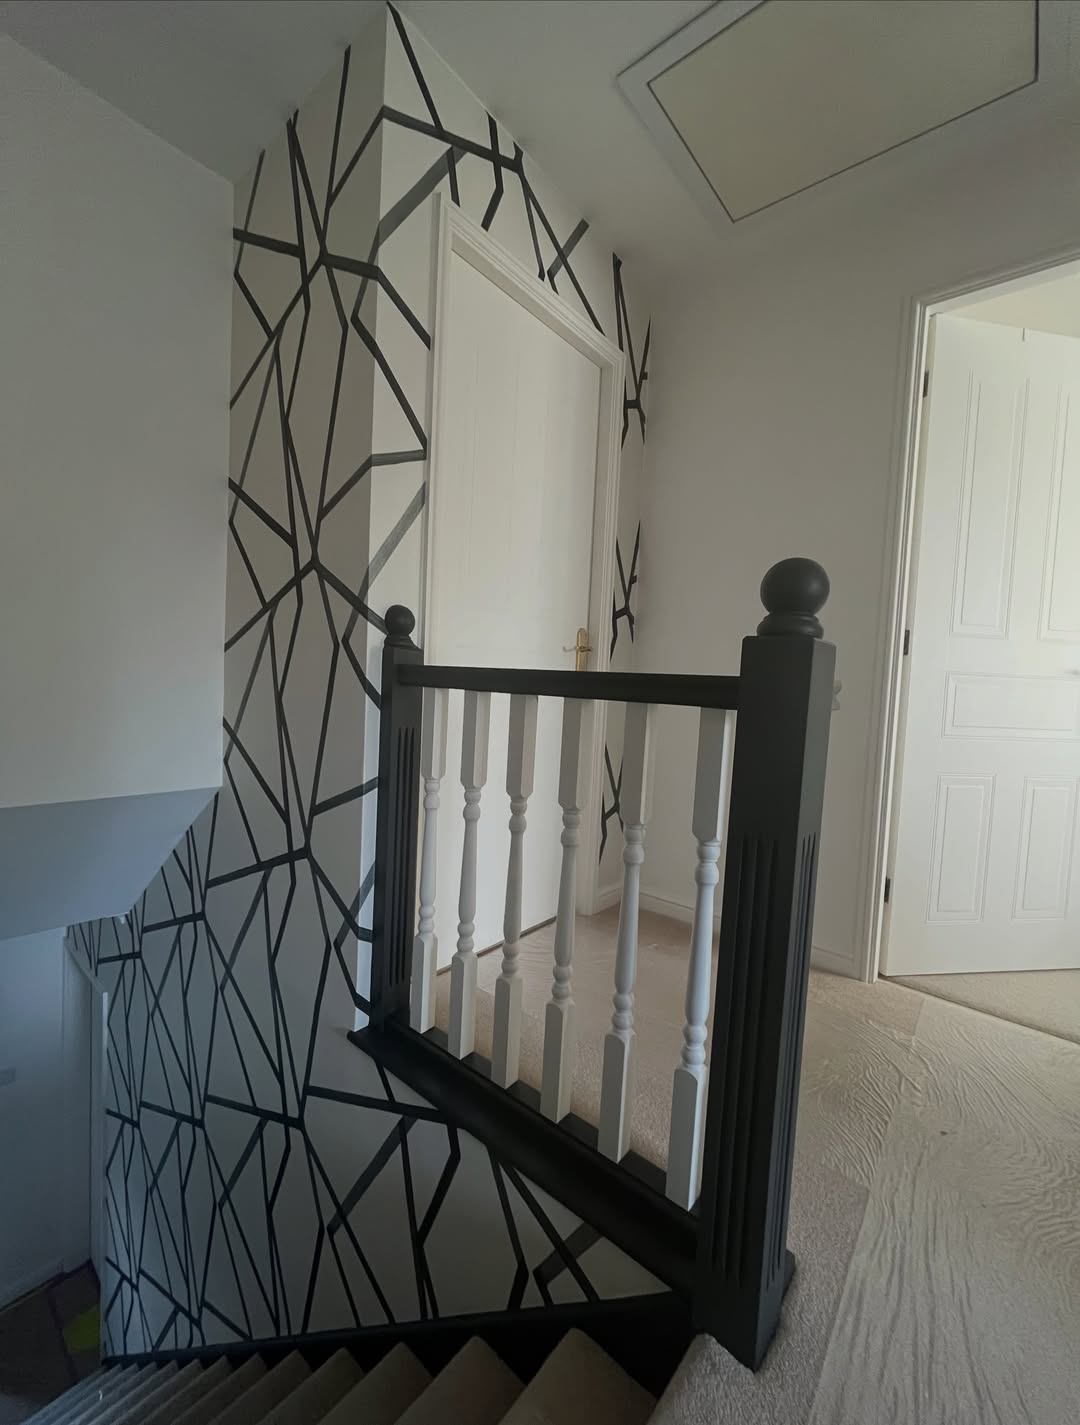
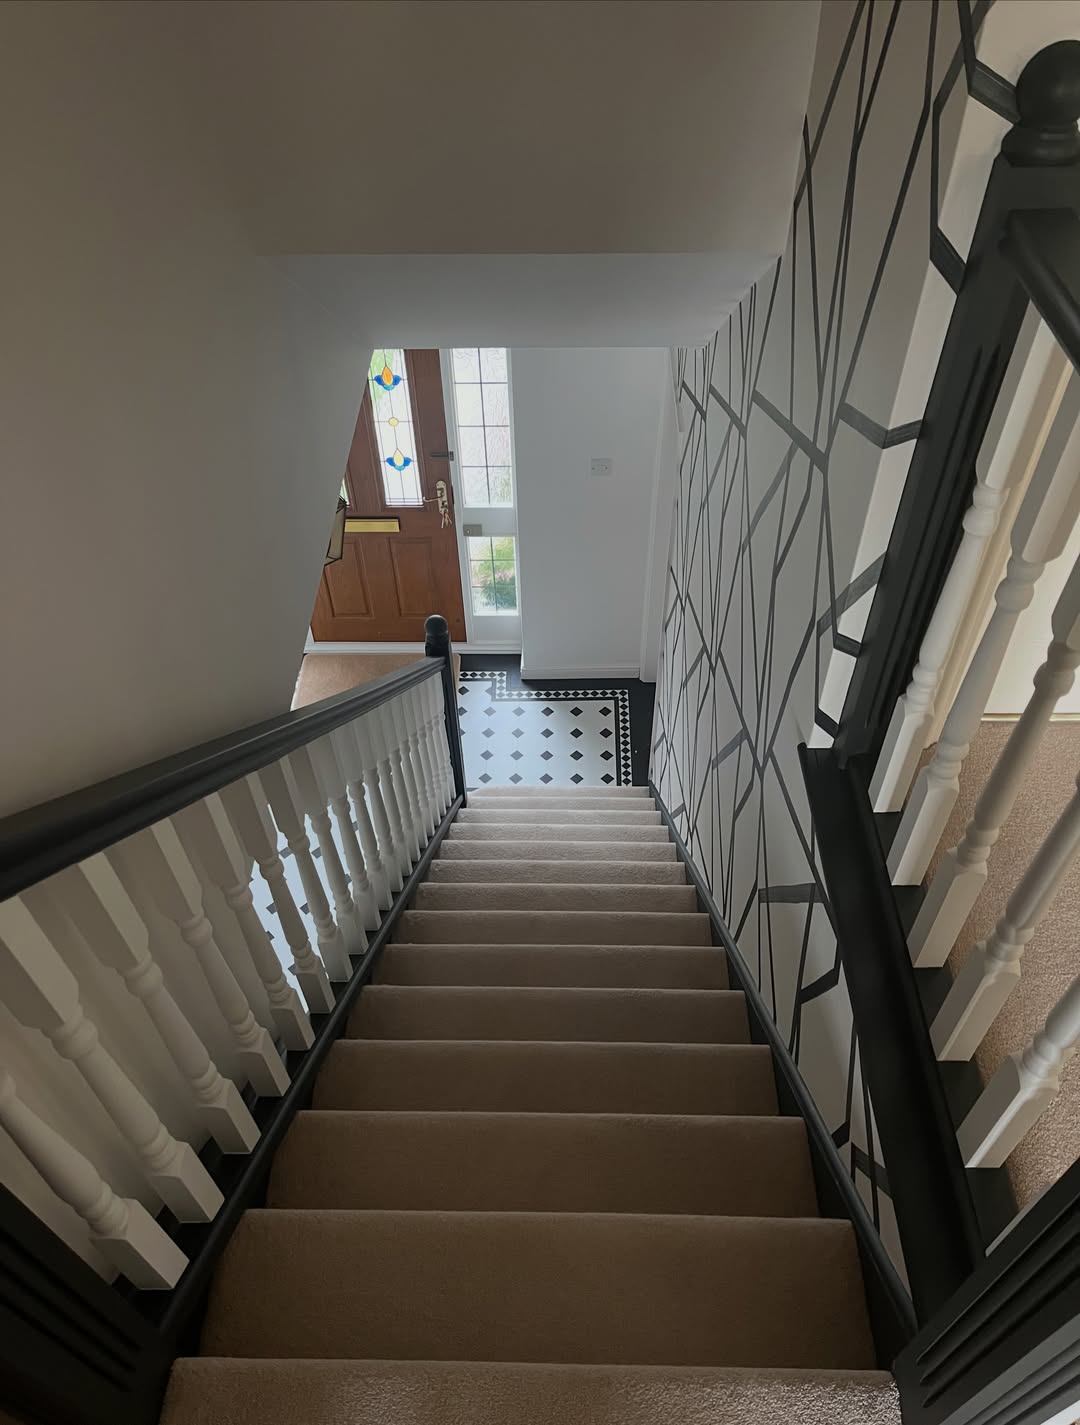
At the top of the stairs, the black newel does the heavy lifting. It anchors the end of the banister and gives your eye somewhere solid to land before the pattern starts again on the far wall.
The floor was the secret the whole scheme was built around
This is the part nobody notices first, and it’s what makes the whole hallway feel designed instead of just repainted.
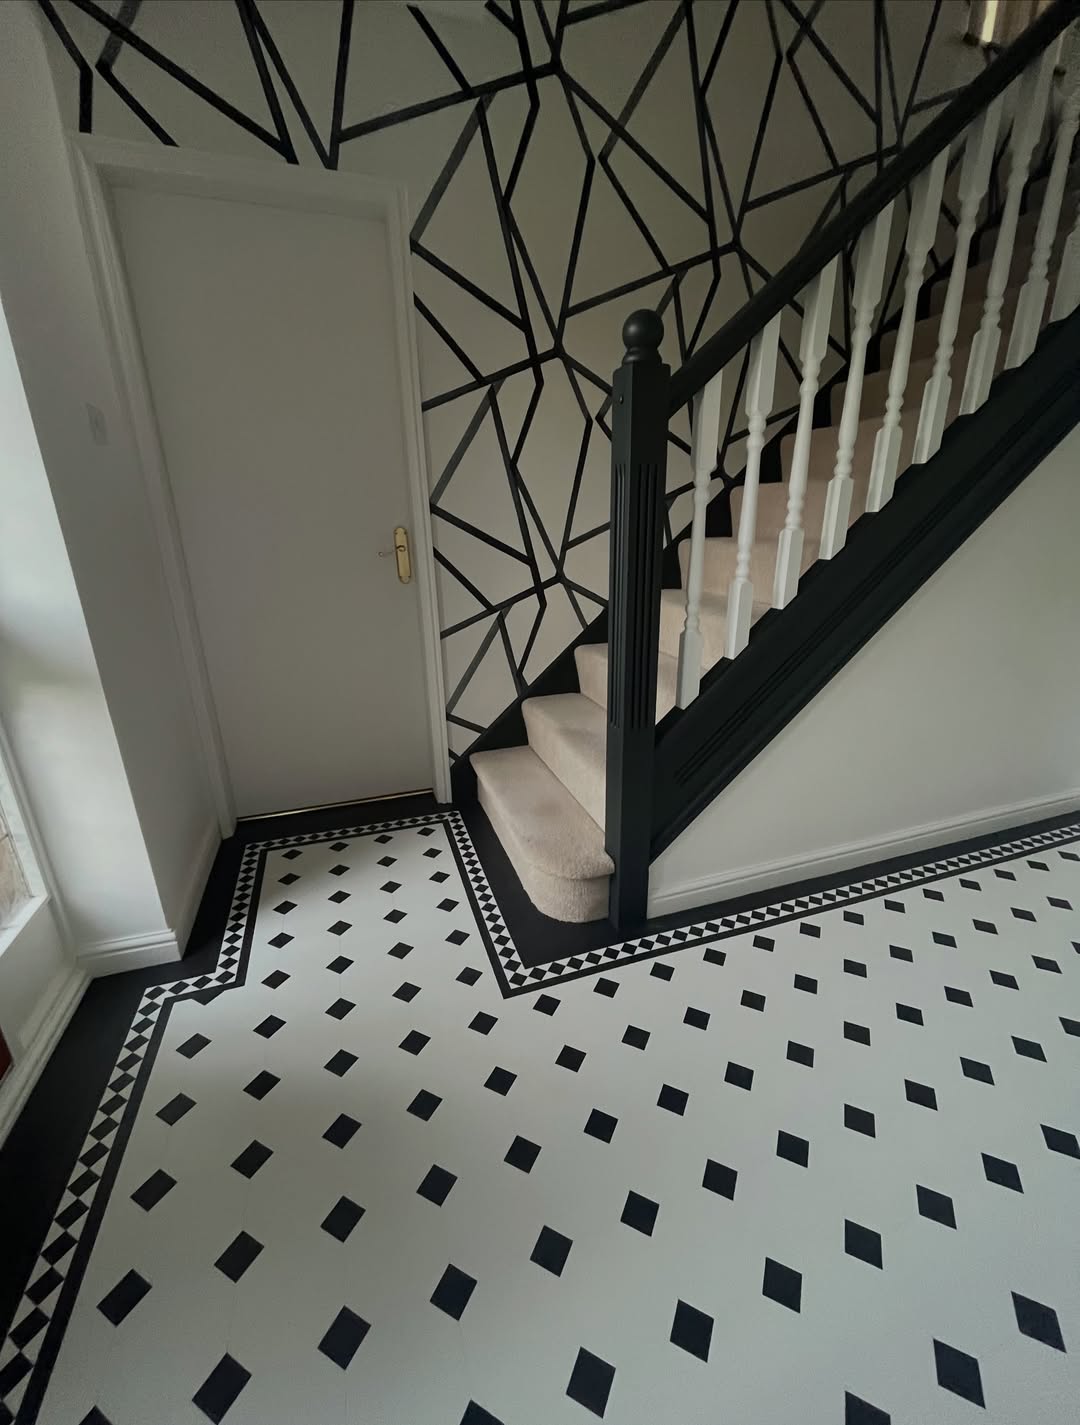
Those black and white octagon-and-diamond tiles were already there. You can even spot a sliver of the same tile in the bottom right of the mahogany-banister before shot. Everything in the after was chosen to talk back to that floor.
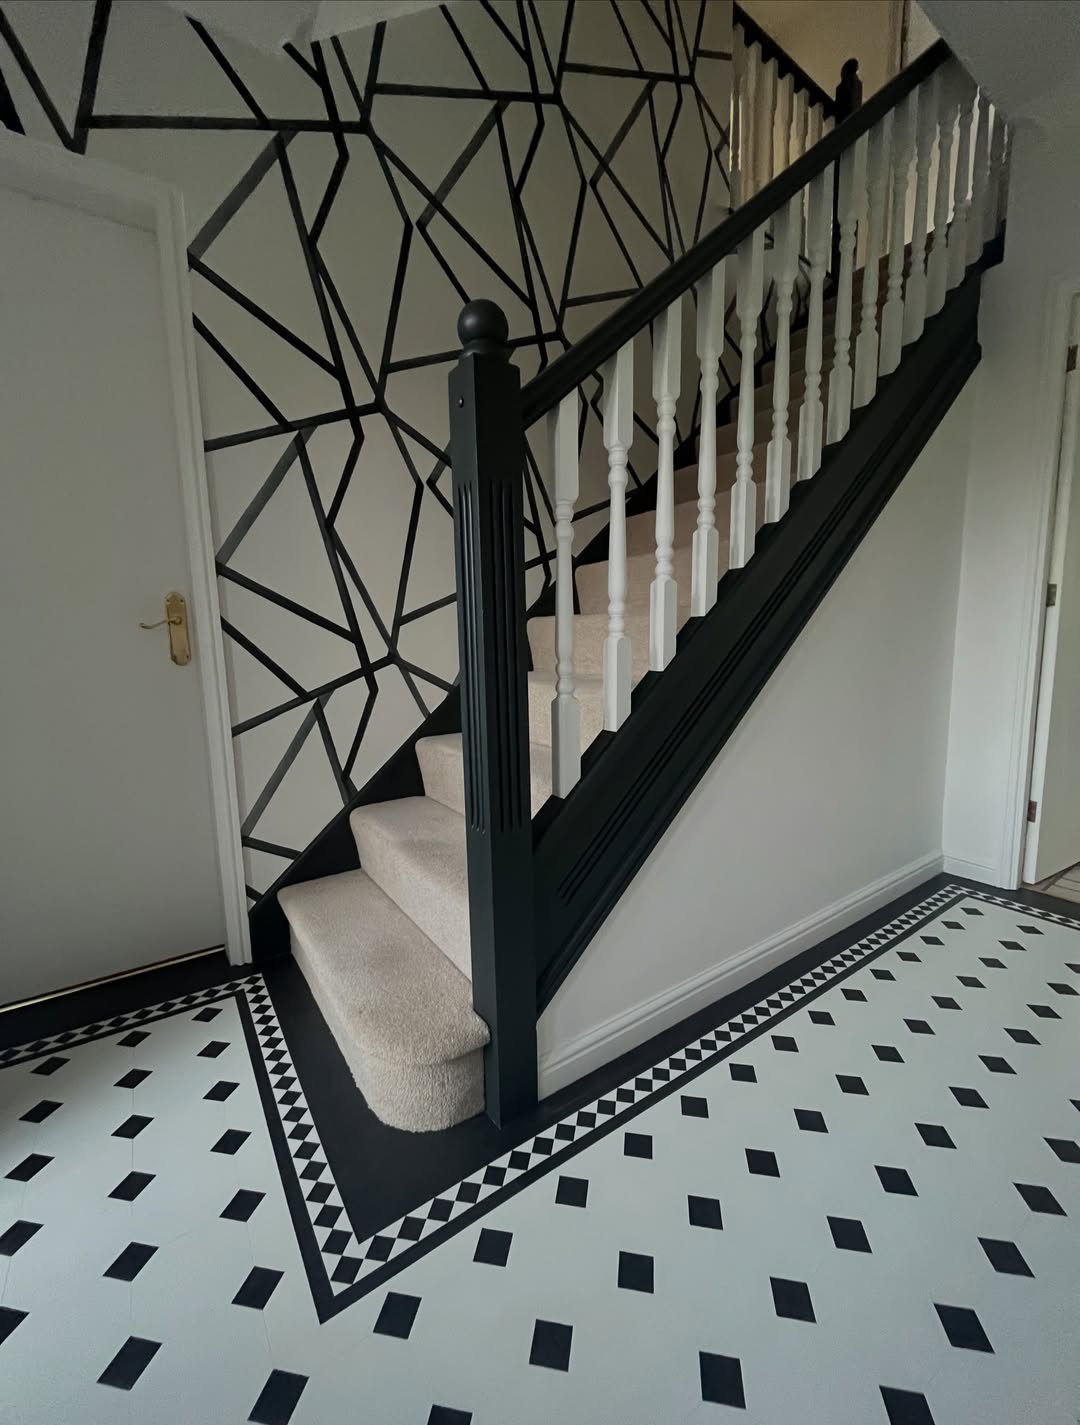
The black tile border is matched by the black stair stringer and skirting. The white octagons are matched by the white spindles. The scattered diamonds are scaled up into the wall pattern. Same design language in three sizes, which is why it reads as one room.
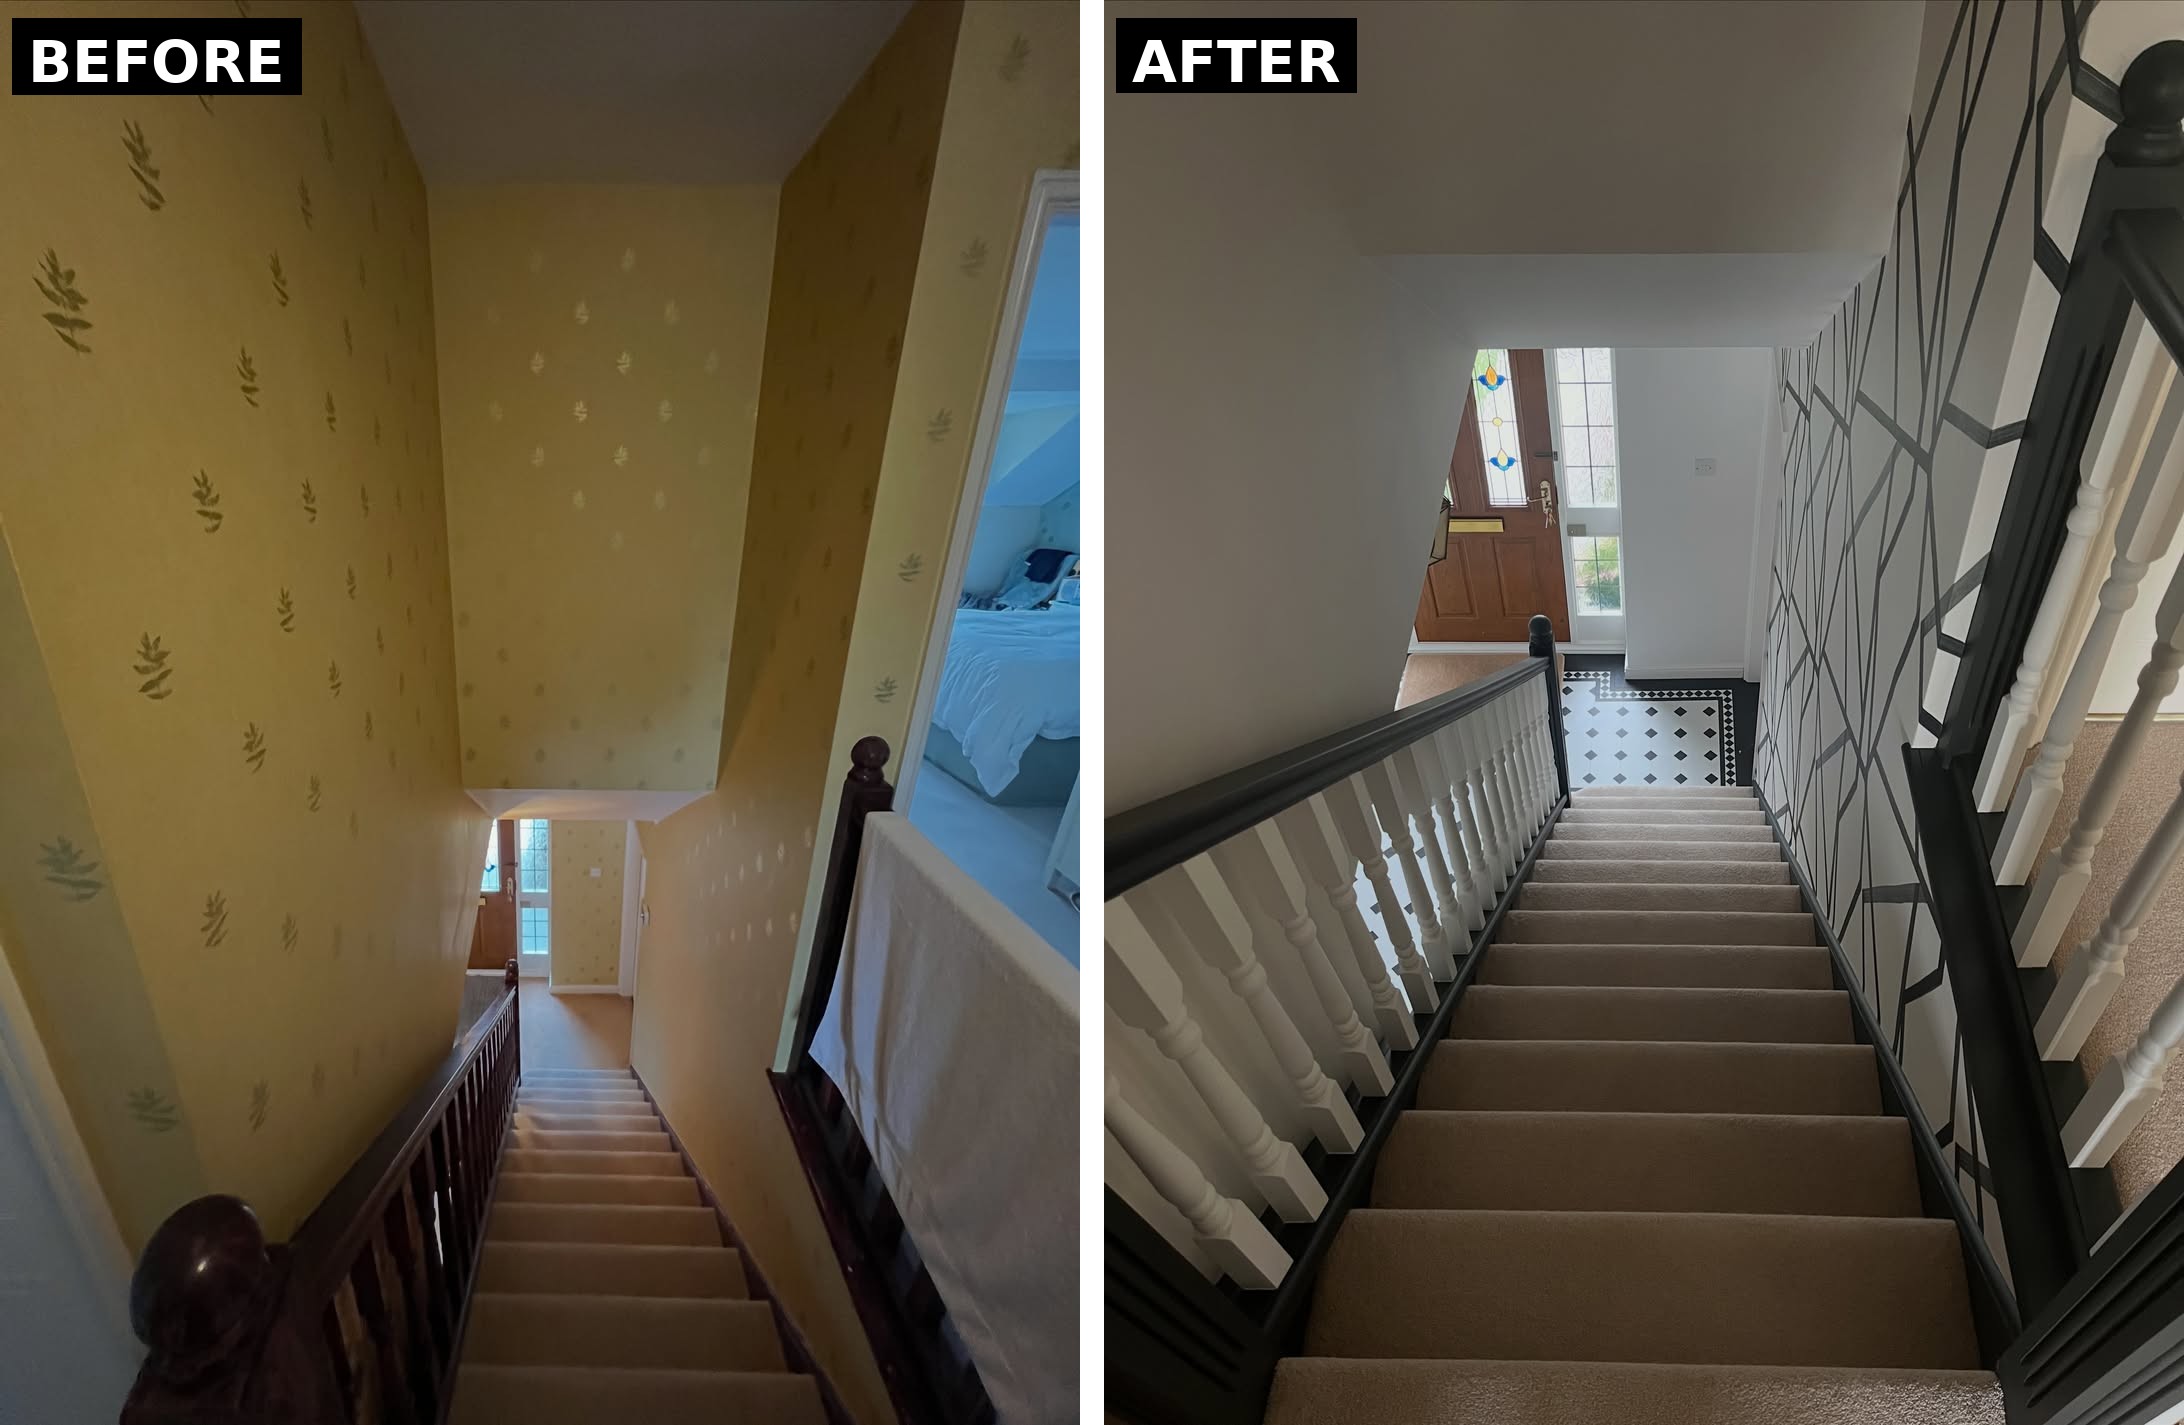
Line the two shots up from the same spot at the top of the stairs and the depth reads completely differently. Same walls, same windows, same stained-glass front door. The white makes the stairwell feel twice as tall, and the geometric wall walks your eye all the way down to the floor.
The one rule that made all of it work
Two colours, plus the cream carpet and the warm tones of the Victorian tile. That’s the whole palette.
No sage green on a feature door. No brushed brass swapped for the original. No third accent on the landing. No wood left on the handrail. The discipline is holding at black, white, and whatever was already on the floor, and not reaching for one more clever touch when the scheme is mostly done. That reach is what sinks most DIY attempts.
If you’ve been quoted thousands for a rip-out, this is permission to put the quote down for a week and price up paint, tape, and a weekend of patience instead. Would you tape it yourself, or pay someone to do it for you?