

The homeowner opened a quote for the kitchen he actually wanted and shut the laptop. The number was way over what he had set aside, and the kitchen he already had was fine. Cream shaker cabinets. Faux-granite worktop. A full wall of upper cupboards. Four appliances in a tidy row. Any realtor in the country would have called it move-in ready.
He ripped the whole thing out anyway.
He had done a bit of DIY before, nothing on this scale. He kept a few of the old carcasses, bought a few more to shift the sink under the window, and started cutting doors in a home workshop. He cut several of them too small and had to recut them. He laid the floor tile, botched it badly, pulled it up, and laid it again. The worktop was the only part he outsourced, made to order to his sizes.
What he built in place of the safe cream kitchen is the opposite of safe. Every color in it, every material, every small decision at the handles and the hood, is on a list of things most pros would tell a homeowner not to do. Half the people seeing it now mistake the before photo for the after. The other half can’t stop asking him how he pulled it off.
Here is what he actually did.

The Choices That Shouldn’t Have Worked
The worktop is plywood. Not quartz. Not butcher block. Plain birch ply with the layered end grain left bare on purpose, right where the farmhouse sink drops in. Every contractor who weighed in is predicting that sink edge will swell and rot within a year. He sealed it and left the stacked grain showing anyway, because the layered look is the whole point.

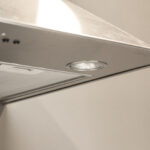
The upper cabinets are mostly gone. He kept a short run of white uppers on one wall and let the rest of the room breathe. The vent hood over the gas cooktop is gone too, for now. He plans to add one on the side wall later. Both decisions cost him storage and function. Both are the reason the room reads as quiet instead of crowded.
The Color Choices Nobody Tells You to Make
The backsplash is mustard-olive. The floor is deep oxblood red quarry tile laid in a straight grid. Every “timeless neutral” guide you have ever read tells you to avoid both. Together they do something a safer palette couldn’t: they pull the warmth of the plywood across the whole room and hold the eye at the backsplash and the floor instead of letting it drift up to blank cabinet doors.

The window frame got painted matte black. The tap matches it. Those two small moves tie the whole palette together without a single piece of trim or molding. In the before shots the window was a plain white hole in a plain cream wall. Now it reads as a framed view.

The DIY Shows in the Right Places
The handles are the giveaway. They are plywood blocks he cut himself, offcuts of the same birch sheet as the doors, sanded smooth and screwed on. Not store-bought. Not metal. They match the cabinets because they are the cabinets. Most expensive kitchens miss this detail and go to brass or black metal that fights the wood.

The doors themselves are flat slabs. No shaker frame. No beveled edges. The reveals between them are tight and even, which is the hard part when you are cutting your own doors at home and making your own mistakes along the way.

The Space Looks Bigger Even Though It Isn’t
Compare the two wide shots and the galley looks like it doubled in width. It didn’t. The footprint is the same. What changed is how much visual noise he pulled out of it. The old kitchen had cream cabinets fighting a dark worktop, four finishes of appliance front, a washing machine right next to the sink, a bulky hood, and uppers crowding both long walls.

The new one gives every material one clear job. Plywood for the lowers. White for the worktop. Mustard for the walls. Red for the floor. Black for the metal. That is the whole system.

The Small Details Carry the Whole Thing
The exposed ply edge on the worktop lip. The matching toe-kicks at the base of every cabinet. The two vintage Hornsea canisters sitting in the corner, nodding to the 1970s mustard-and-oxblood palette without feeling like a prop. Even the light switch is a choice. Matte black on raw ply.

In the old cream kitchen that switch would have read as a mistake. Here it looks like the room was planned around it.

The Takeaway
He didn’t remodel for resale. He didn’t remodel for the neighbors. He remodeled because the quote scared him and he was willing to be the one who messed it up. The before was a kitchen anyone could have had. The after is a kitchen only he has.
And he built it himself, one recut door at a time.


It’s crazy that looking like an unfinished shop kitchen isn’t even the worst offense here. This has to be a joke.
As a designer and builder, I cannot wrap my head around anyone wanting to showcase this as if it’s some great idea.
Yes, the homeowner pieced together a kitchen in the cheapest way possible. Congratulations. But this kitchen is exactly why not everyone should be doing DIY.
Homeowner will be hiring a contractor and replacing this kitchen inside of a year….when all the materials are warped, stained and moldy.
Round of applause.
Great article thank you.
Tbh I’ve also struggled to get my head around plywood kitchens being fashionable again.
I find so many kitchens a bit samey though so just love it when people do it their own way.
People’s reactions to anything different entertain me.
My guess would be that the ply worktop may or may not last… If I was the owner I’d take pleasure in having broken an odd kitchen rule and seeing what actually happens!
Worse case scenario it might need replacing –
something that could be done many times over compared to cost of most worktops.
We’ve just taken much satisfaction in ripping out units like the pre cream photo and are now enjoying making our own dreams come true.
We’re even planning to use wallpaper in the kitchen – a bit of kitchen rule breaking of our own :)
I seriously thought the after was the before, looks like a kitchen in an institutional setting. To each their own i guess.
Literally the definition of “can you do it cheaper.”
Articles like this make me so frustrated. As a contractor, this kitten is terrible.
Everyone thinks that things should cost 1/2 of what they do, want a champagne kitchen on a beer budget, and think, “I can do that.”
This is clearly not a kitchen to be used. The materials are wrong and the finishes are so minimal that I think it would be better suited as a shop kitchen.
Gorgeous! Looks like a designer kitchen out of a magazine.
Not a fan of the backsplash color but the whole point is he did this to suit him, which is what we all should do!! The workmanship is awesome!!
The worktop was a poor choice! It won’t last around the sink.
There’s no cooking extractor either… does the person who made this choice actually cooks food? Or do they just warm up rewdy made food?
This kitchen wasn’t thought to be used…
the “after” pictures look like they should be “before”.
I LIKED THE WHITE KITCHEN BETTER.THE NEW KITCHEN I DON’T THINK WILL LAST, AND IT’S GOING TO STAIN REALLY EASILY. NOT MY STYLE .
I love it especialy the floor. very nice job
Looks like a knockoff of a1980’s lame low budget Ikea kitchen.
My biggest concern is the plywood countertop when water gets to it
This looked better before. Plywood is cheap and looks cheap. Did he rip out real wood for plywood? It won’t last, or hold up as well. The tiles are a specific style and don’t really match.
Should have left it white.