
She didn’t repaint the cabinets. She ripped them out.
That is the whole surprise of this $15,000 kitchen redo. Every DIY tutorial on the internet starts the same way. Sand the cabinets, prime them, roll on two coats of a new color. Everyone treats it as the one and only move for a tired kitchen, and the comment sections repeat it like it is law. She skipped it entirely. The old oak cabinets came off the walls and went to the curb. The fake green tile came off too. The three mismatched countertops, gone. The joint compound hiding under the mint paint, scraped back. By the time the dust settled, every surface in the room had been pulled off and replaced with something new.
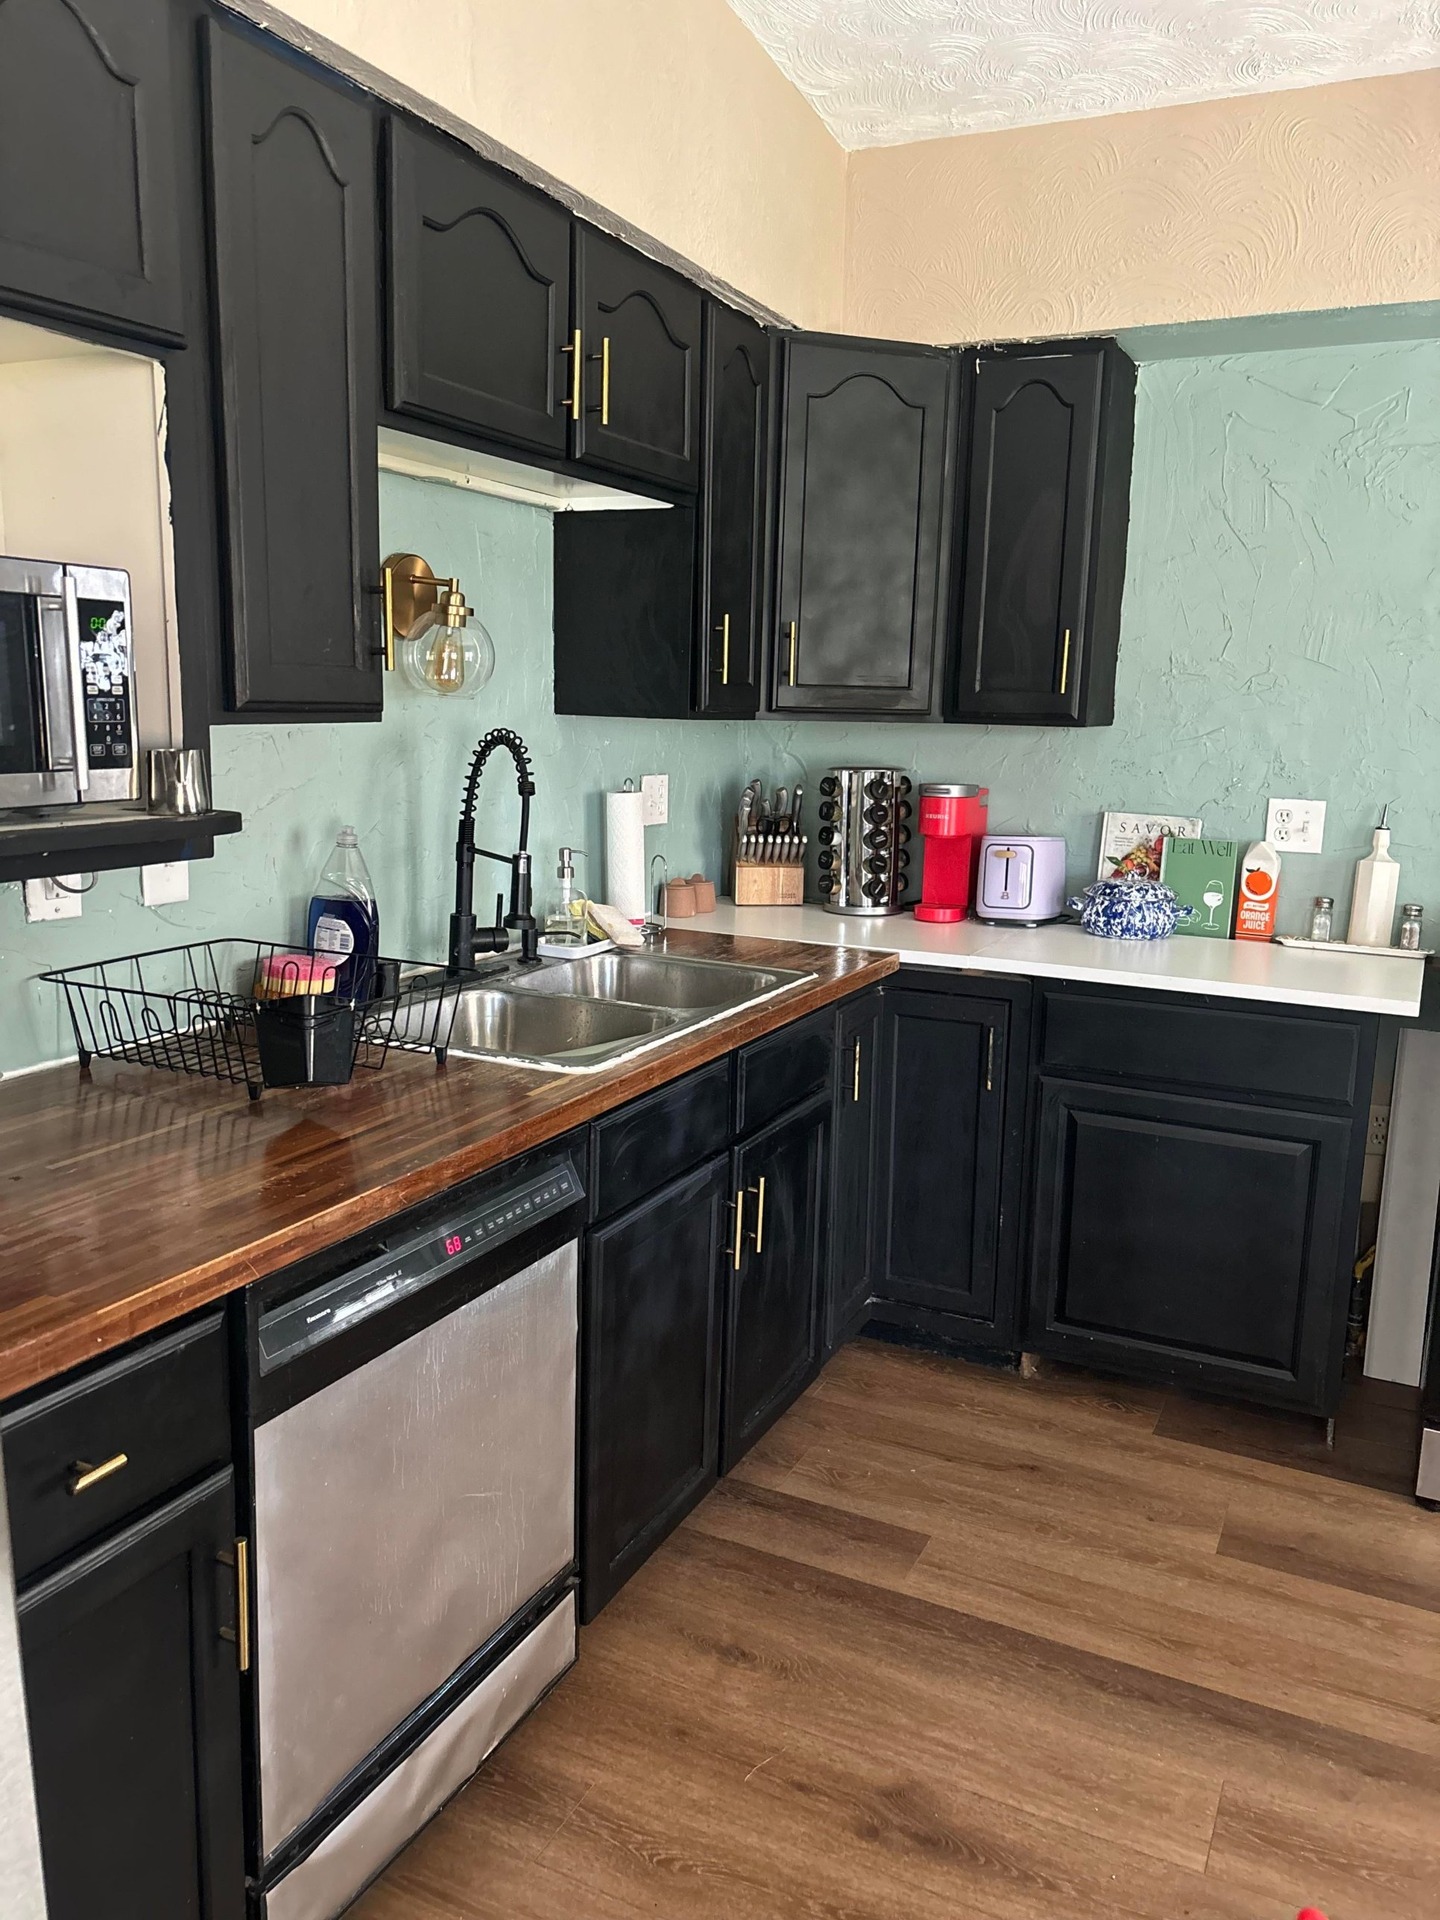
What she walked into when she bought the house was the worst kind of flipped kitchen. Someone before her had reached for a paint can every time something needed fixing, then listed the house as “updated.” She knew within a week that paint was not going to fix any of it.
So she stopped trying. She started over. The $15,000 that followed, almost all of it in materials because she installed everything by hand, bought her the kind of kitchen that will not need redoing in two years. Here is how she did it, step by step, in a redo that went far beyond paint.
What the previous owners did
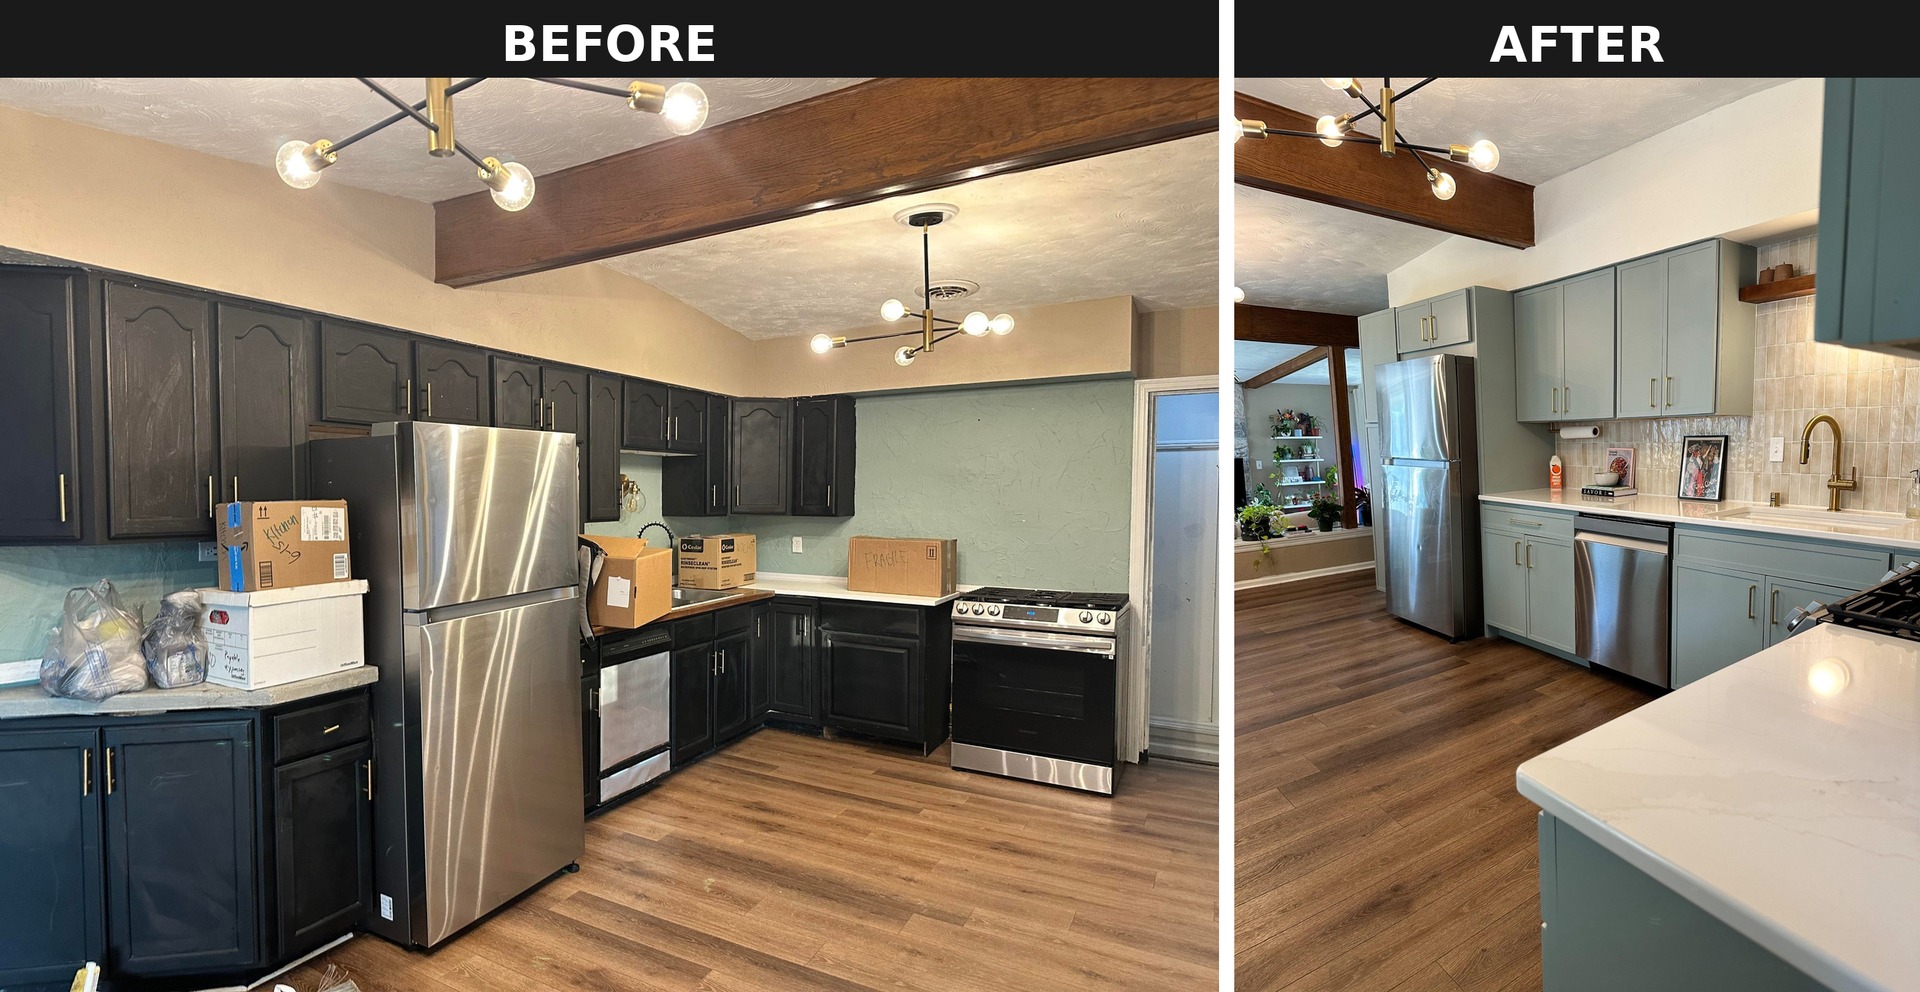
They had taken a kitchen full of real oak cabinets and painted every door black with a brush. The strokes show from across the room. They tore the original backsplash off the wall, troweled joint compound over the damage, and painted the lumpy mint-green result so it would pass as a textured tile effect. It did not. Three different countertops sat side by side. A butcher block near the sink. A stretch of white laminate. A gray patch at the end. One brass sconce, one black spring faucet, and a wire dish rack. That was the extent of their work.
Why repainting the cabinets was a dead end
Sand the black off those oak doors. Pick a prettier color. Call it a day. She didn’t. A DIY paint job on cabinet doors chips around the pulls inside eighteen months. A year later you are sanding and repainting the same doors you already sanded and repainted. The only way out of the cycle is to stop painting.
She tore the whole kitchen apart
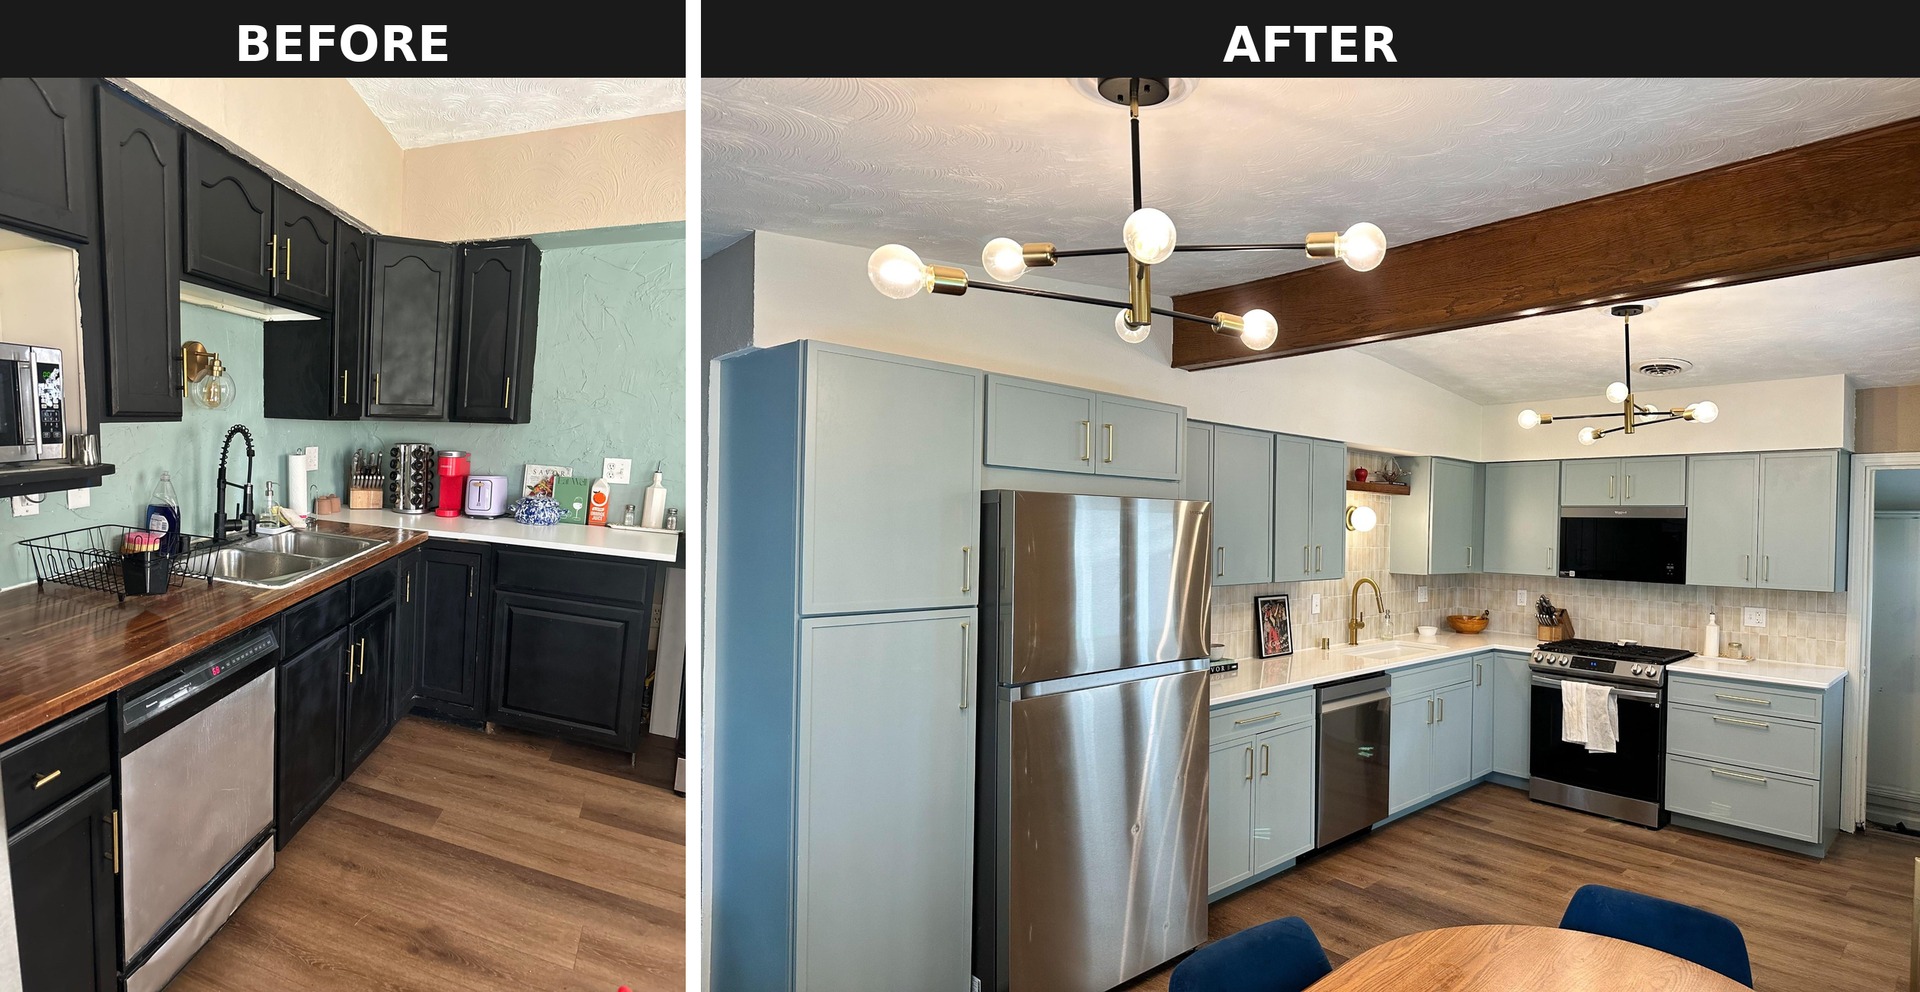
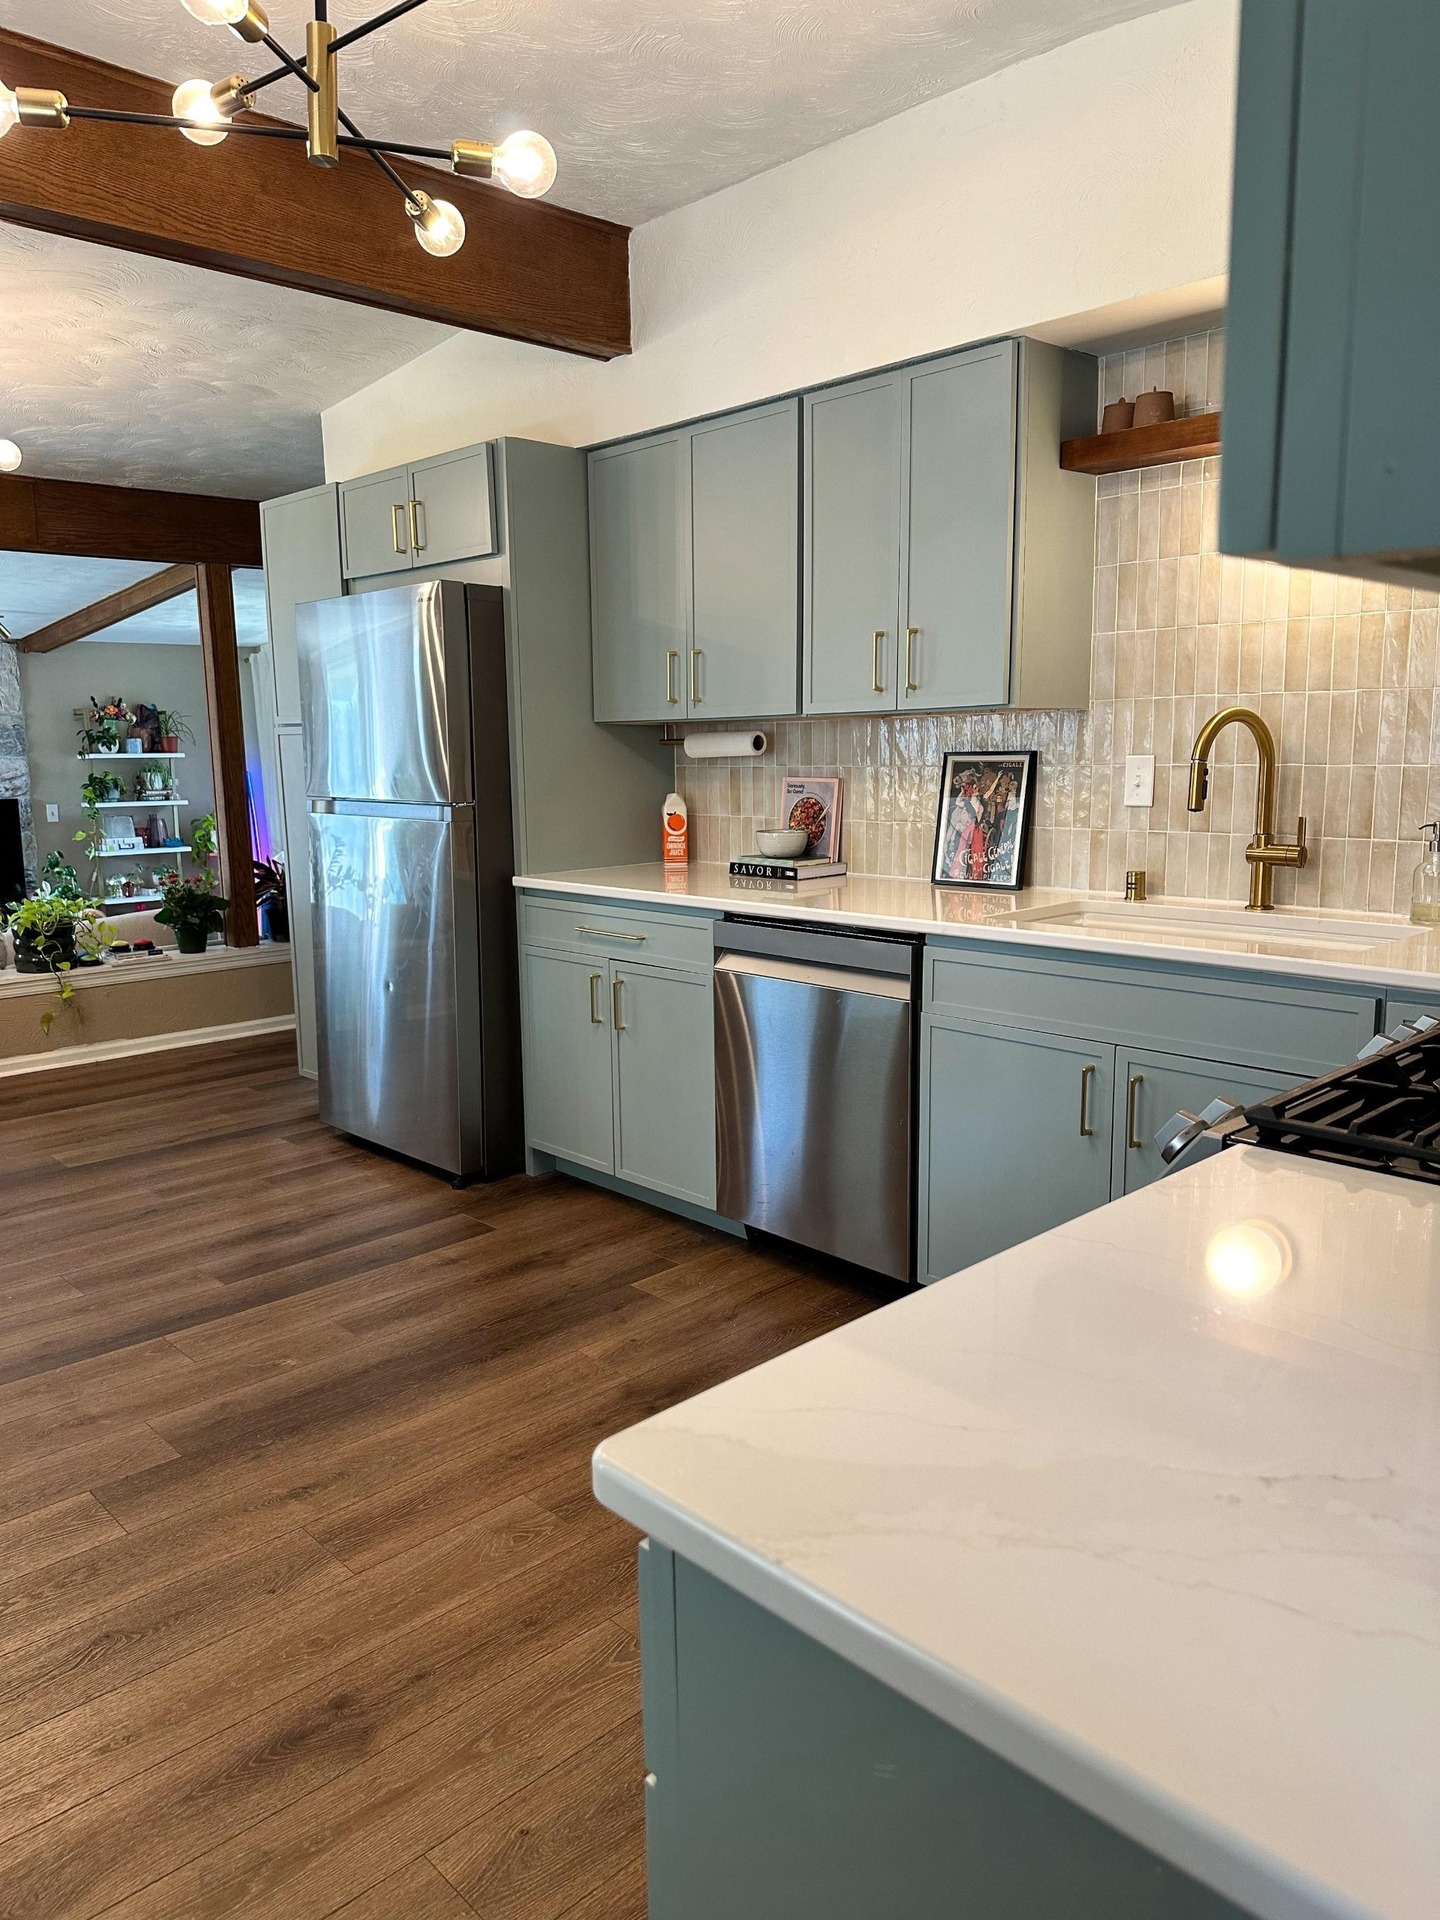
Oak cabinets, mint walls, mismatched counters, all out. New cabinets came from cabinets.com in a color called Haze, a soft sage with a shaker-style door front. The paint on these is factory applied, which lasts decades, not seasons. She also redrew the layout. The stove and microwave moved. The fridge got pulled out of its awkward corner into a proper tall surround.
The ugly middle most people quit at
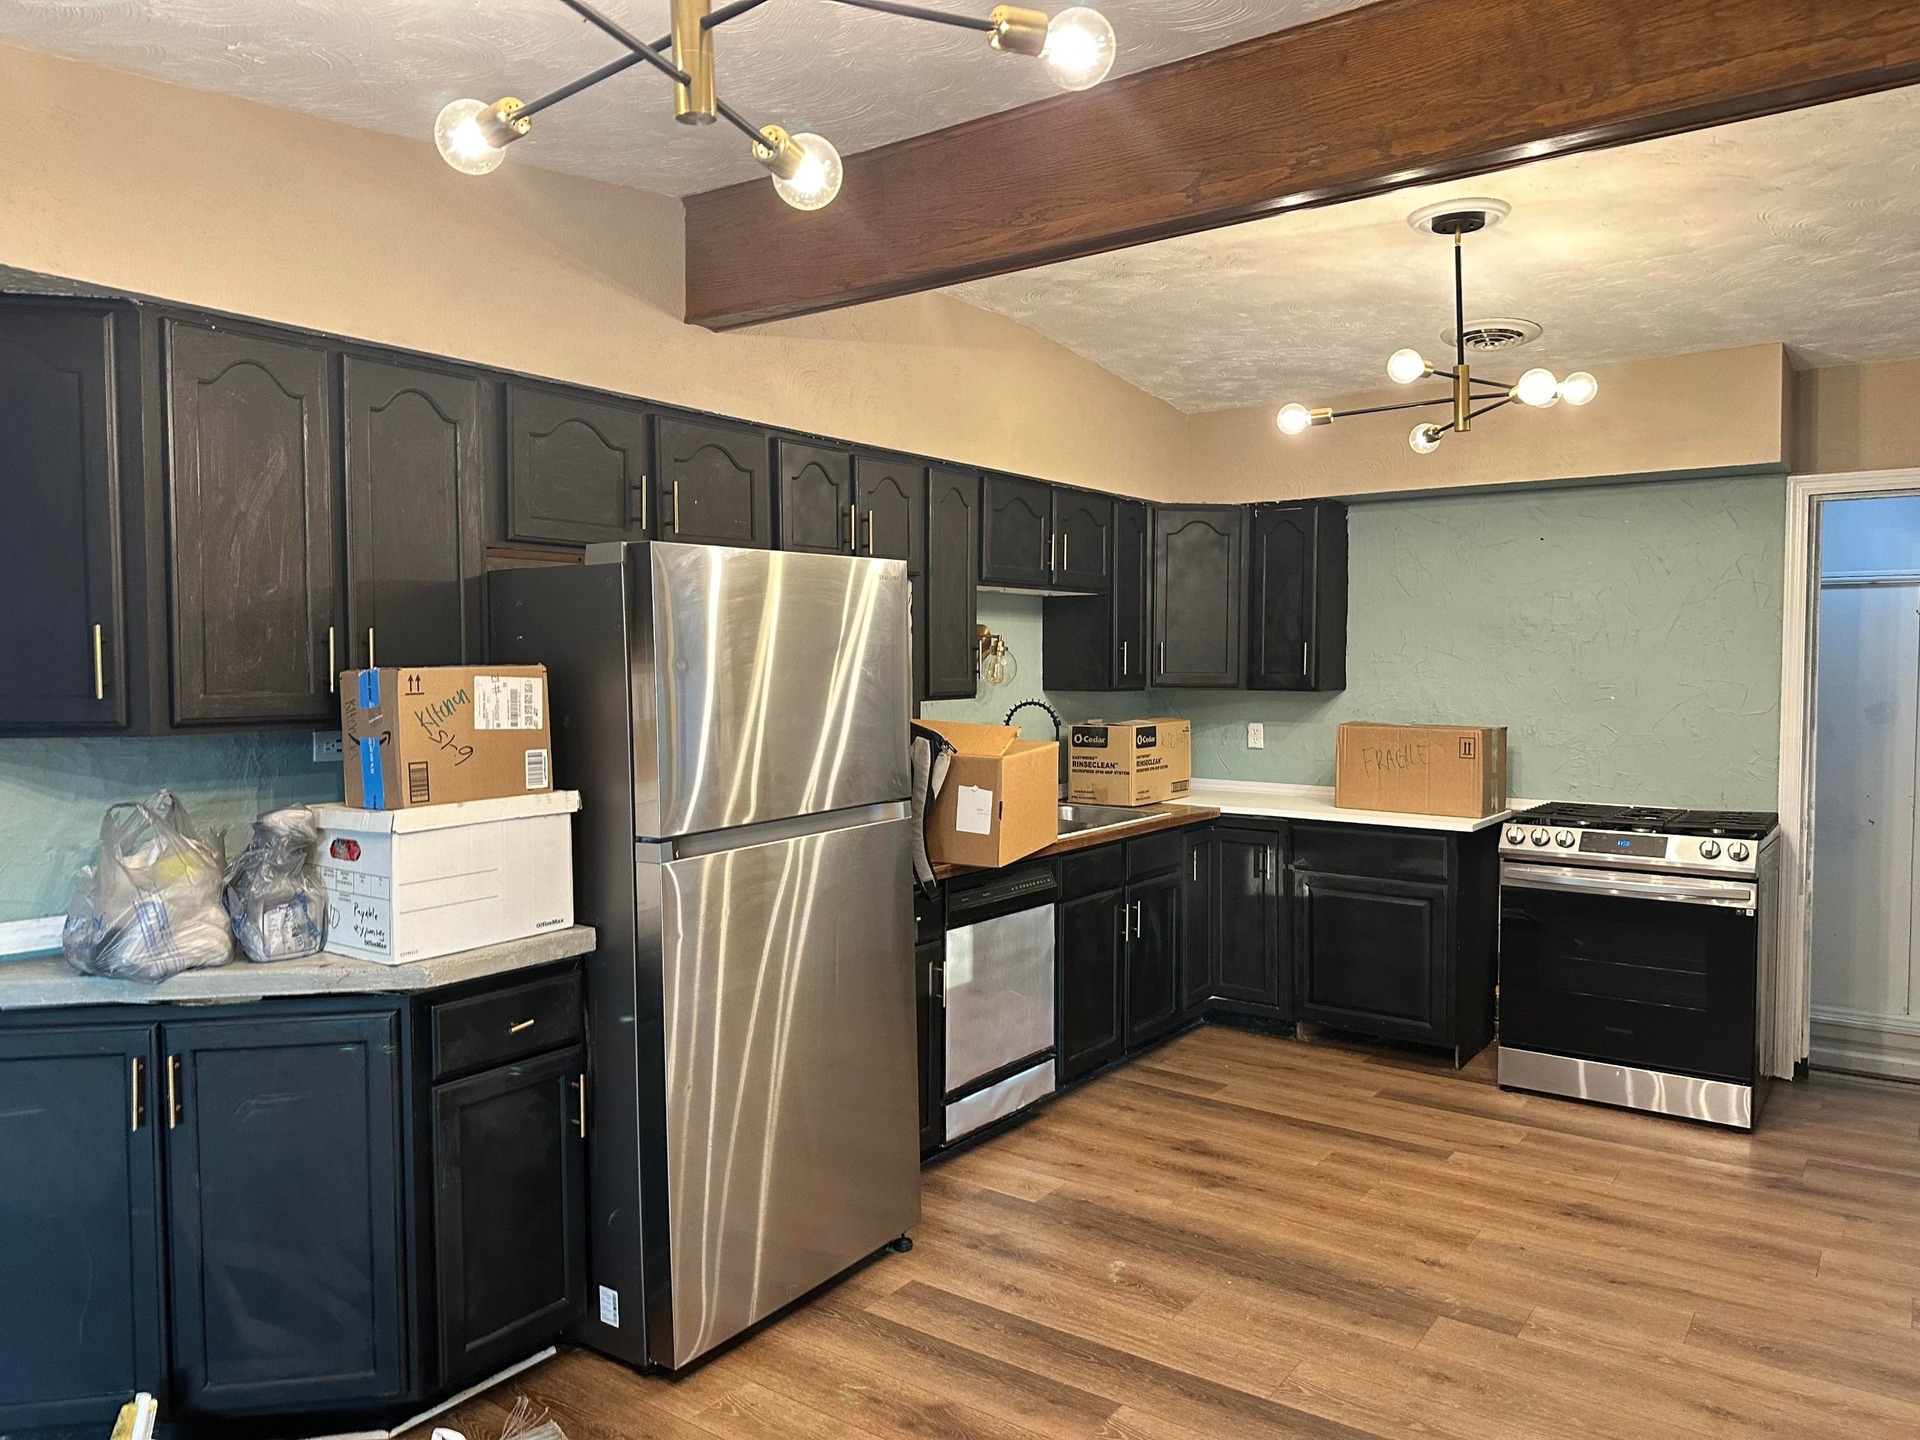
The mid-remodel shot tells you how much got replaced. Boxes on the counters. Old black cabinets still on the walls. New stainless appliances arriving one by one. The fake green tile still there. The joint compound bumps still visible. This stage is where most people quit, because the kitchen looks worse than before and the money is already spent.
One slab, one tile, one hardware finish
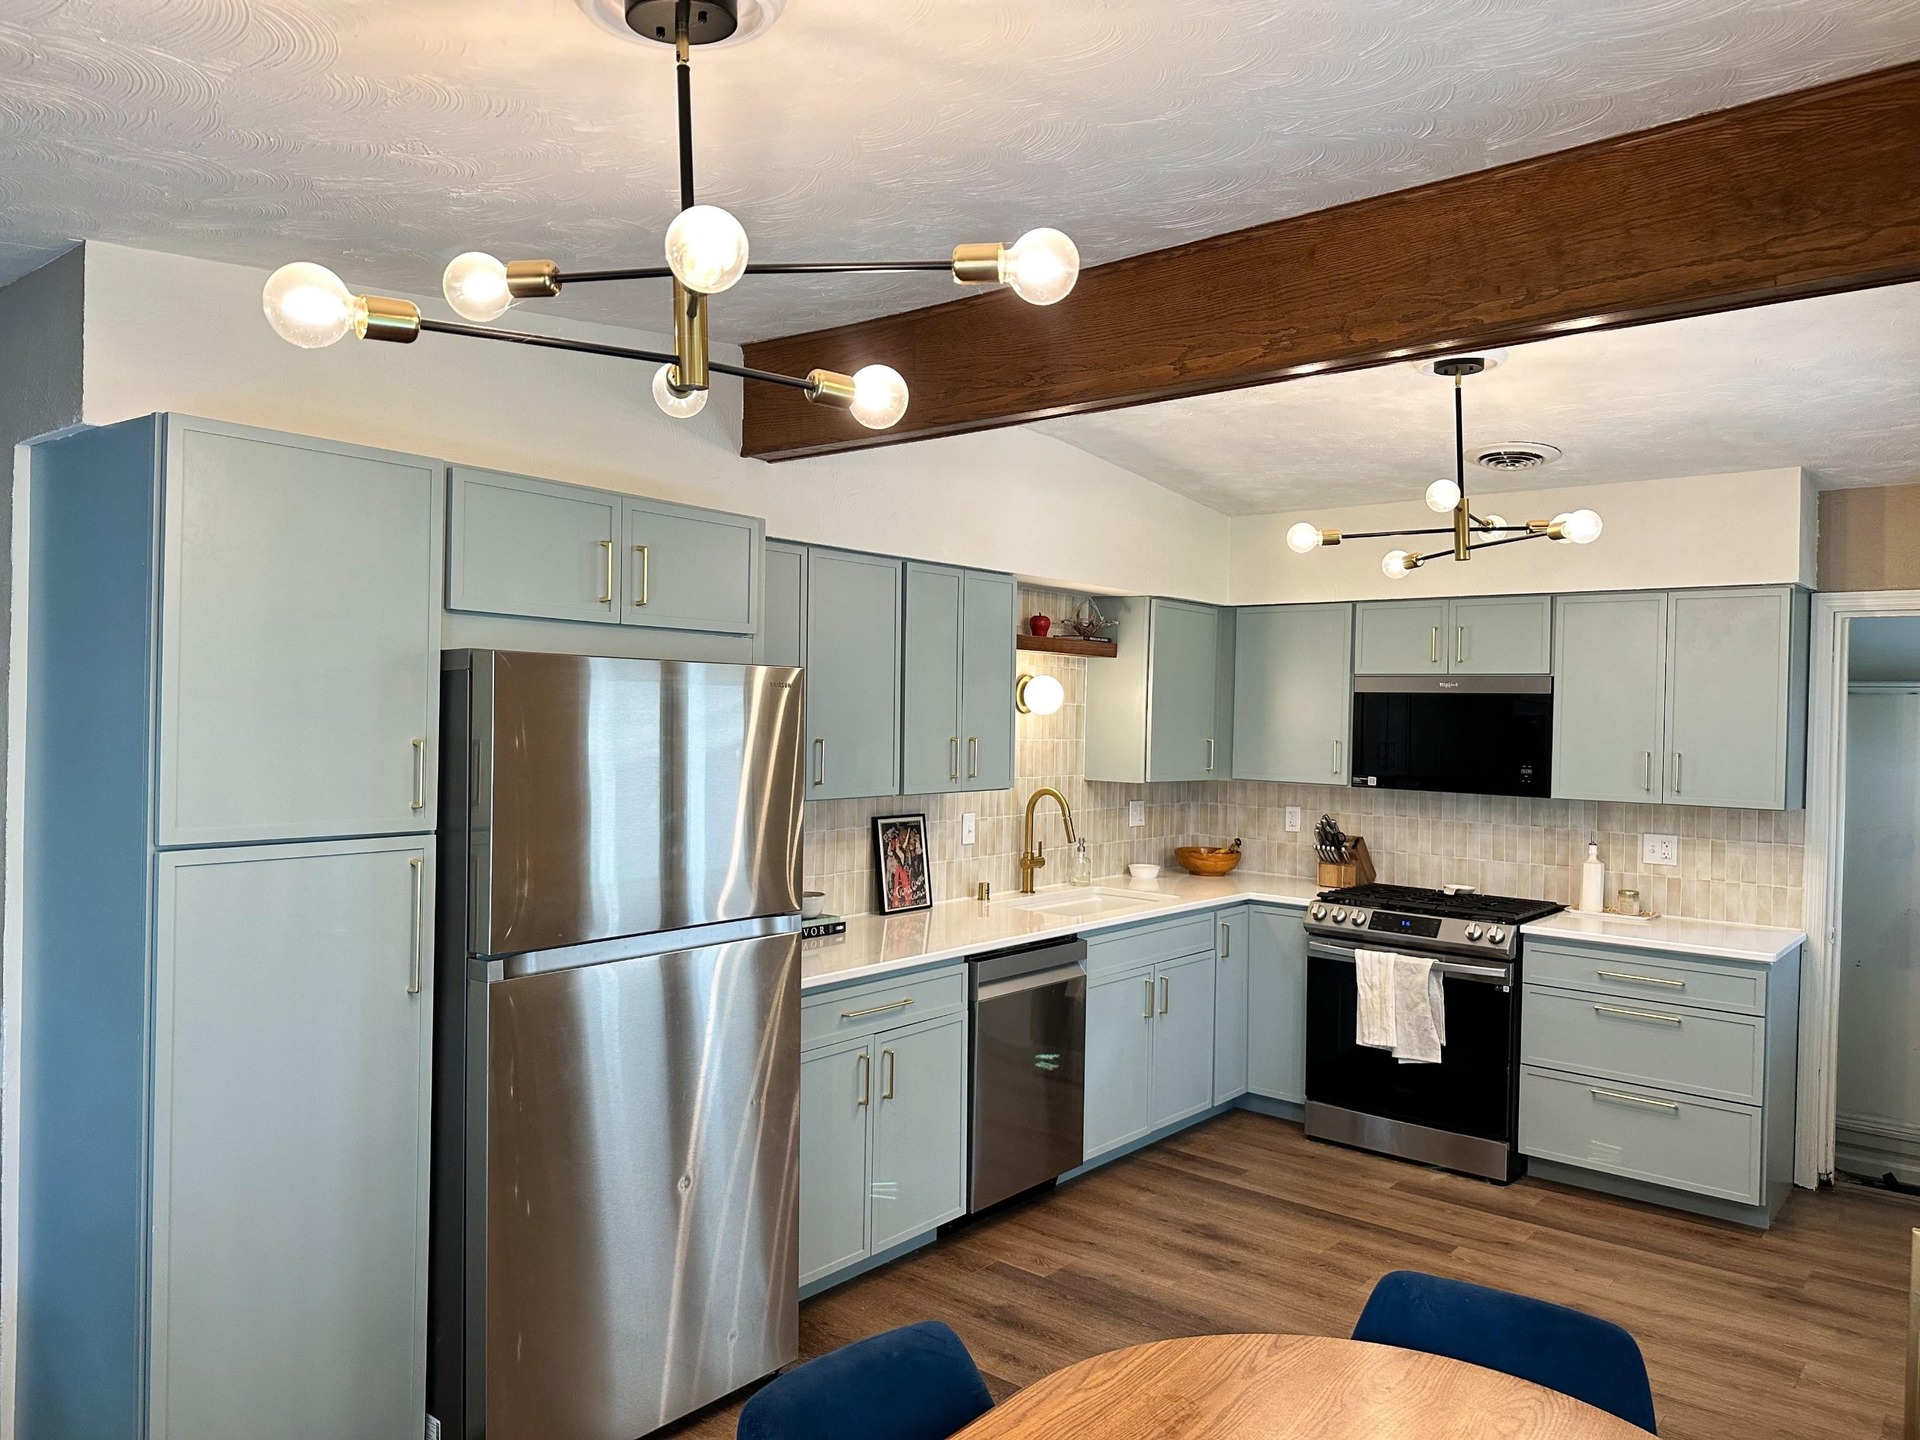
She kept going. One slab of Calacatta Suprema quartz from Home Depot ran across every counter in the room. One real backsplash this time, Merola Tile Coco Glossy Canvas Beige, ran from the counter up to the base of the upper cabinets, stacked vertically. One hardware finish, brushed brass, pulled it all together. The mint walls got stripped back and the stucco smoothed. New sink, new gold faucet, new under-cabinet floating shelf in warm wood.
The ceiling beam led the whole color story
The thing that pulls the room together is the ceiling beam. It is the one feature from the old kitchen she did not touch. In the earlier shots the beam disappears into the busy walls and dark cabinets. In the after, it is the hero of the room. The sage pulls the green out of the wood, the beige tile picks up the warm notes, the brass echoes the grain. The previous owners probably thought of the beam as something to work around. She treated it as the anchor.
What the $15,000 number actually bought
The $15,000 covered new cabinets, drywall patching, backsplash tile, quartz counters, sink, faucet, dishwasher, outlets, microwave, door pulls, the open shelf, and the tools she bought along the way. She installed everything by hand with help, which is where the savings came from. A contractor would have doubled that number easily.
The lesson every first-time buyer needs
Houses listed as “updated kitchen” in the current market are often cosmetic flips. The paint lasts about a year before the chipping starts. The real cost of the kitchen is the one you pay later, when you figure out what the paint was covering.
She didn’t try to rescue what the last owners did. She ripped it all out and started over. Her kitchen is now hers, in a color she picked once and will not have to touch again. The before and after look like two different rooms because they are two different rooms. The only thing they share is a wood beam the previous owners never knew was the best feature in the house.


