Four images below, two kitchens, except they’re the same kitchen.
That’s the whole trick. The before shots and the after shots are the exact same room, same cabinets, same counters, same appliances, same floors. The only reason your brain reads it as a renovation is that paint can lie to you convincingly when it’s done right.
This is where most oak owners give up
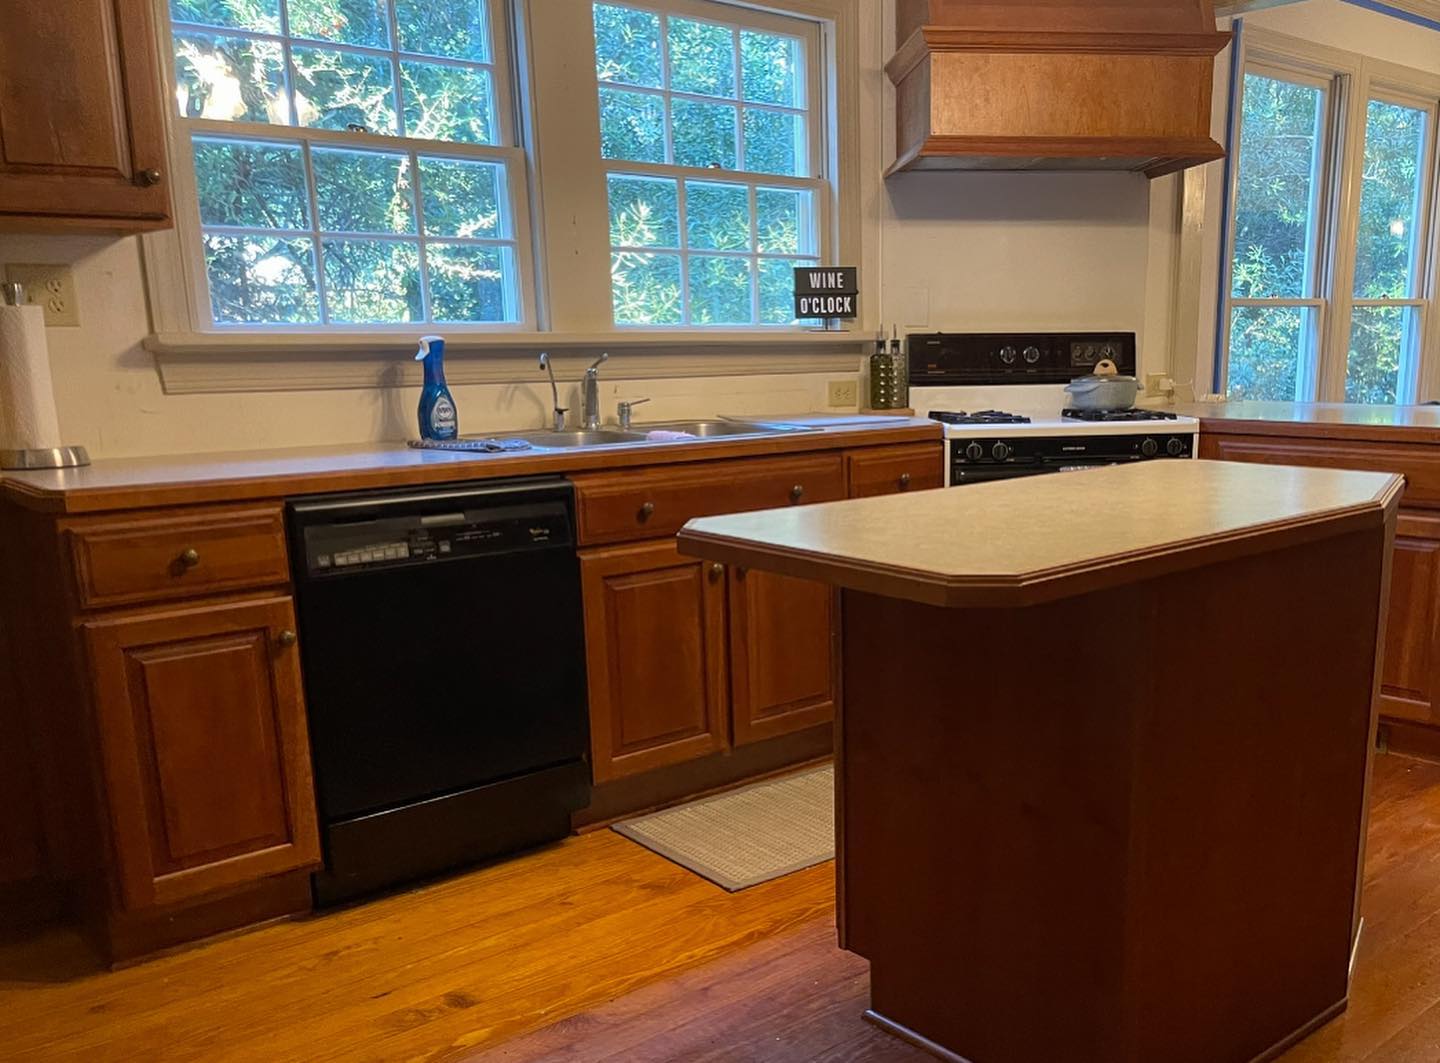
Pure late-nineties builder-grade. Golden oak boxes, raised panel doors, round brass knobs, beveled formica, a chunky wood vent hood over the range, double-hung windows looking out at the pines, a black Whirlpool dishwasher, and the very specific “wine o’clock” sign that only turns up on windowsills in kitchens the owner has stopped loving.
If you’ve got a kitchen like this, you already know the script. Three contractors come out with tape measures and give you the same quote range: around $32K on the low end, closer to $45K if anything is hiding behind the drywall. Rip the cabinets, new quartz, new appliances, maybe knock out a wall. No shortcuts.
What she did instead
She brought in a Raleigh outfit called @myrenewedcabinets, a family-run and female-owned shop that does one job and does it well. They pulled the cabinet doors off the hinges, scuff-sanded the raised panels, hit everything with a stain-blocking primer (critical on oak, because the tannins will bleed orange through any cheap paint and ruin the finish), and sprayed two coats of satin white cabinet enamel. The following weekend, a tiler ran a basic 3×6 inch white subway tile from counter to upper cabinet. The round brass knobs got swapped for satin-nickel bar pulls at about three bucks each from Home Depot. Someone added a dark wood edge band on top of the formica counter, around $40 at Lowe’s and twenty minutes with construction adhesive.
That is the full project list for the sink wall.
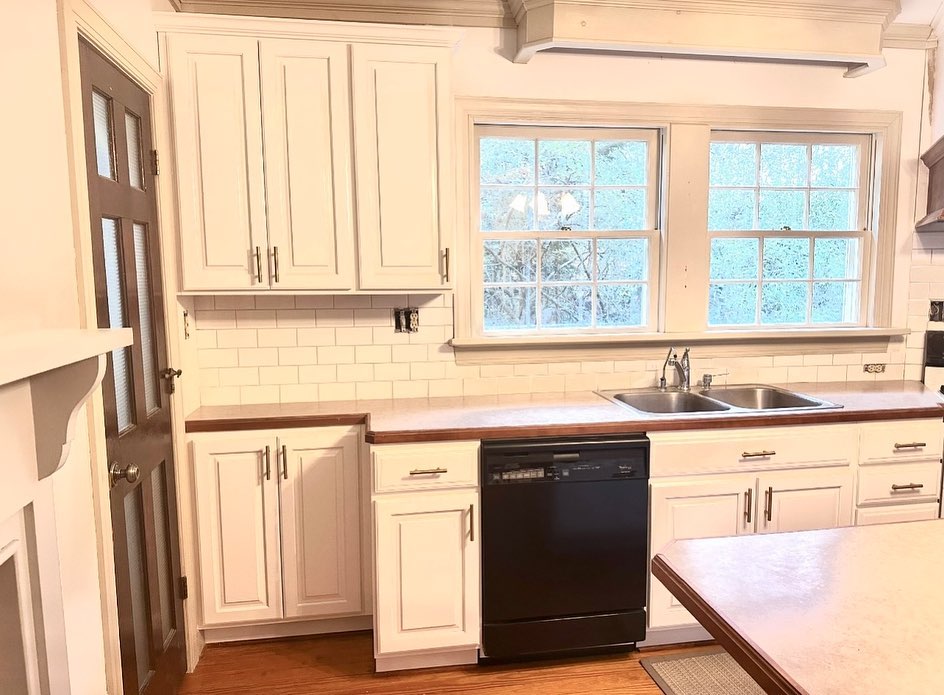
Look at the sink wall now. The sink is the same stainless double basin. The faucet is the same faucet. The dishwasher is the exact same black Whirlpool, dents and all. The counter underneath is the same formica with the same beveled edge, just with a wood band glued on top. Even the window trim is the same oak profile, repainted.
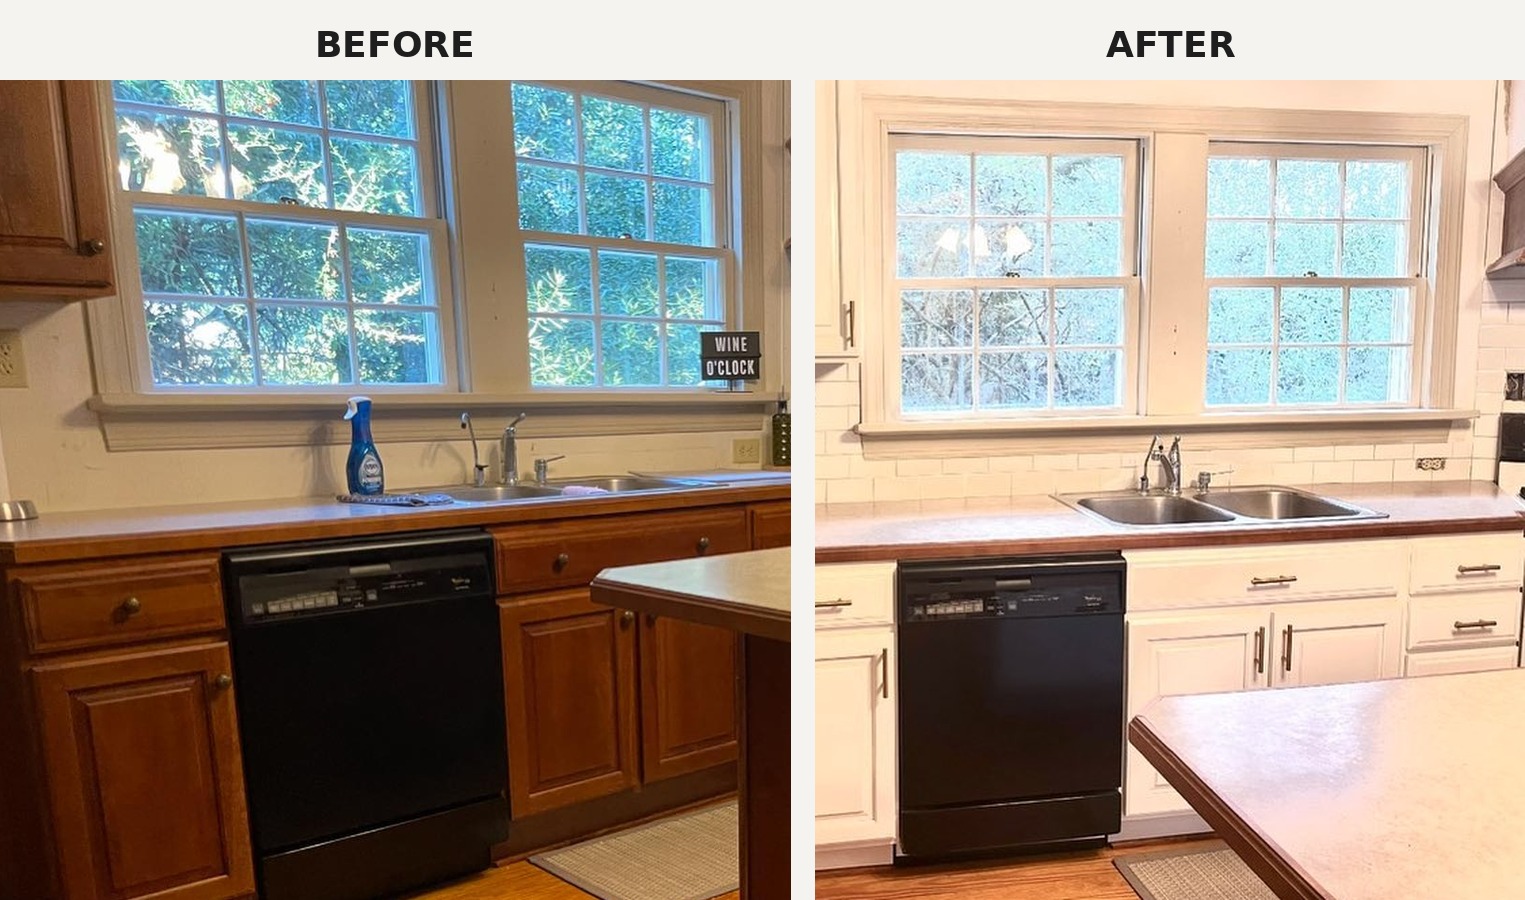
Side by side, it clicks. Same windows. Same sink. Same dishwasher. Same formica. Paint, tile, pulls, counter band. That is everything new on the right panel.
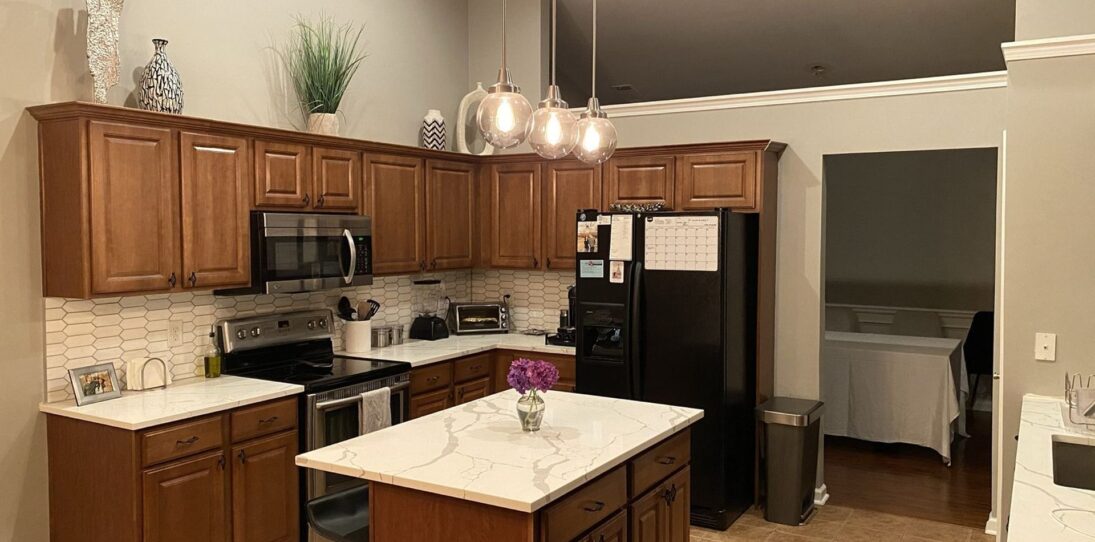

The fridge wall was the harder half
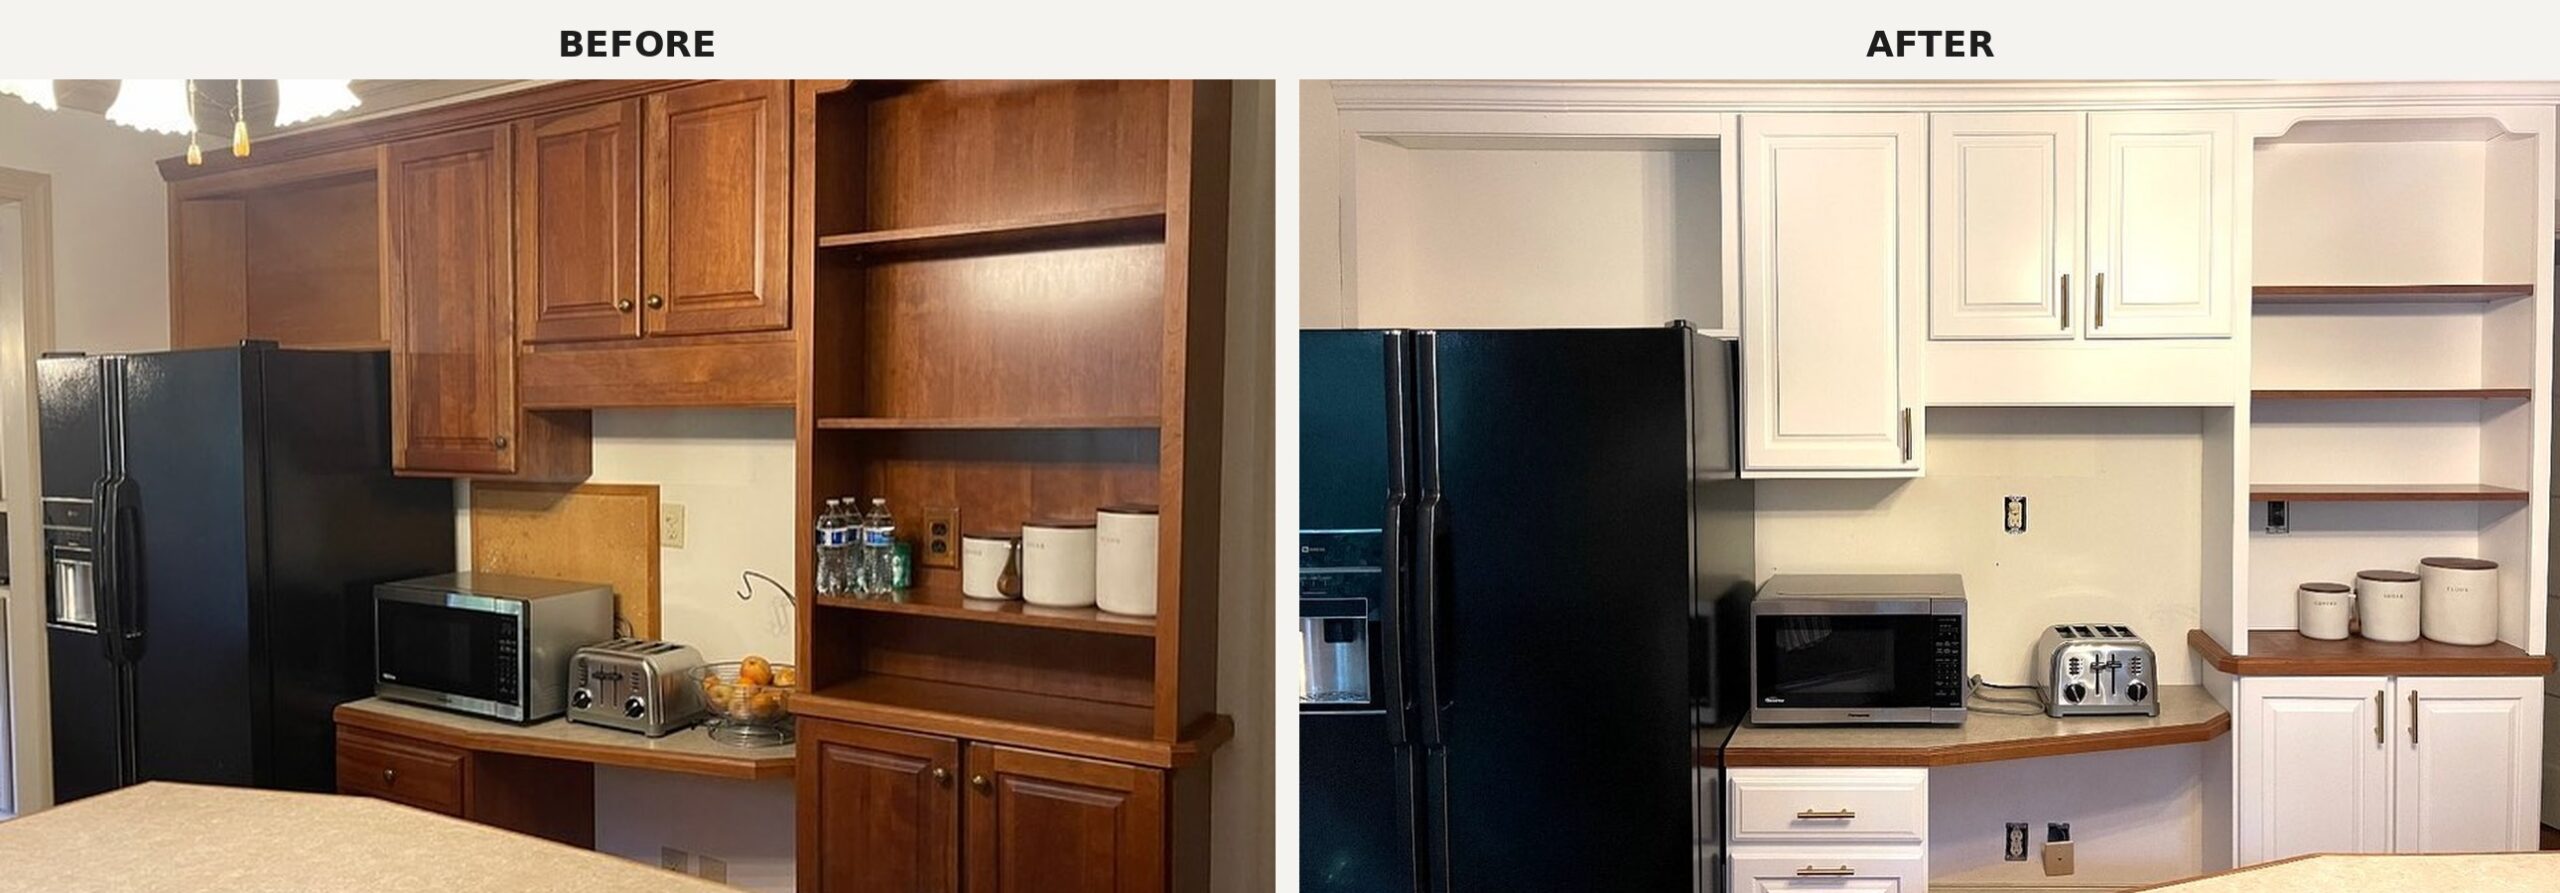
[IMAGE: honey-oak-fridge-microwave-nook-before.jpg] Honey Oak Fridge and Microwave Nook With Open Shelving (Before) | Credit: @myrenewedcabinets Alt: Dated kitchen corner with a black side-by-side fridge, honey oak upper cabinets, a honey oak bookshelf column with three open shelves holding water bottles and canisters, a black Panasonic microwave in a counter nook, and a stainless toaster.
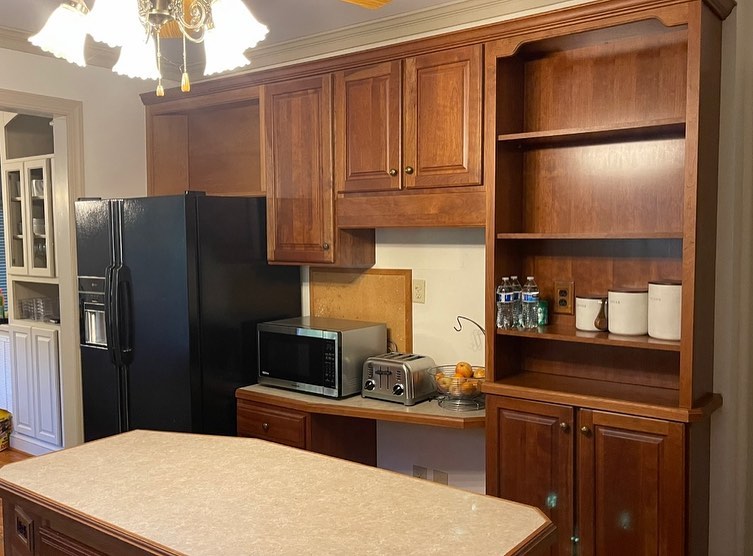
Every surface in this corner except the fridge is oak. Upper cabinets, bookshelf column, lower cabinets, the sides of the microwave nook. It’s oak-on-oak-on-oak with a bit of oak in the middle. Painting a corner this heavy on cabinetry is where most people chicken out, because the fear is that white will flatten the whole thing into one blocky unit.
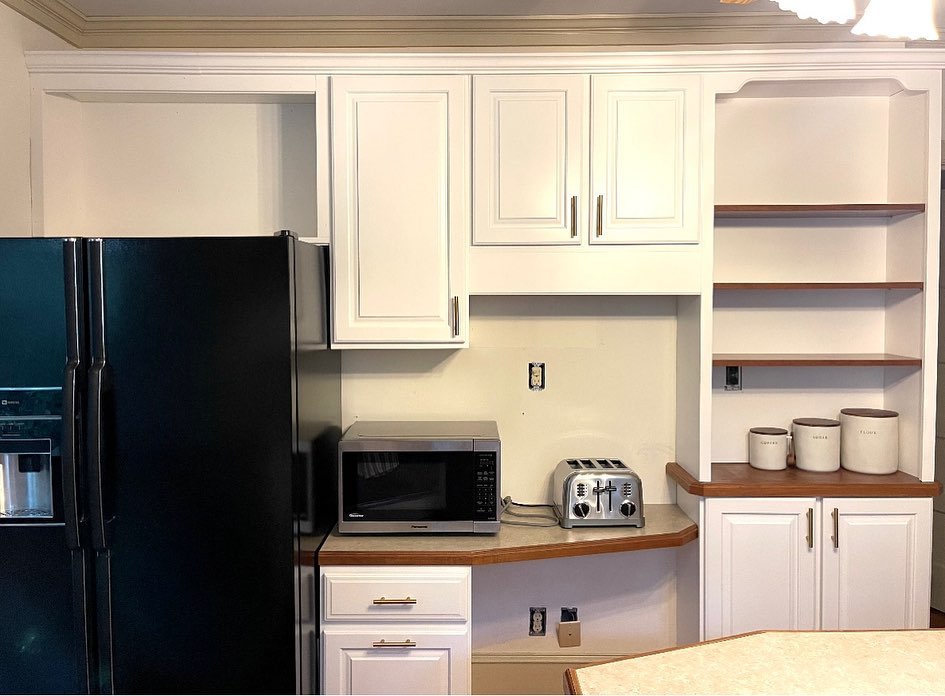
The shelf trick that saved this corner
The save here is the shelves. Instead of painting the open bookshelf solid white too, she sanded the shelf tops down to raw wood and re-stained them a darker walnut tone. That one decision keeps the corner from flattening and gives your eye a resting point. It also ties this wall back to the wood edge band on the sink counter across the room, so the whole kitchen reads as one considered room instead of two separate paint jobs. The canisters moved out of the shelves and onto the counter. The microwave got swapped for a stainless Panasonic (about $90 on Amazon). The fridge is still the same black side-by-side, same ice dispenser, same door handle.
The full cost, line by line
Cabinet spray job: around $3,800 (local quotes for a kitchen this size in central North Carolina run $2,800 to $4,500). Subway tile and thinset: around $600 and a weekend. Hardware: $140 for the whole kitchen. A quart of walnut stain for the shelves: $18. Wood counter band plus adhesive: around $45. New microwave: $90. All in, under $4,700.
Why your contractor won’t suggest paint
Painting a kitchen pays a small crew four grand. Gutting and rebuilding pays a general contractor thirty-five grand plus permits. The paint path does not fund marketing budgets. The gut path does. That is the whole reason “unsalvageable” keeps getting slapped on oak cabinets that are perfectly solid.
How to actually do this yourself
Pull every door off and label the hinges with painter’s tape so you know which door came off where. Degrease with TSP substitute. Scuff-sand with 220 grit, just enough to kill the sheen. Prime with INSL-X Cabinet Coat or BIN shellac (do not skip this on oak). Roll two topcoats of Benjamin Moore Advance or Sherwin Williams Emerald Urethane in satin, 16 hours between coats. A long weekend plus two drying days gets you the right side of the photos above.
Your counters can wait. Your appliances can wait. Your floors can wait. The whole look of your kitchen is sitting on the surface of the wood you already own.
If this was your kitchen, would you paint the oak or hold out for the full gut remodel?
Credit for this transformation goes to @myrenewedcabinets on Instagram, a family-run, female-owned cabinet painting shop serving the Raleigh, Cary, and Holly Springs area of North Carolina.