
The before photos of this kitchen look exactly like what every renovation forum tells you to tear out. Cream laminate cabinets with dark walnut edge-banding on every door. A brown diamond-pattern tile backsplash. Cola-dark laminate counters that drag the whole room into the late ’80s. Beige floor tile. One sad fluorescent box in the ceiling. The kind of kitchen that gets a $30,000 gut-and-redo quote and a six-week timeline.
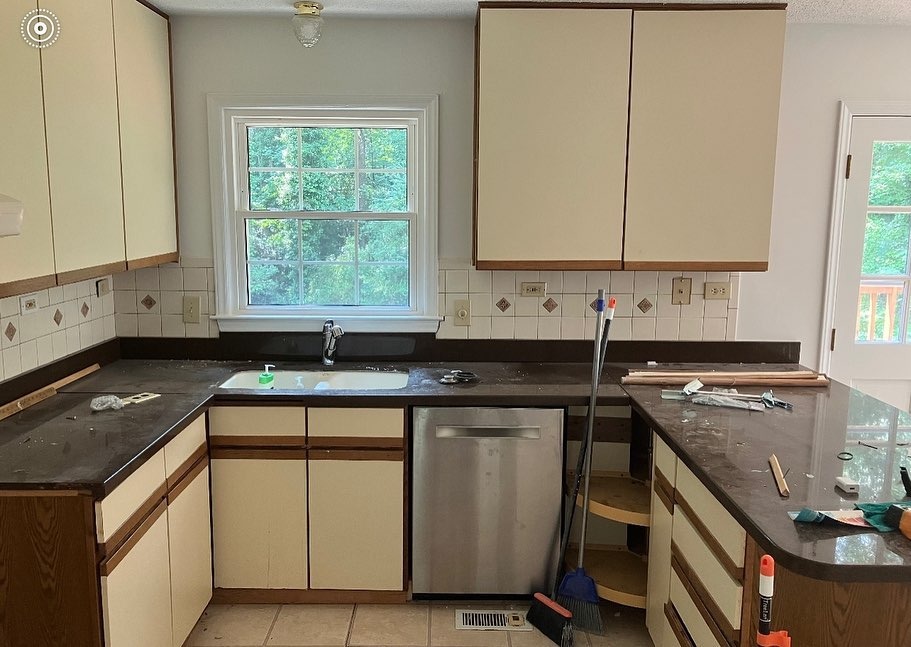
The flipper who took this on is a Raleigh-area cabinet refinisher called @myrenewedcabinets. She did not spend $30,000. She did not spend six weeks. She painted the cabinets, painted the backsplash tile, kept the dark counters right where they sat, and walked out with a kitchen that reads like a modern listing. The math only works because she kept the big-ticket items.
The second wall was worse
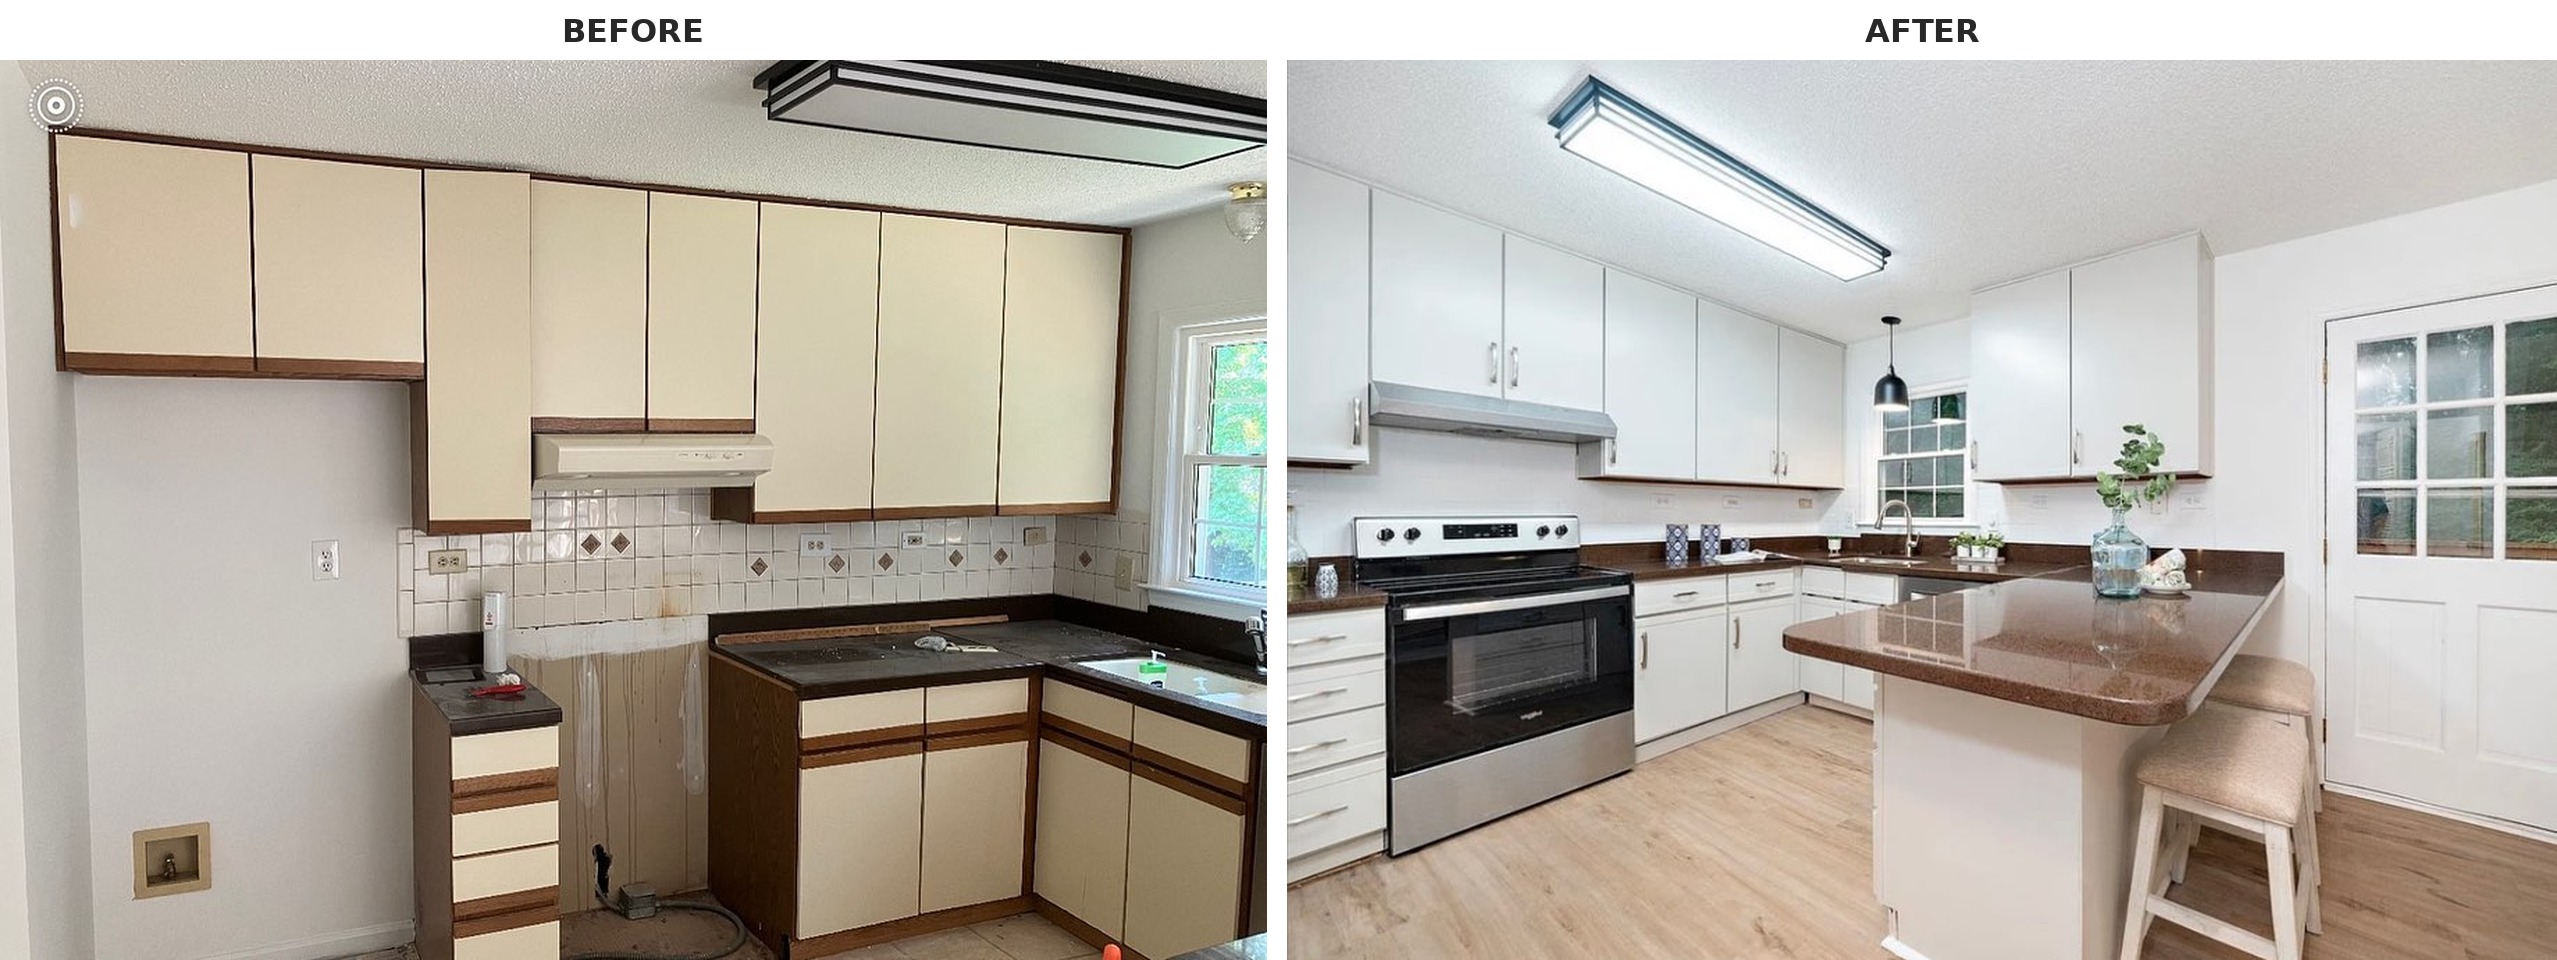
The opposite wall had more going wrong with it. Water stains running down a cabinet door below the hood. Two different diamond patterns on the tile backsplash. Uppers that run all the way up to a textured ceiling under a boxy fluorescent fixture. Three different beige tones all fighting for attention.
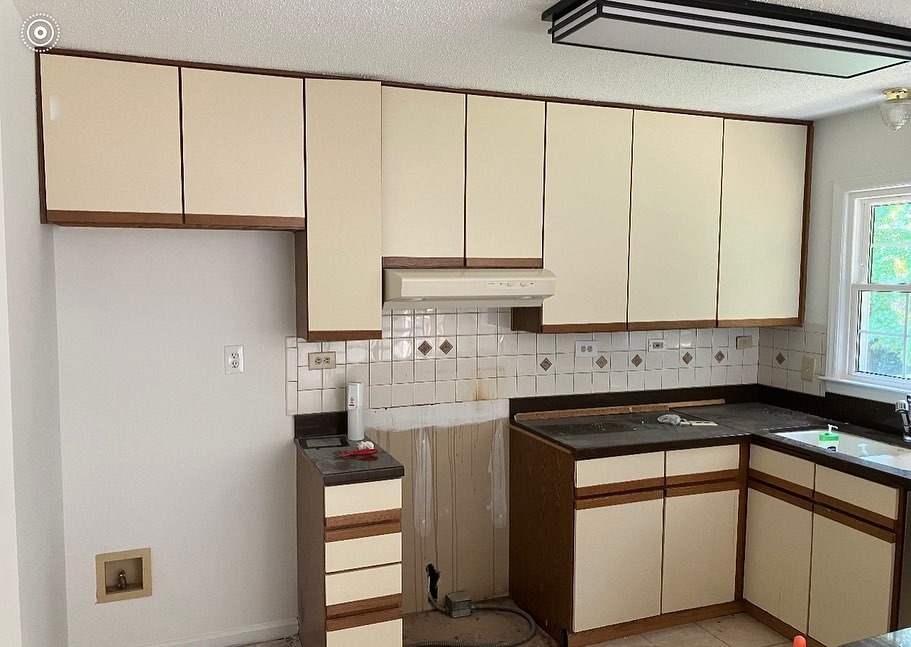
Nothing on that wall got replaced. The hood is the same hood. The uppers are the same uppers. The tile is the same tile. The ceiling is the same ceiling. All of it got repainted.
The reveal
Here’s the same sink wall, side by side, before and after:
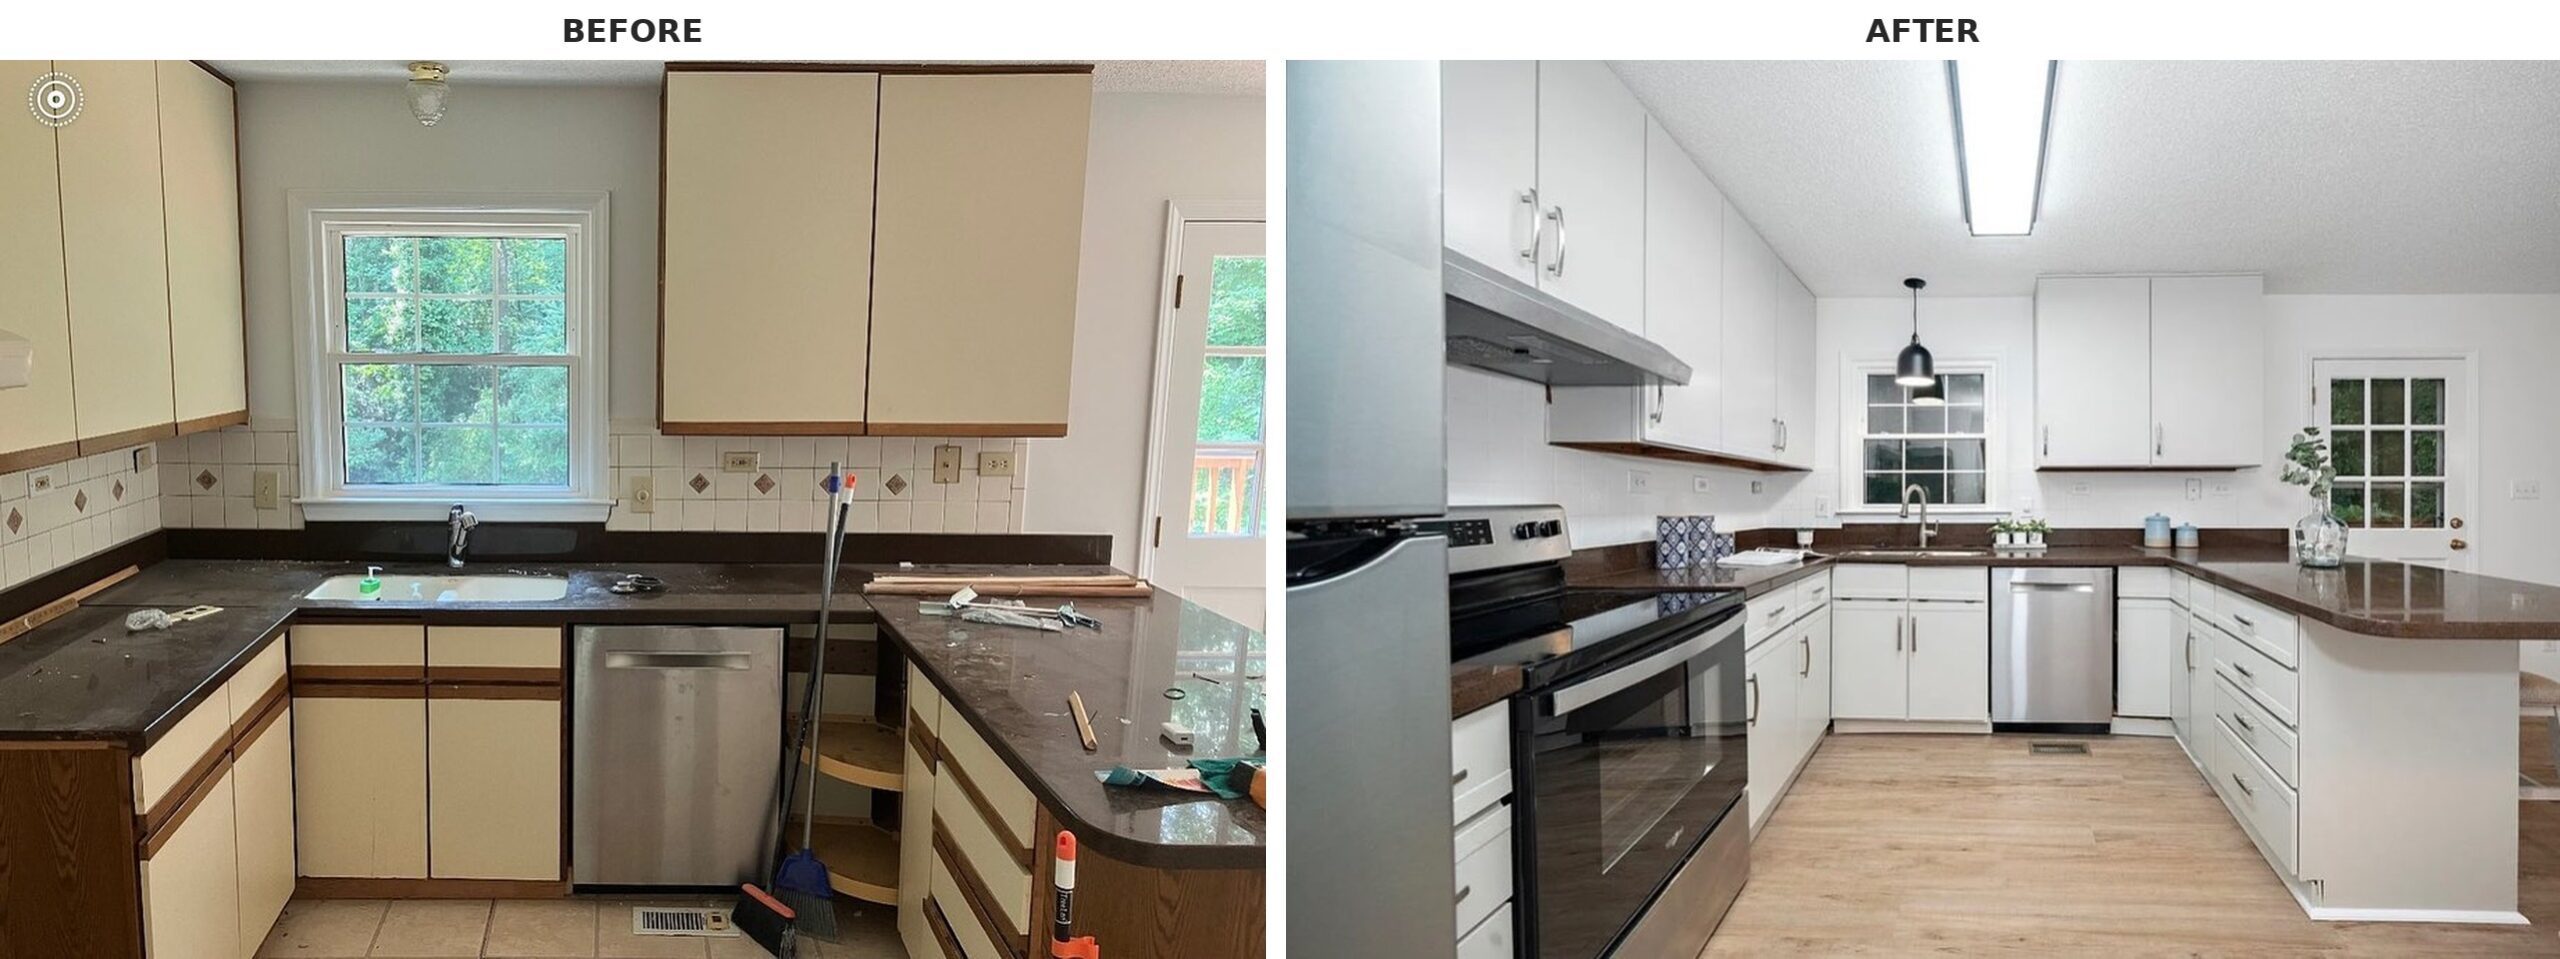
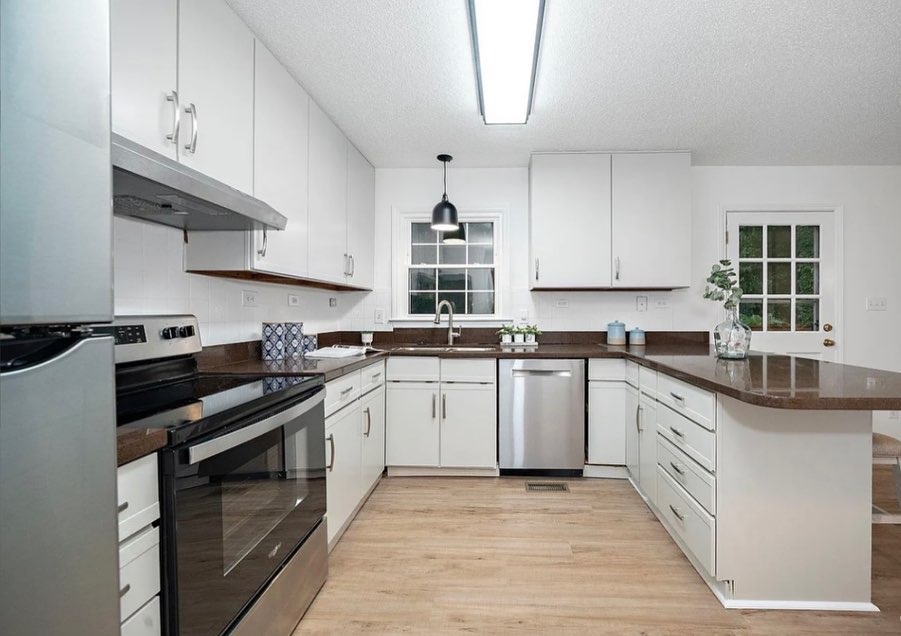
Same cabinet boxes. Same doors. Same counter. Same window. Same sink. The floor is new (light wood-look LVP replaced the beige tile). The appliances are new (stainless fridge, slide-in range, dishwasher). The fluorescent box over the sink got swapped for one clean black pendant. The hardware went from small brown knobs to brushed nickel bar pulls. That’s it. Everything else got a coat of paint.

Why painted laminate actually works here
The reason most homeowners think you can’t paint laminate cabinets is that most people try it with a brush, a roller, and a quart of wall paint. That version does peel. It chips on the edges inside a year. The pulls catch on the paint and the corners start to look fuzzy.
A cabinet refinisher doesn’t paint cabinets that way. The hashtags on the original post tell you what she used: an Italian two-part catalyzed cabinet coating (the Milesi, Renner, or ICA tier that real cabinet shops spray), put on with HVLP spray gear after a proper degrease, a scuff-sand, and a bonding-primer pass. That finish is harder than factory. It doesn’t peel. It outlasts the next owner. This is the technical shortcut that the “you can’t paint laminate” advice is missing.
The second move most people miss: the backsplash
She painted the tile backsplash too.
That brown-and-tan diamond pattern on the before? Painted over, in solid white. The tiles are still there. The grout lines are still there. The diamond accents are still there, just invisible under paint. In a low-splash zone like this (above a counter, no running water), tile painted with the right primer and tile paint holds up fine. The alternative was tearing out tile that sits directly against the counter, which almost always destroys the counter underneath. Painting the tile is what let her keep the counter.
And the counters stayed
This is the piece most people would never leave alone.
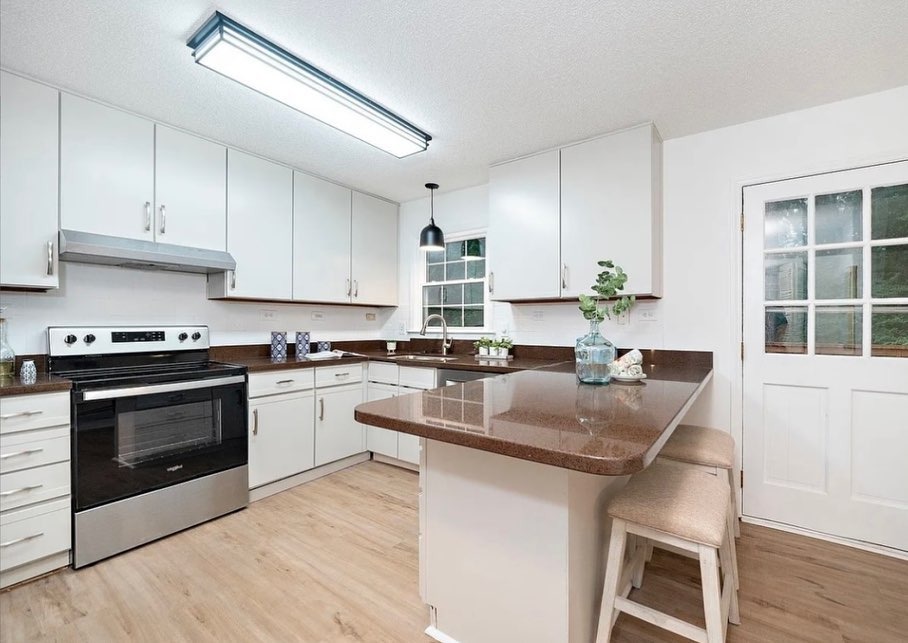
The dark brown counters she kept are the same laminate counters from the before shots. Dark brown counters against beige cabinets, beige tile, and beige floor read “dated ’80s.” The exact same dark brown counters against white cabinets, white backsplash, a light wood-look floor, and stainless appliances read “intentional contrast kitchen.” She didn’t need to replace $5,000 of surface. She needed to change what sat around it. The counter went from the problem to the only warm note in a cool, bright room.
The math (and the lesson)
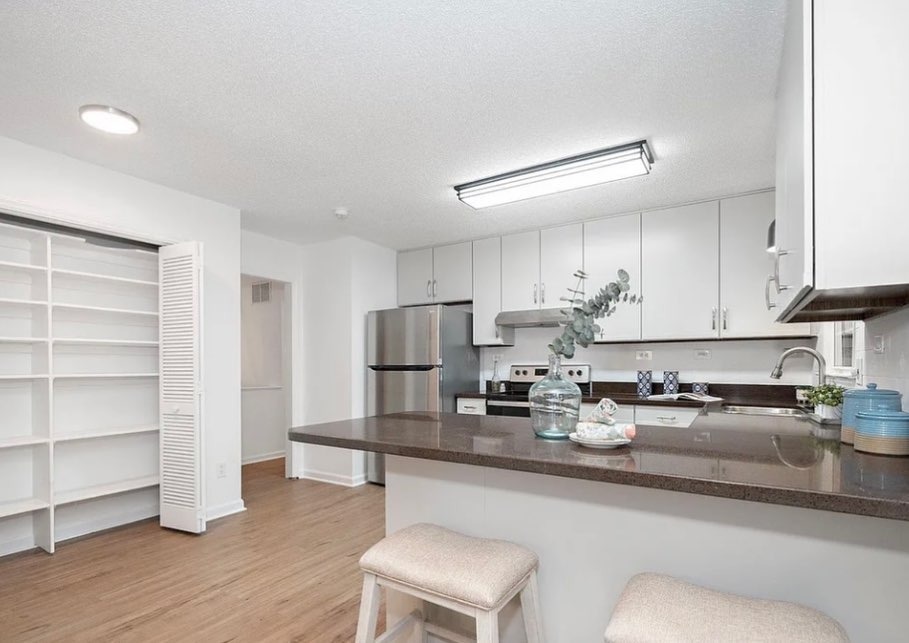
Add it up. Cabinets painted. Tile painted. Hood painted. Counters kept. New floor, new appliances, new pendant, new hardware, two counter stools, a little styling. A kitchen that photographs like a $30,000 remodel for closer to $8,000 and about two weeks of work. On an investment property, that’s the gap between a flip that cash-flows and one that doesn’t.
The takeaway for anyone staring at an ’80s kitchen in their own house is the same. Those cabinets probably aren’t the problem. The dark counters probably aren’t the problem either. The problem is everything around them agreeing that the kitchen is old. Change what agrees, and the “doomed” pieces stop looking doomed.