TheCoolist is a mood board for your headspace.

    He kept the black granite and painted cherry cabinets Mega Greige: now the kitchen looks custom
  1. TheCoolist
  2. Kitchen

He kept the black granite and painted cherry cabinets Mega Greige: now the kitchen looks custom

The cabinets in the before photo are the same cabinets in the after photo. Same wood. Same hinges. Same raised panel doors. Three days later, the whole room reads like somebody else lives there.

If your house went up between 2000 and 2010, this might be your kitchen too. Red cherry everywhere, black granite counters, a travertine backsplash in little diamonds, and small round silver knobs stuck in the middle of every door. For most of a decade, that was the “nice kitchen” package in American builder homes. Millions of houses got it. It aged in a hurry. By now it screams a date on the house.

The problem is what you’re told to do about it. Realtors say gut it. Contractors quote $25,000 to $45,000 just for new cabinets, before anyone has touched the counters or the backsplash. HGTV crews come in with sledgehammers. So most homeowners either eat the quote, live with the red for another decade, or buy a can of Behr Ultra White and watch their DIY job chip at every fingernail scrape while pink tannins bleed through in six months.

This homeowner did none of that.

Three days of paint, zero demo work
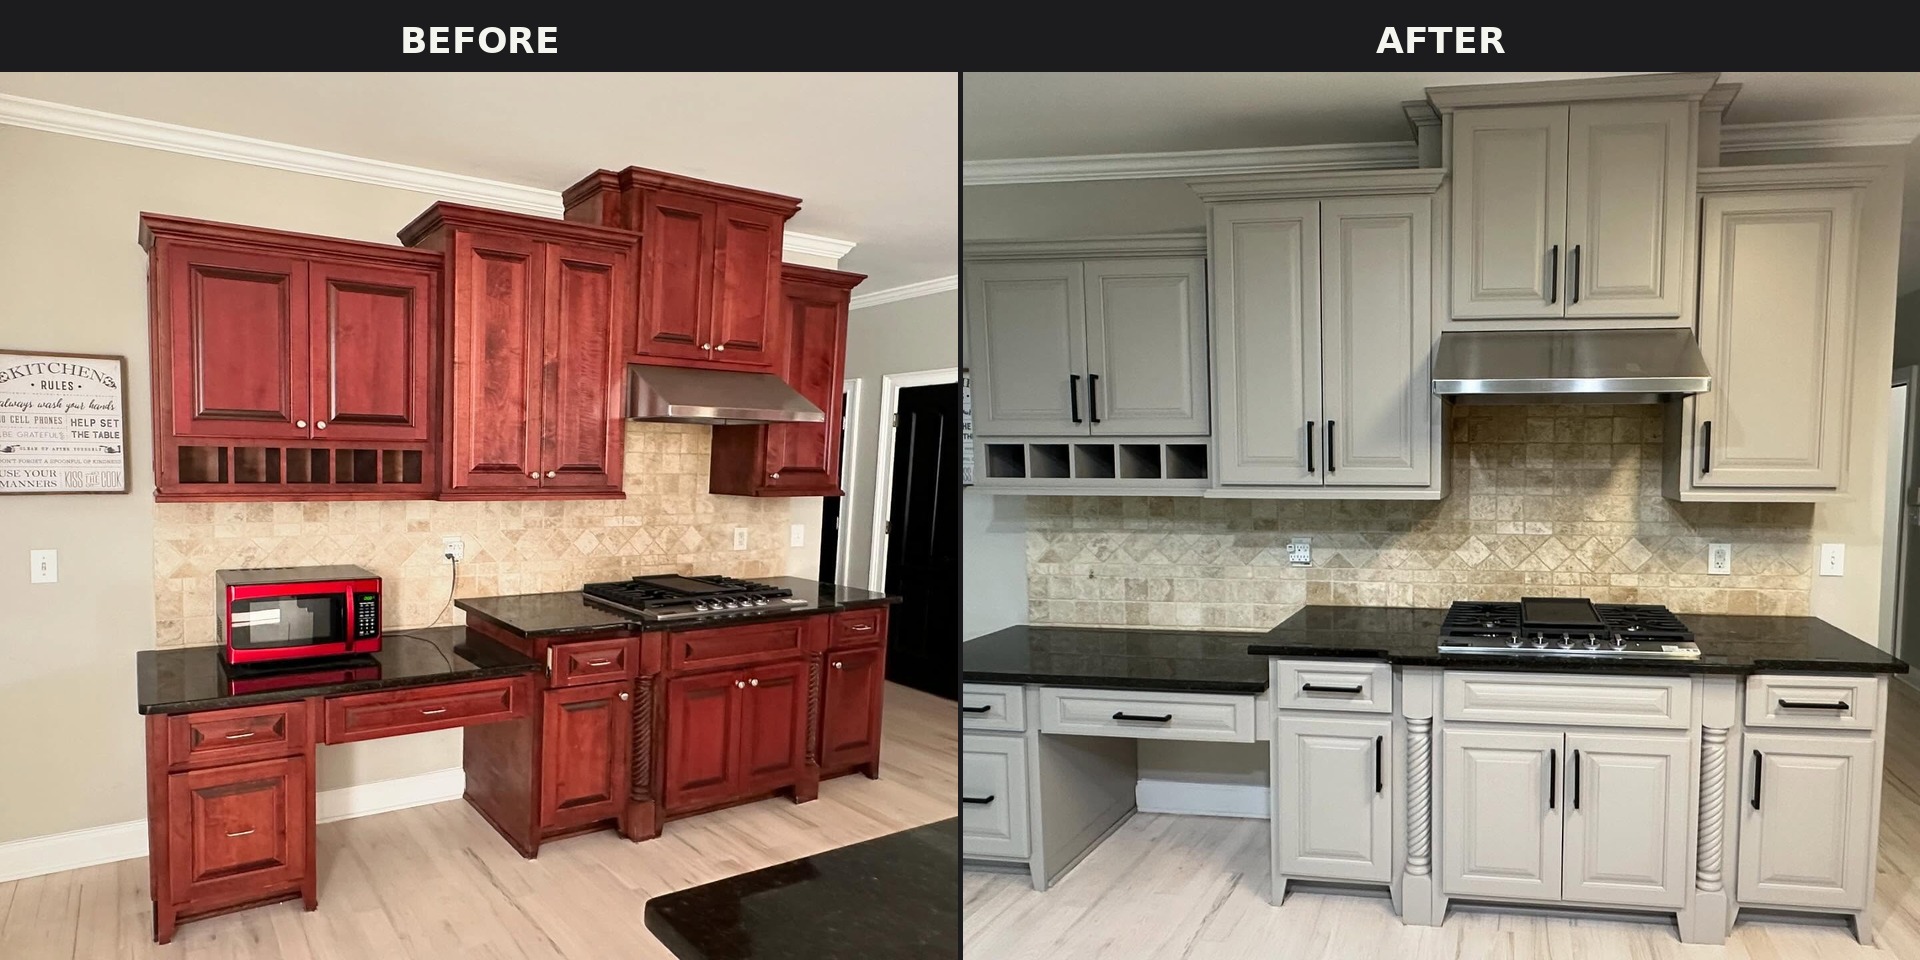
Side by side of the main kitchen wall and cooktop island, deep cherry cabinets with a red microwave on the left and the same cabinets painted warm Mega Greige with a stainless hood installed in place of the microwave, with new long black bar pulls, on the right. Same travertine backsplash and black granite counter in both.
Cherry To Mega Greige Wide View Comparison (Before And After) | Credit: @duartpainting

Two cans of Sherwin-Williams. One tin of lacquer bonding primer. A new set of long matte black bar pulls. That was the whole job.
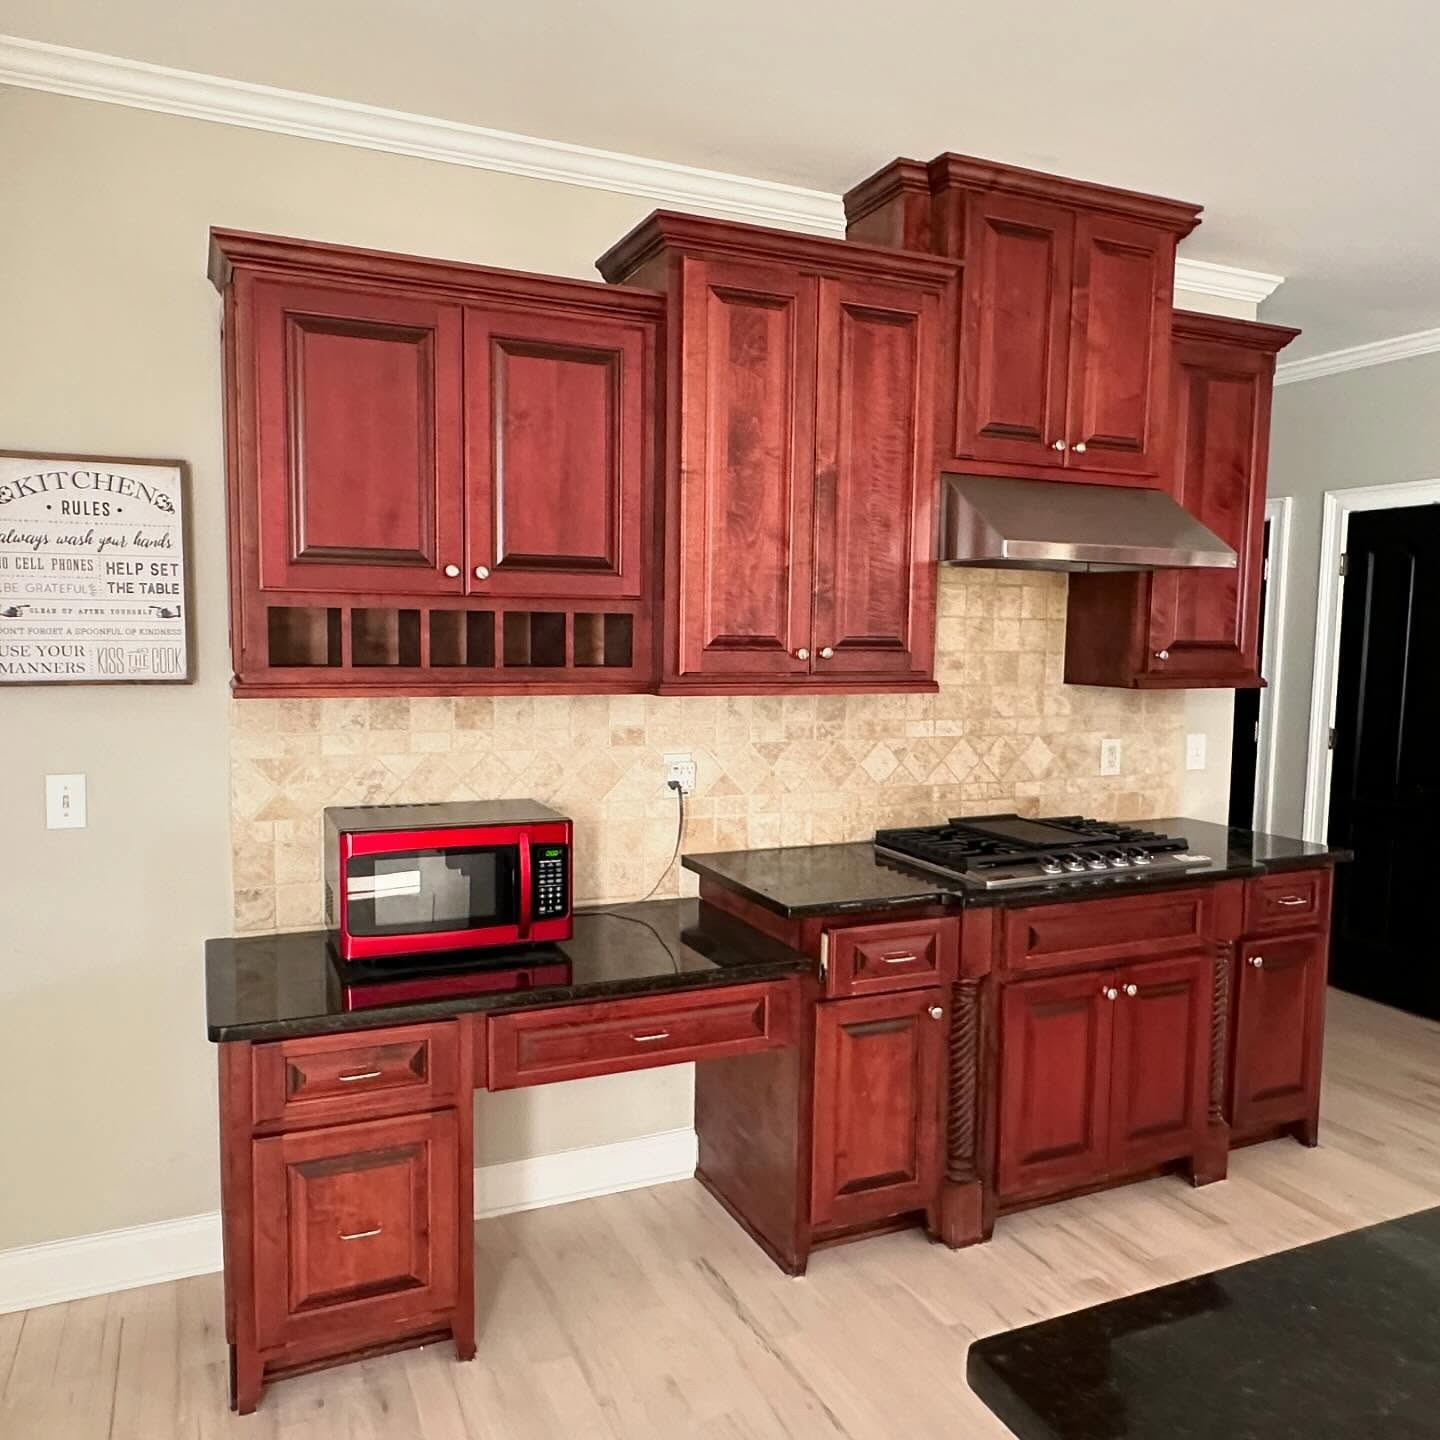
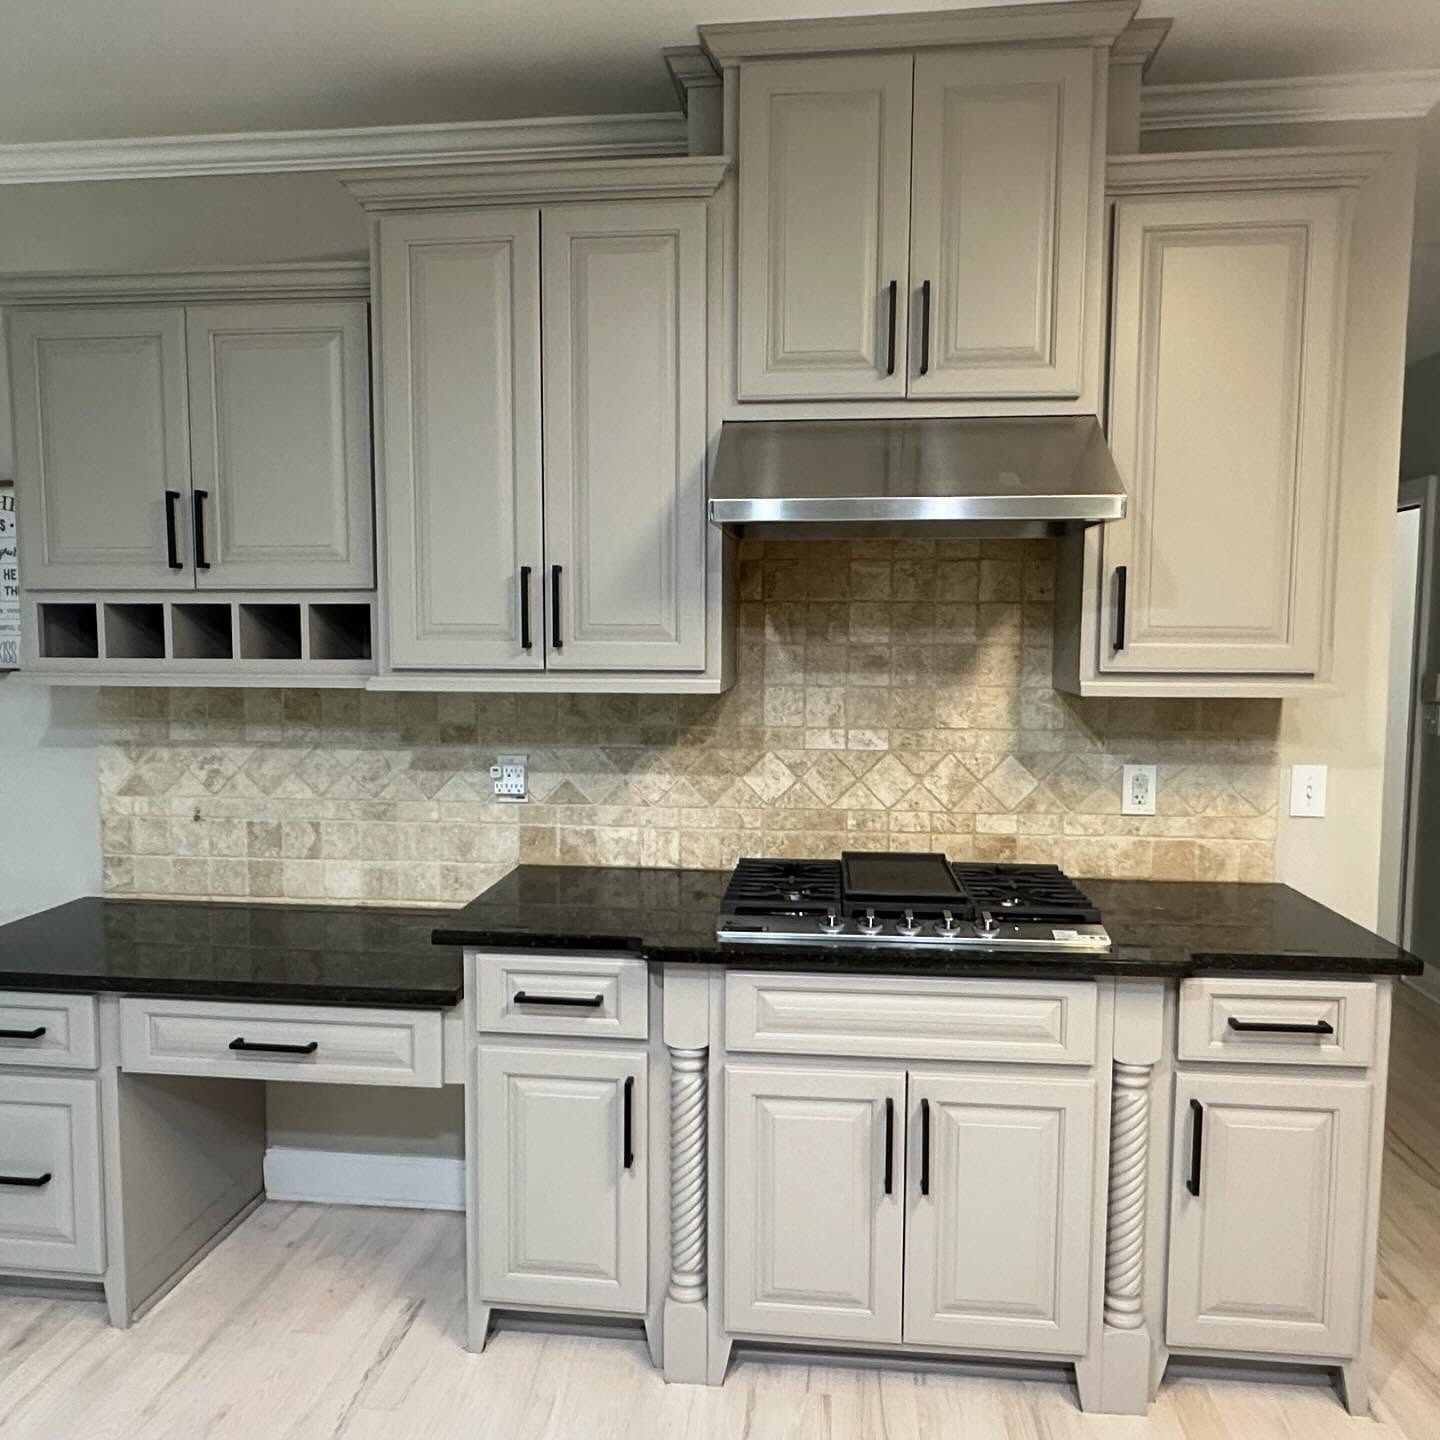
Red cherry cabinets along one wall with stepped crown molding, wine rack slots under the uppers, a red countertop microwave sitting on the perimeter counter, and a cherry island with a built-in cooktop and ornate turned column supports.
Cherry Kitchen Wide View With Red Microwave (Before) | Credit: @duartpainting
The same wall and island now painted warm Mega Greige, a stainless hood pulled down over the cooktop, long matte black bar pulls on every door and drawer, and the original travertine backsplash and black granite counter still in place.
Mega Greige Kitchen Wide View With Stove (After) | Credit: @duartpainting

The money move: keep the granite, change what’s touching it

Nobody tells you this, but the black granite was never actually the problem. It only looked tired because it was pinned between red cabinets above and red cabinets below. Put something quieter around it and the same slab suddenly looks like a decision somebody made, not a leftover.

The travertine backsplash stayed too, and that was the smart call. A cooler gray paint would have turned that beige stone yellow. Mega Greige is warm enough to pull the tile into the new story instead of leaving it stranded.

No tile saw. No new counters. No plumber. No electrician.

The oven wall: look at how little actually moved
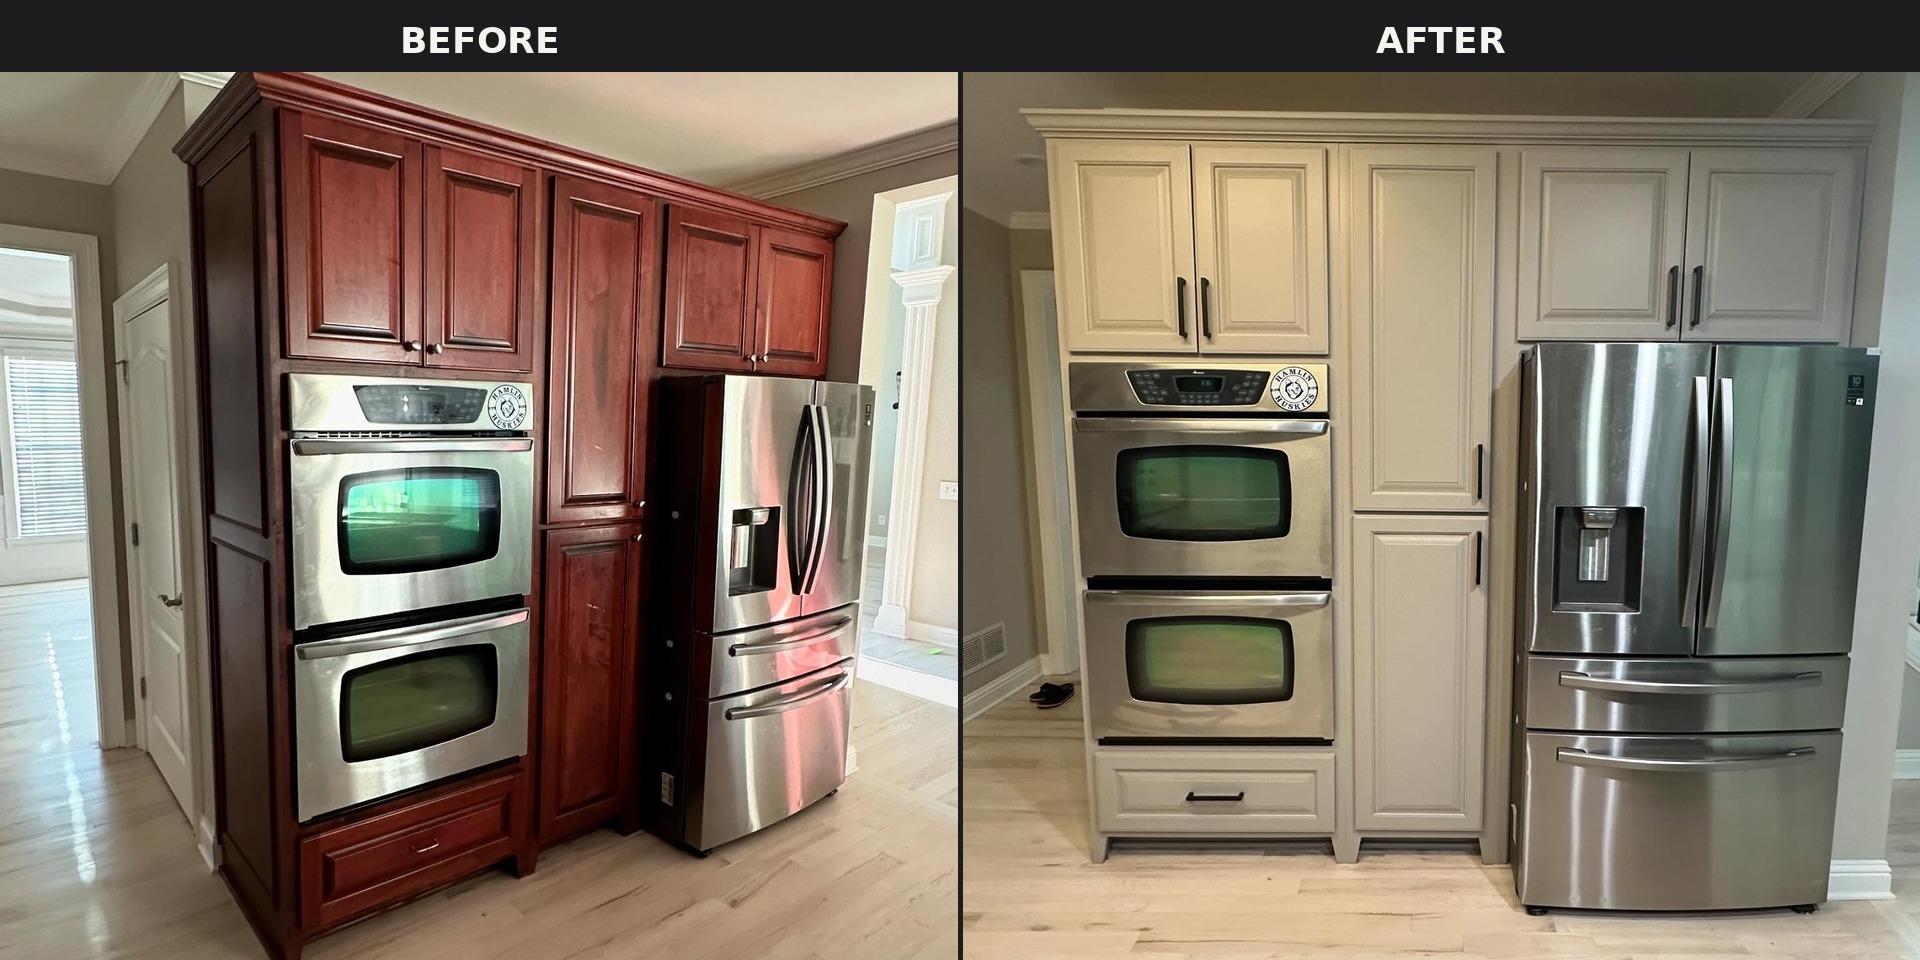
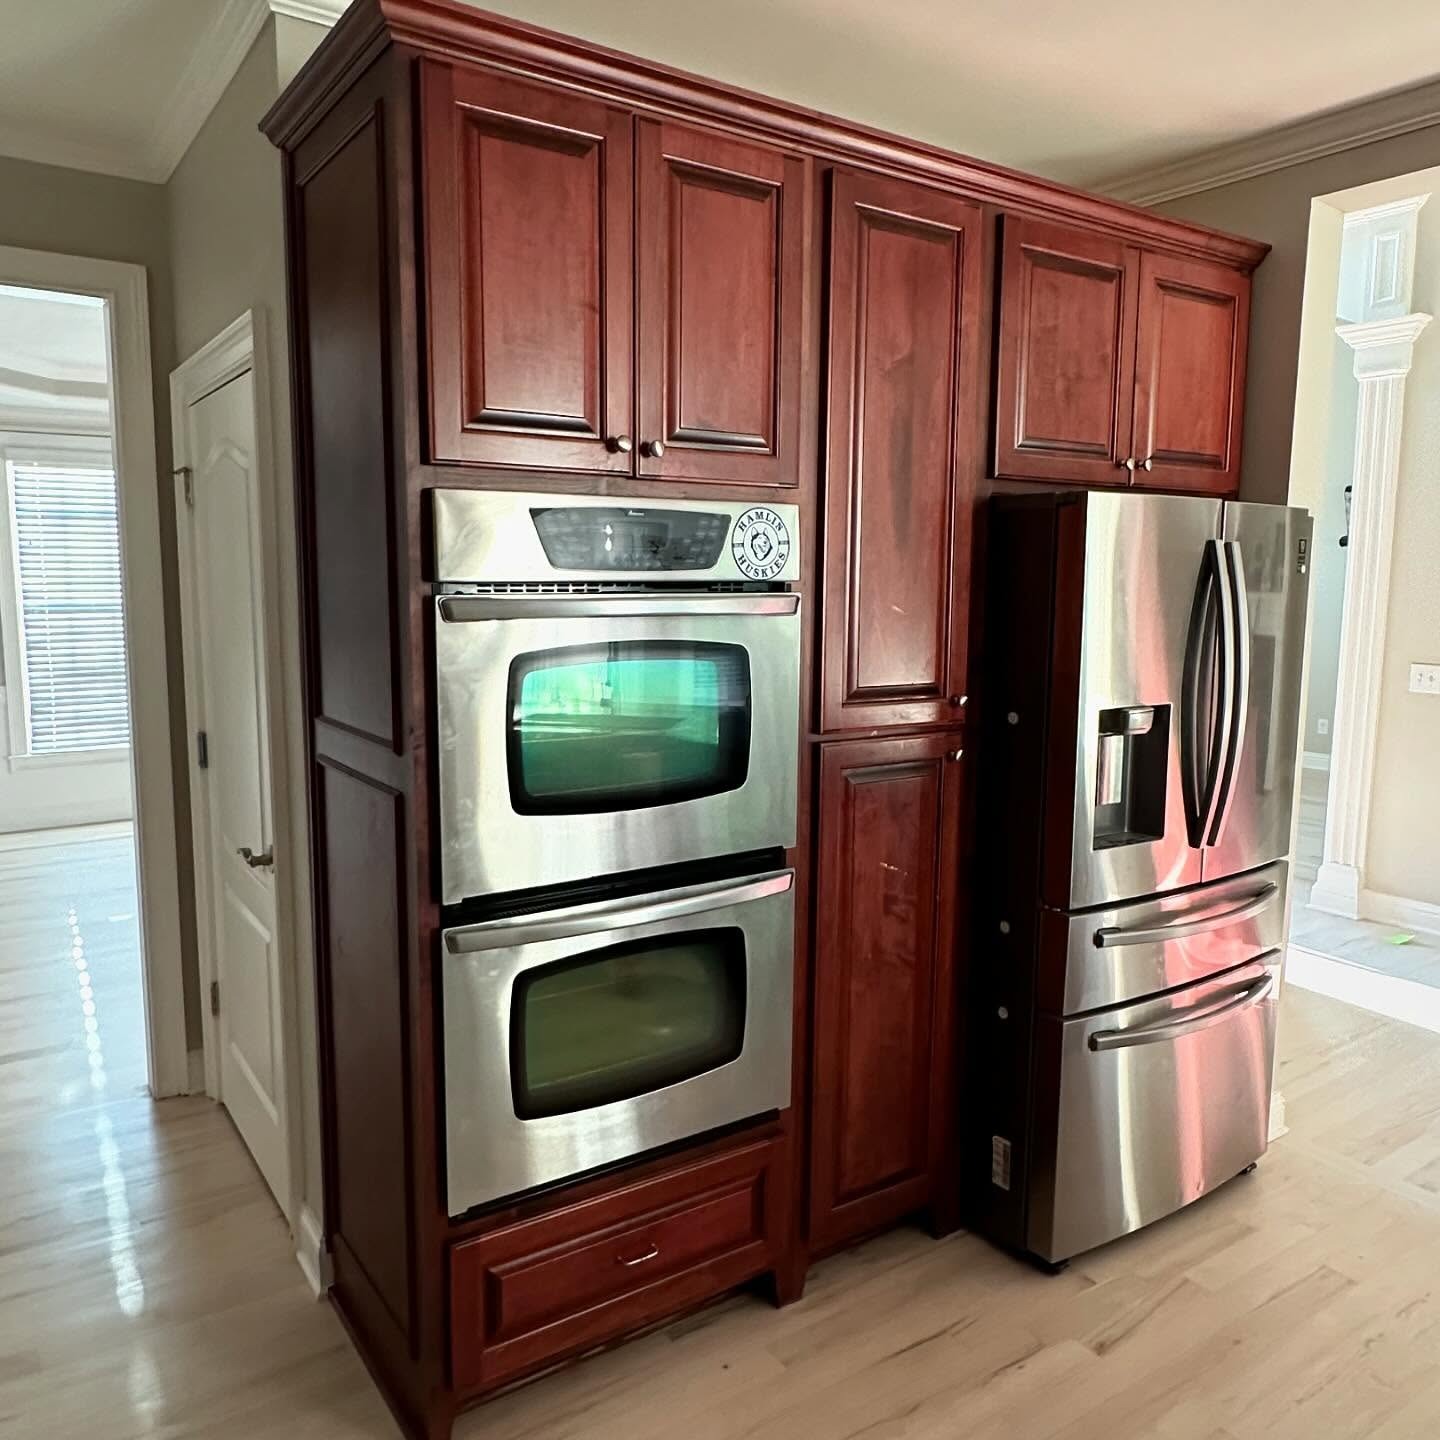
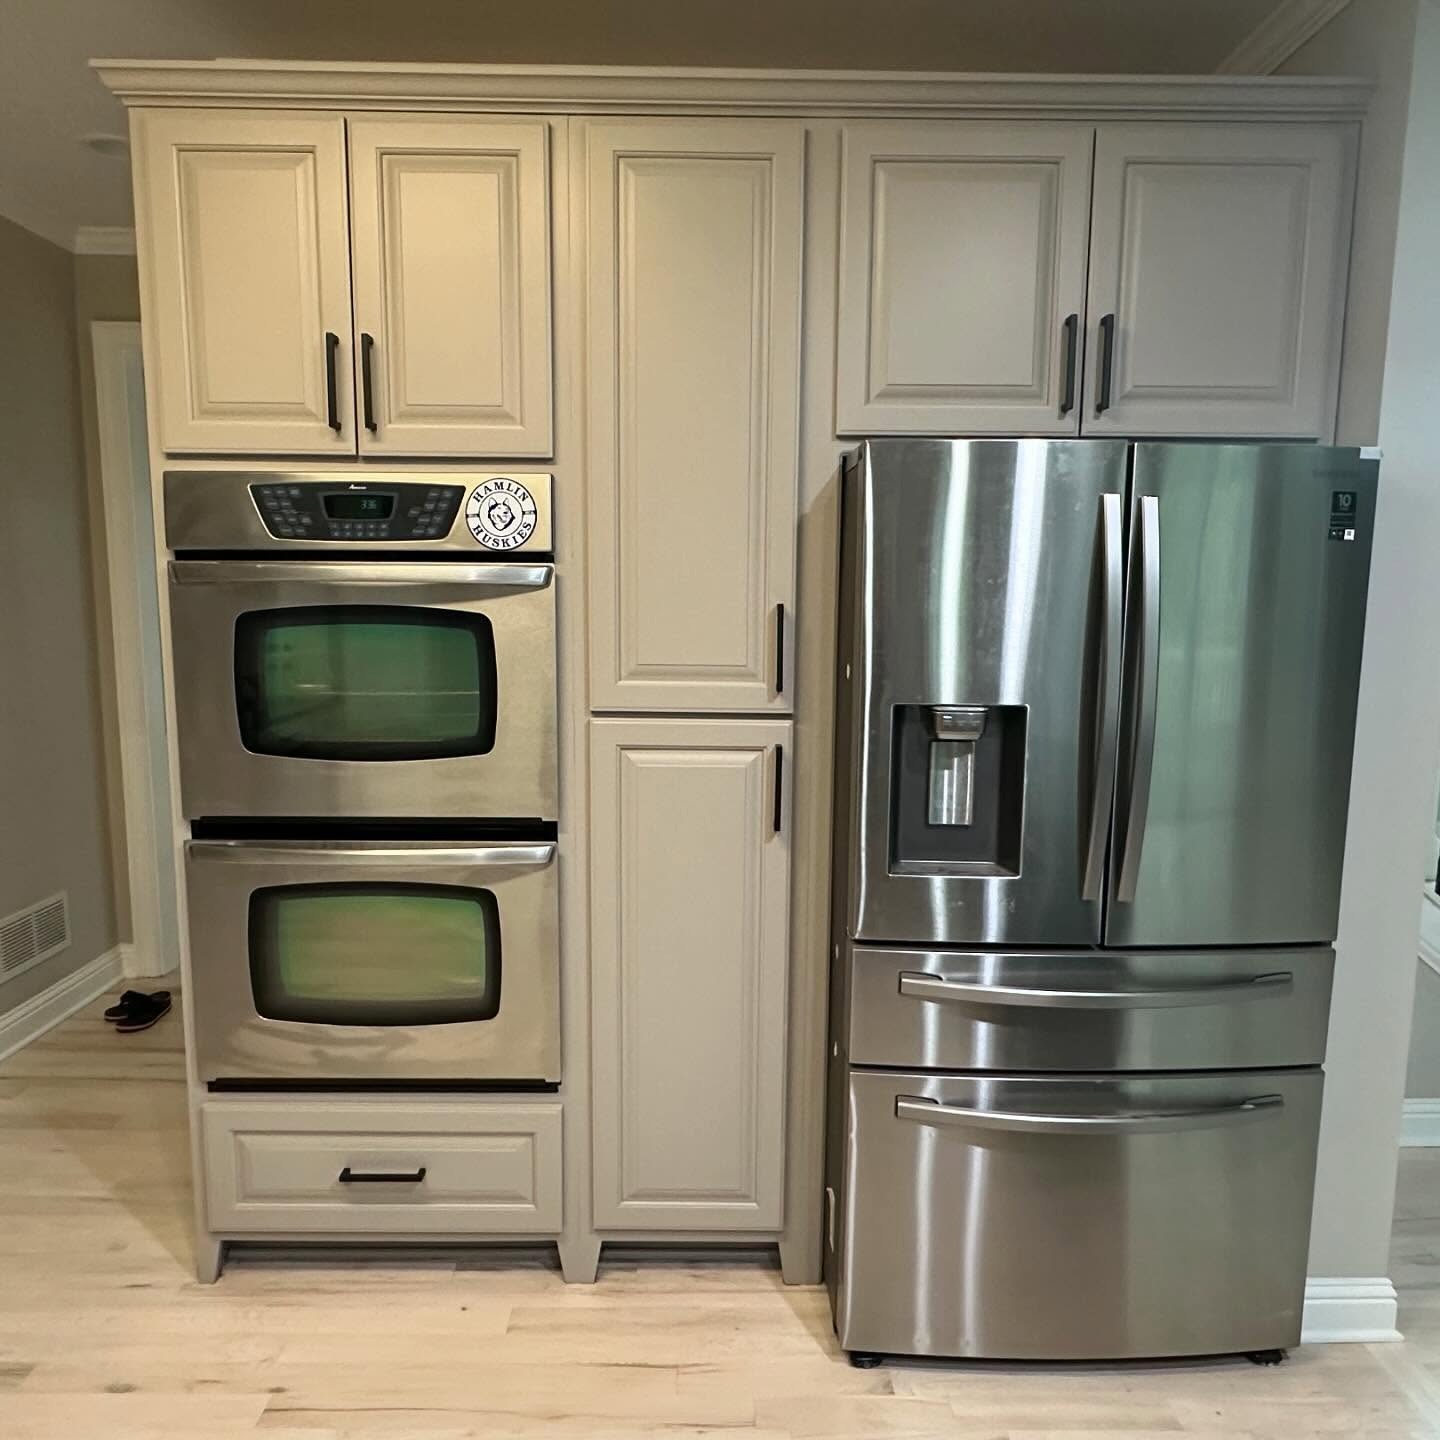
Side by side of the double wall oven and fridge, deep cherry raised panel cabinets with small round knobs on the left and the same cabinets painted soft warm Mega Greige with long black bar pulls on the right. Same ovens, same fridge, same hallway doorway on the left.
Cherry To Mega Greige Double Oven Wall Comparison (Before And After) | Credit: @duartpainting
Tall cherry cabinets wrapping a stainless Amana double wall oven with a Hamlin Huskies magnet on top, a tall pantry cabinet in the middle, and a stainless French door fridge on the right, over a light hardwood floor.
Cherry Kitchen Double Oven Wall (Before) | Credit: @duartpainting
The same tall cabinets now in Mega Greige with slim black bar pulls, the same Amana double oven still carrying the Hamlin Huskies magnet, and the same stainless French door fridge beside it.
Mega Greige Kitchen Double Oven Wall (After) | Credit: @duartpainting

The magnet on top of the oven is still there in both photos. Same magnet. Same oven. Same floor. Nothing has moved by an inch.

The one real swap, besides paint, is the hardware. And it does more than you expect. The old round knobs sat halfway up each door and made every cabinet feel short and squat. The long bar pulls run most of the door and drag your eye straight up. An eight-foot kitchen suddenly reads taller than it did last week.

And then one piece went in a totally different direction
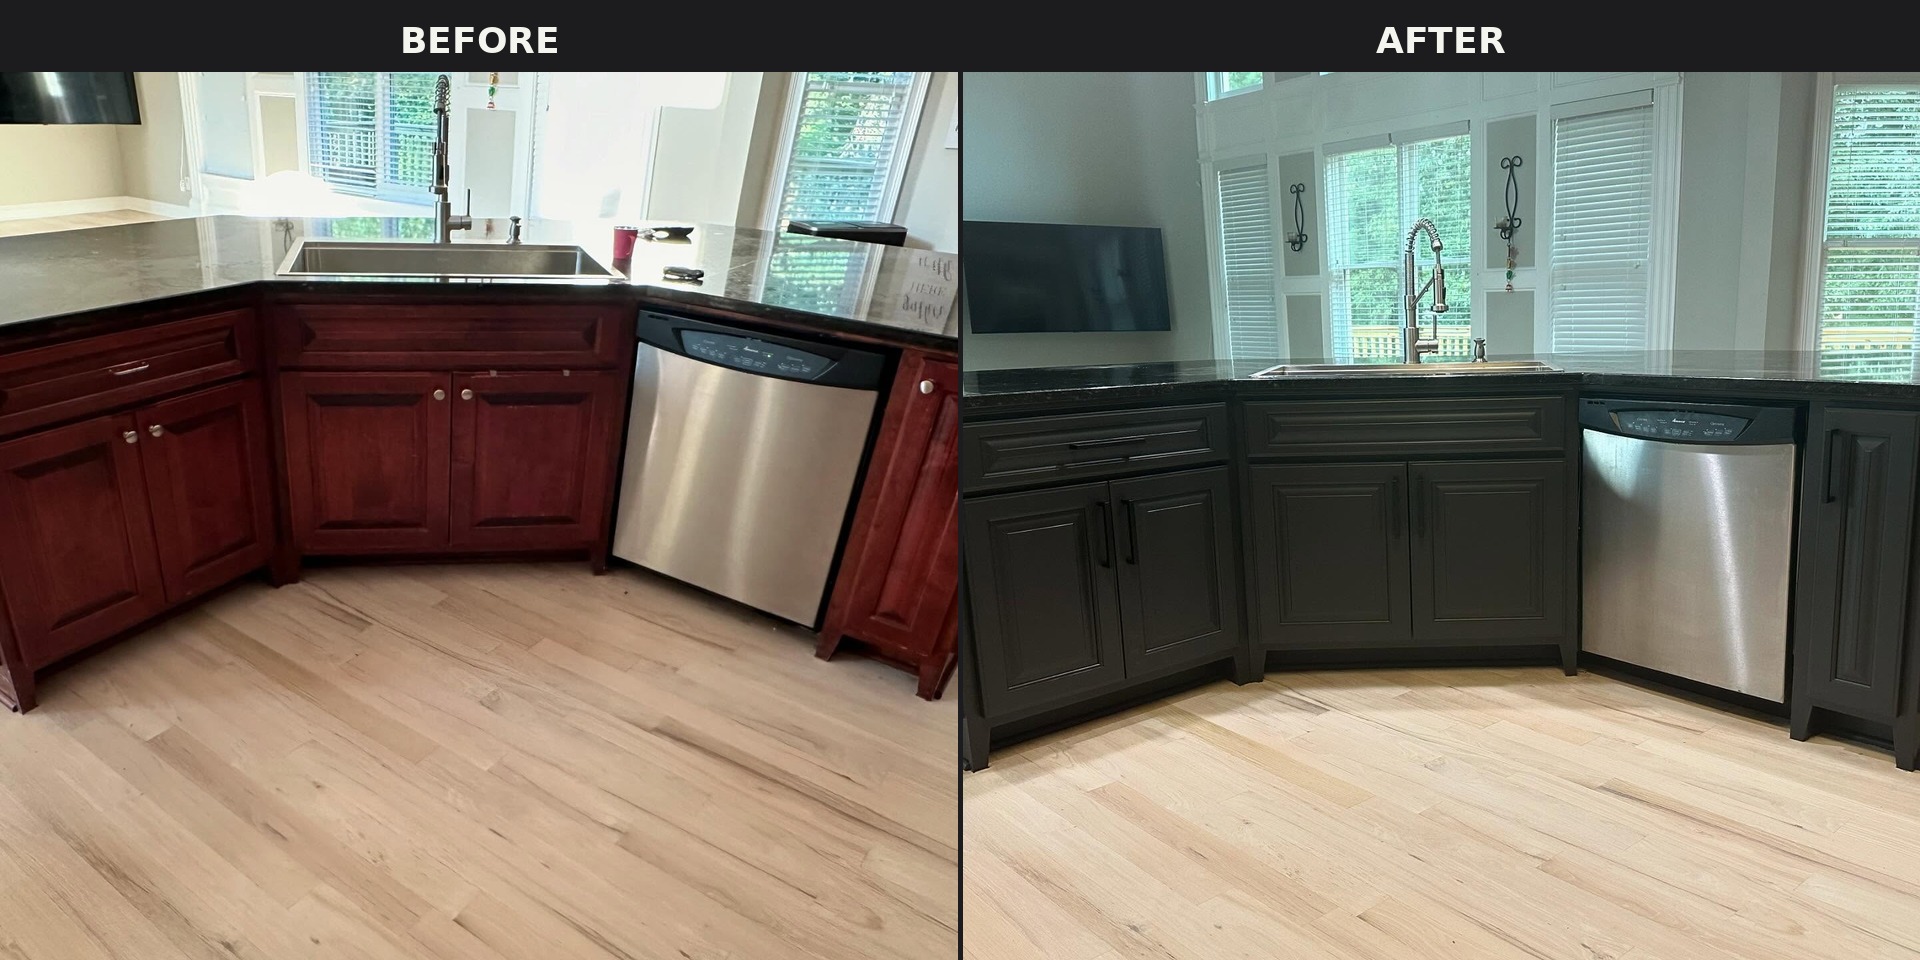
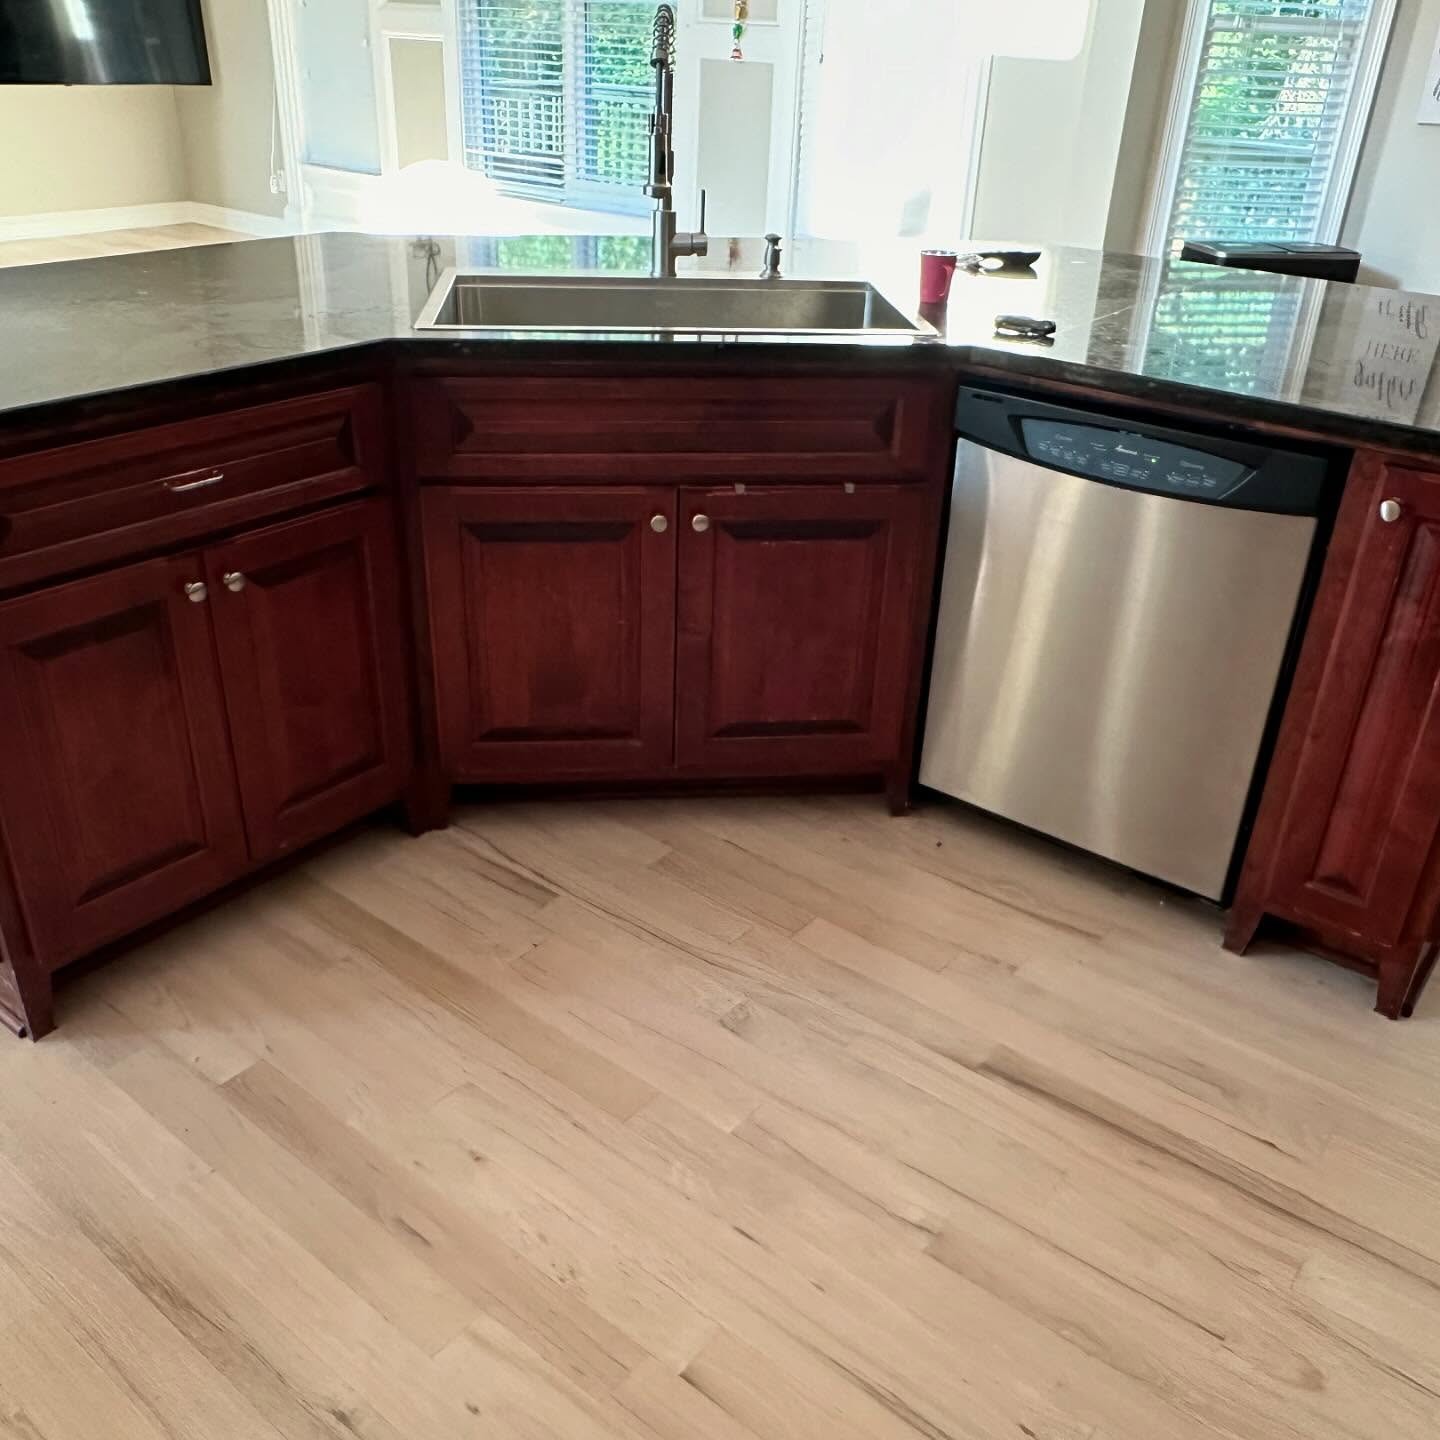
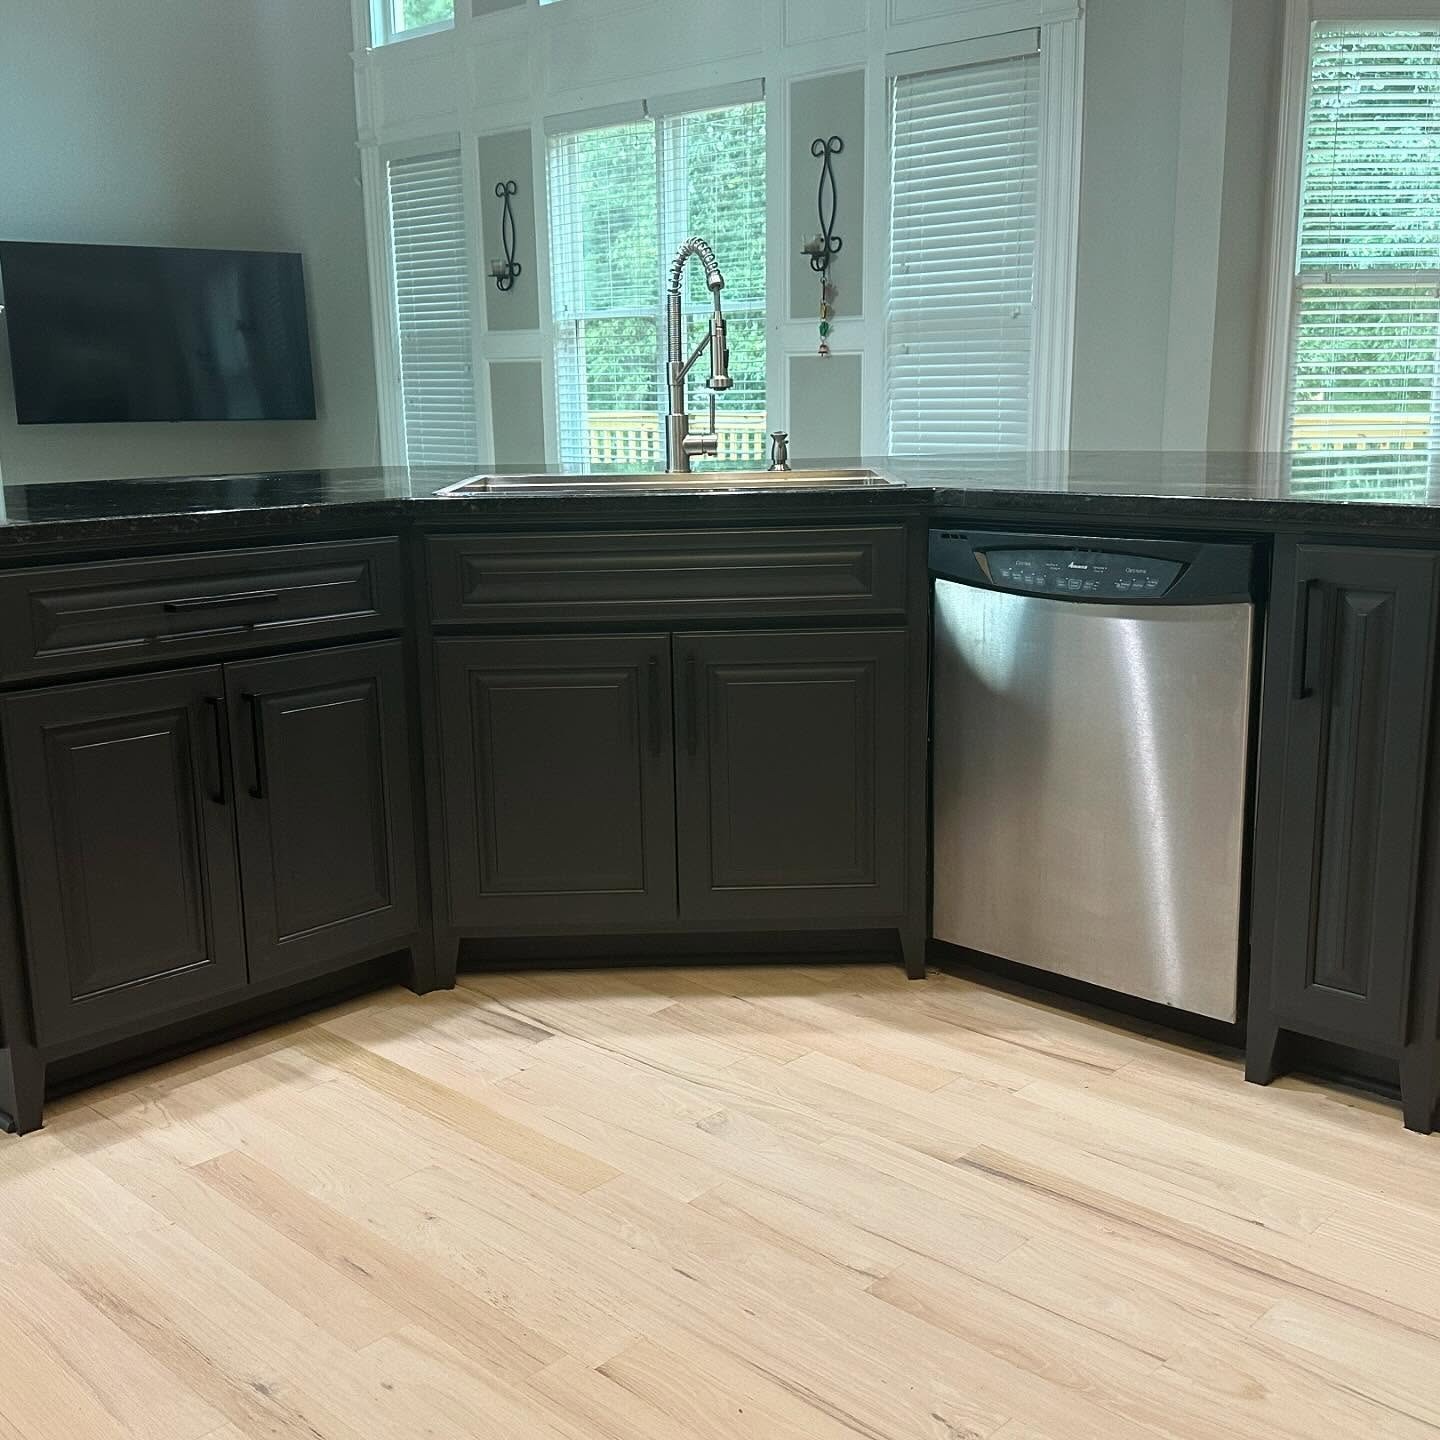
Side by side of the corner sink cabinets, deep cherry with small round knobs on the left and the same cabinets painted Tricorn Black with long black bar pulls on the right. Same stainless dishwasher in both, same wall mounted TV in the upper left, same bay window above the sink.
Cherry To Tricorn Black Sink Corner Comparison (Before And After) | Credit: @duartpainting
Cherry red lower cabinets wrapping a corner sink with a pull down faucet, black granite counter, stainless Amana dishwasher immediately to the right, a mug and keys on the counter, and bright daylight coming through the window behind the sink.
Cherry Kitchen Corner Sink (Before) | Credit: @duartpainting
The same corner now in Tricorn Black with a tall spring coil pull down faucet, long matte black bar pulls on every door, the original black granite still in place, and the tall bay window and wrought iron sconces behind the sink fully visible.
Tricorn Black Kitchen Corner Sink (After) | Credit: @duartpainting

This is where the whole project earns its payoff. The sink corner didn’t go Mega Greige with the rest. It went Tricorn Black.

If every cabinet in the house had been painted the same soft greige, the kitchen would still look nice. Polite. But flat. Like a slightly updated version of the same thing. The black is what gives the room a point of view. Your eye lands on it first, then relaxes across the greige. That is not an accident. That is the two-color plan.

The black does one more thing worth noticing. The cabinet fronts are busy, with raised panels and heavy bevels. In cherry, you see every curve. In Tricorn Black, those details disappear into one solid silhouette. The ornate 2004 fuss is still there under the paint. You just can’t see it anymore.

The pantry nook got the same love
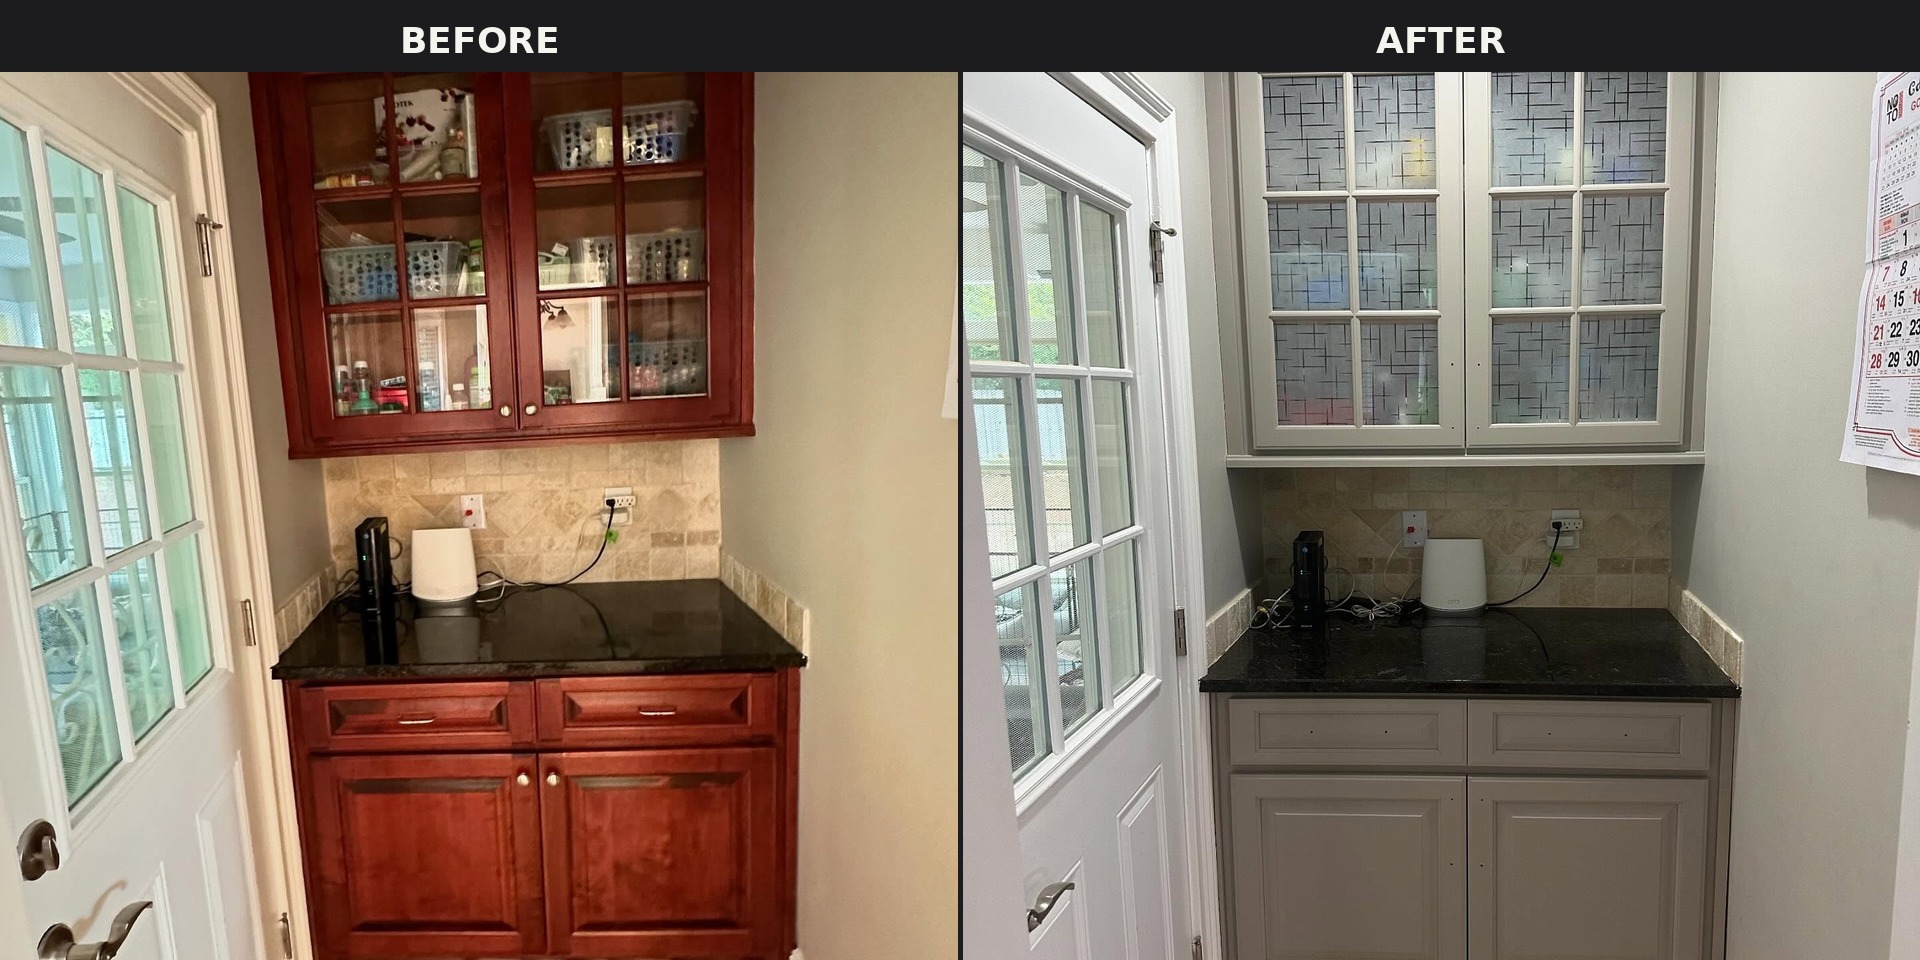
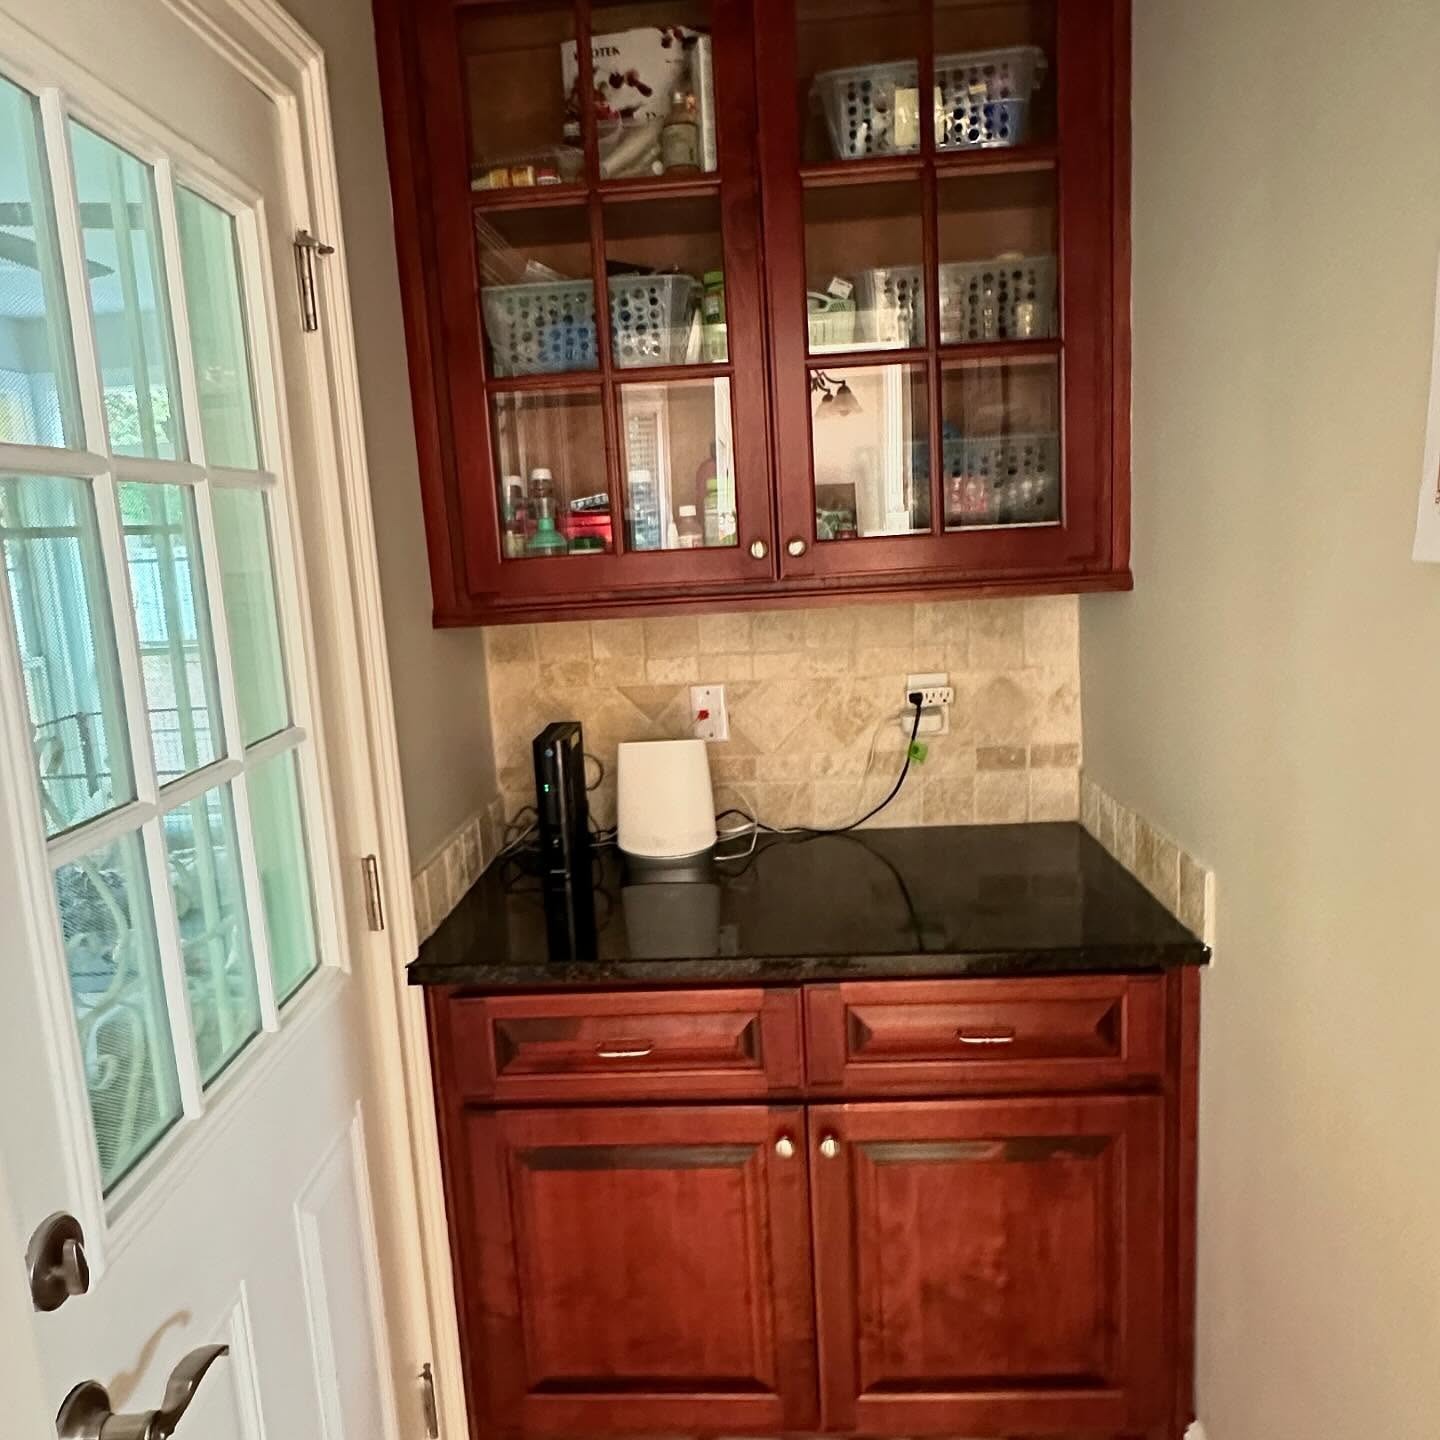
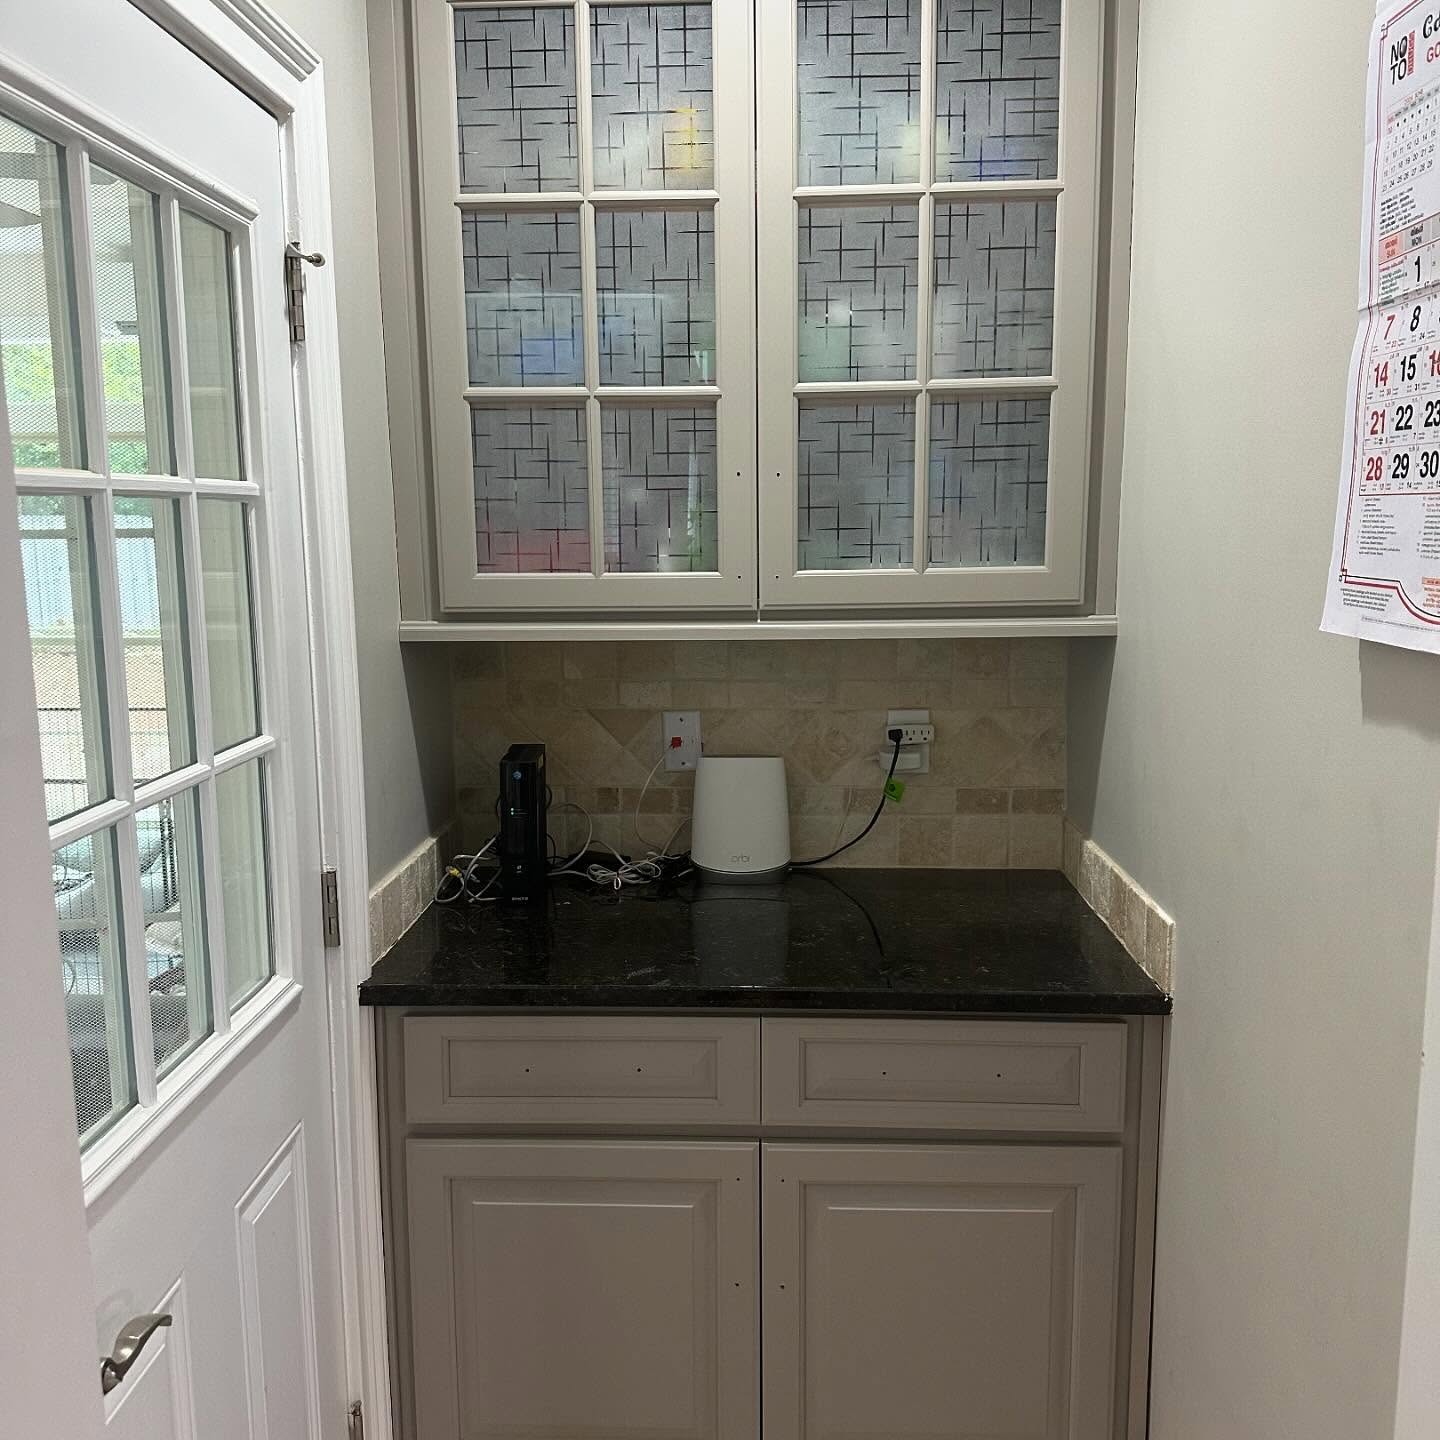
Side by side of a small pantry nook with a glass front upper cabinet, cherry wood with the plastic storage bins fully visible on the left and painted Mega Greige with frosted privacy film inside the glass panes on the right.
Cherry To Mega Greige Butler Pantry Comparison (Before And After) | Credit: @duartpainting
Small cherry cabinet nook next to a glass paned exterior door, with a six pane glass front upper cabinet full of clear plastic storage bins, and a black granite counter holding a modem, Orbi router, and tangled cables.
Cherry Kitchen Butler Pantry (Before) | Credit: @duartpainting
The same nook now in Mega Greige with frosted crosshatch privacy film applied to the inside of the glass panes so the bins no longer show through, and a wall calendar hung to the right of the cabinet.
Mega Greige Butler Pantry (After) | Credit: @duartpainting

The frosted film is the quietest move in the whole project. Ten bucks and an afternoon. It hides the plastic bins without taking the glass doors off, and it keeps your eye from skipping over the paint job to look at household supplies.

Why it stuck: one can of primer most people skip
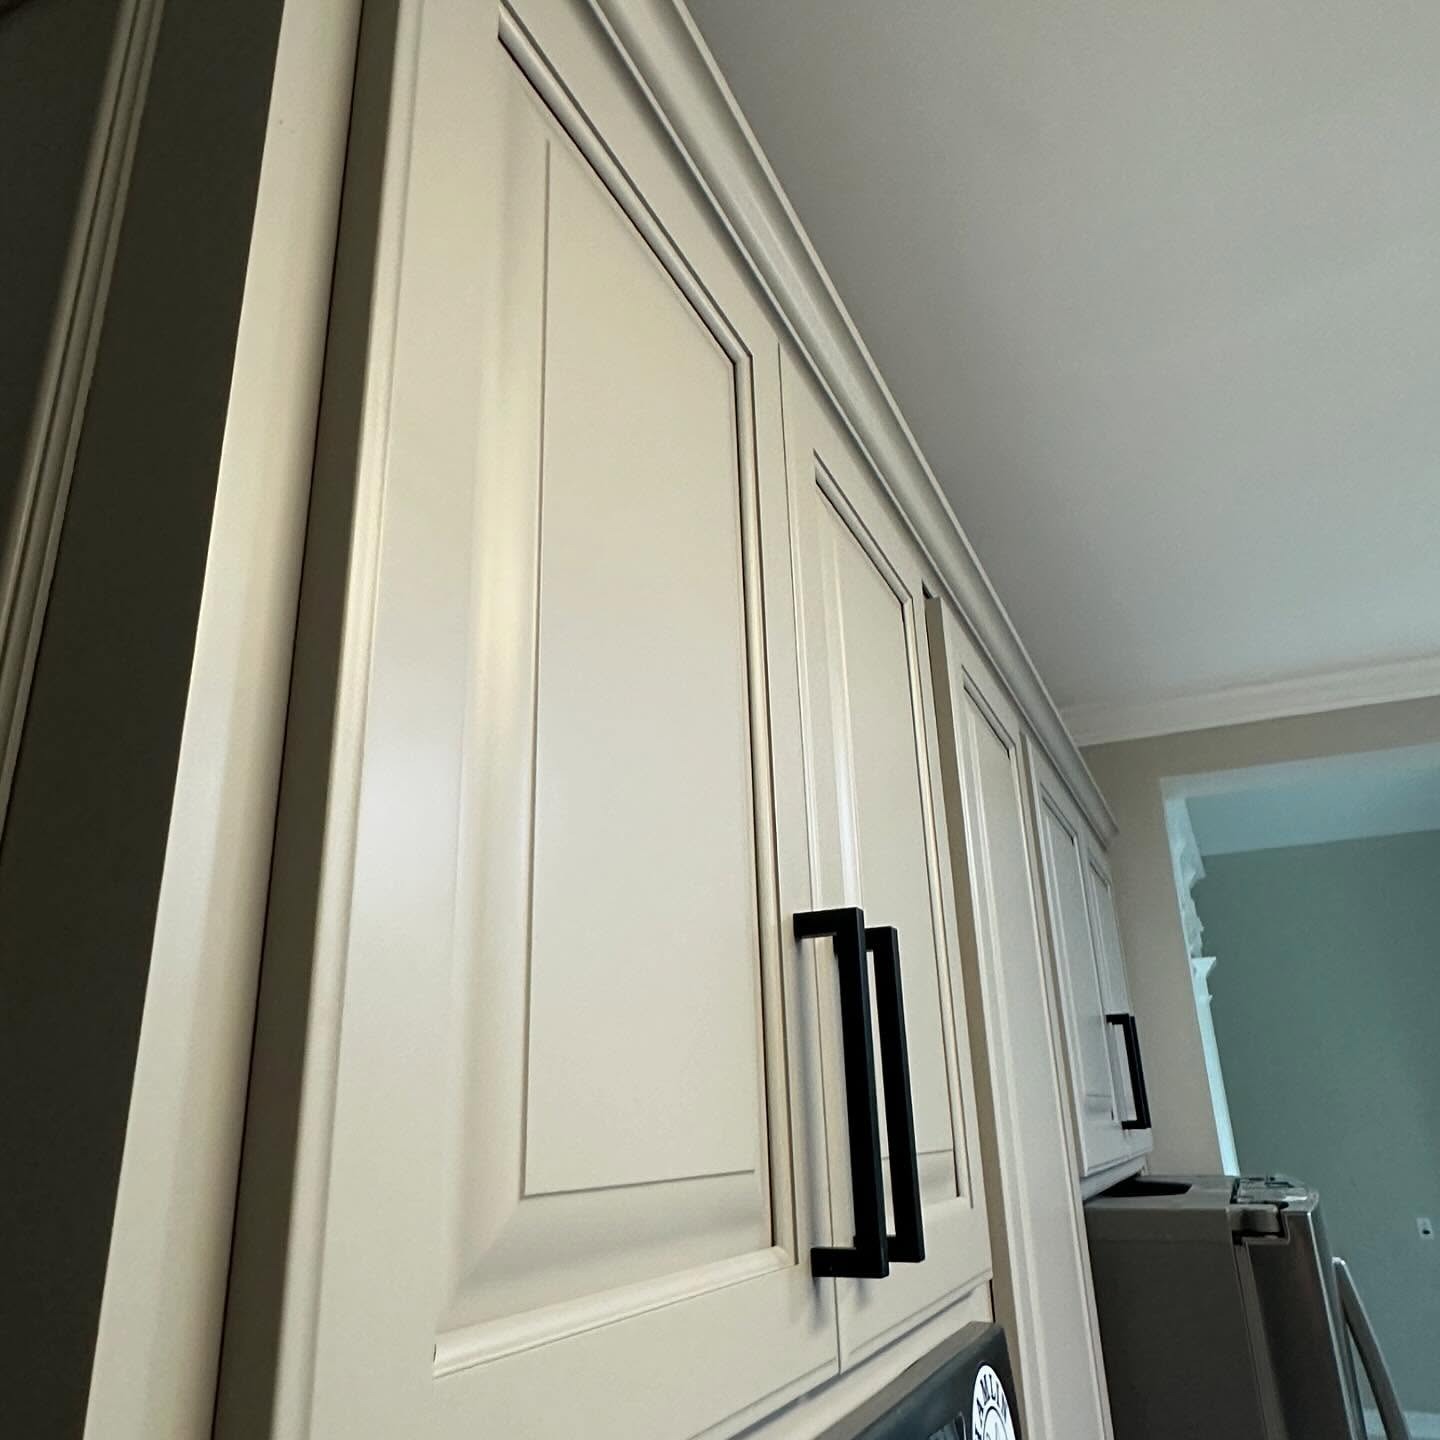
Close up of a Mega Greige raised panel cabinet door with crisp bevel edges and a long matte black bar pull, with a smooth sprayed finish and no visible brush marks.
Mega Greige Cabinet Door With Black Bar Pull (Detail) | Credit: @duartpainting

Here is the one real secret, and it is not glamorous. The factory topcoat on cherry cabinets is slick on purpose. It is engineered to repel water and food. It also happens to repel paint. That is why nearly every DIY white-paint-over-cherry story ends the same way: peeling at the edges, pink bleed through the surface, do-over.

The pros skipped the hardware-store primer and used a lacquer bonding primer instead. It bites into that slick finish, locks the red tannins in so they can’t bleed through, and gives the topcoat something to grab. Everything after that is just a steady hand.

Three days. One primer. Two colors. New pulls. A kitchen you were told to tear out, saved.

Would you paint yours, or still rip it out?