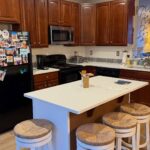
Two years ago, a designer walked into this house and saw what most of us would. Dark honey oak everywhere. Those tall, curved cabinet doors every design account tells you to rip out. Speckled brown counters. A chocolate brown wall color pulling the whole room down.
Here’s the surprise. She didn’t call a cabinet company. She didn’t touch a single arched door.
She painted them. And the finished kitchen looks like it was built this way on purpose.
Where she started
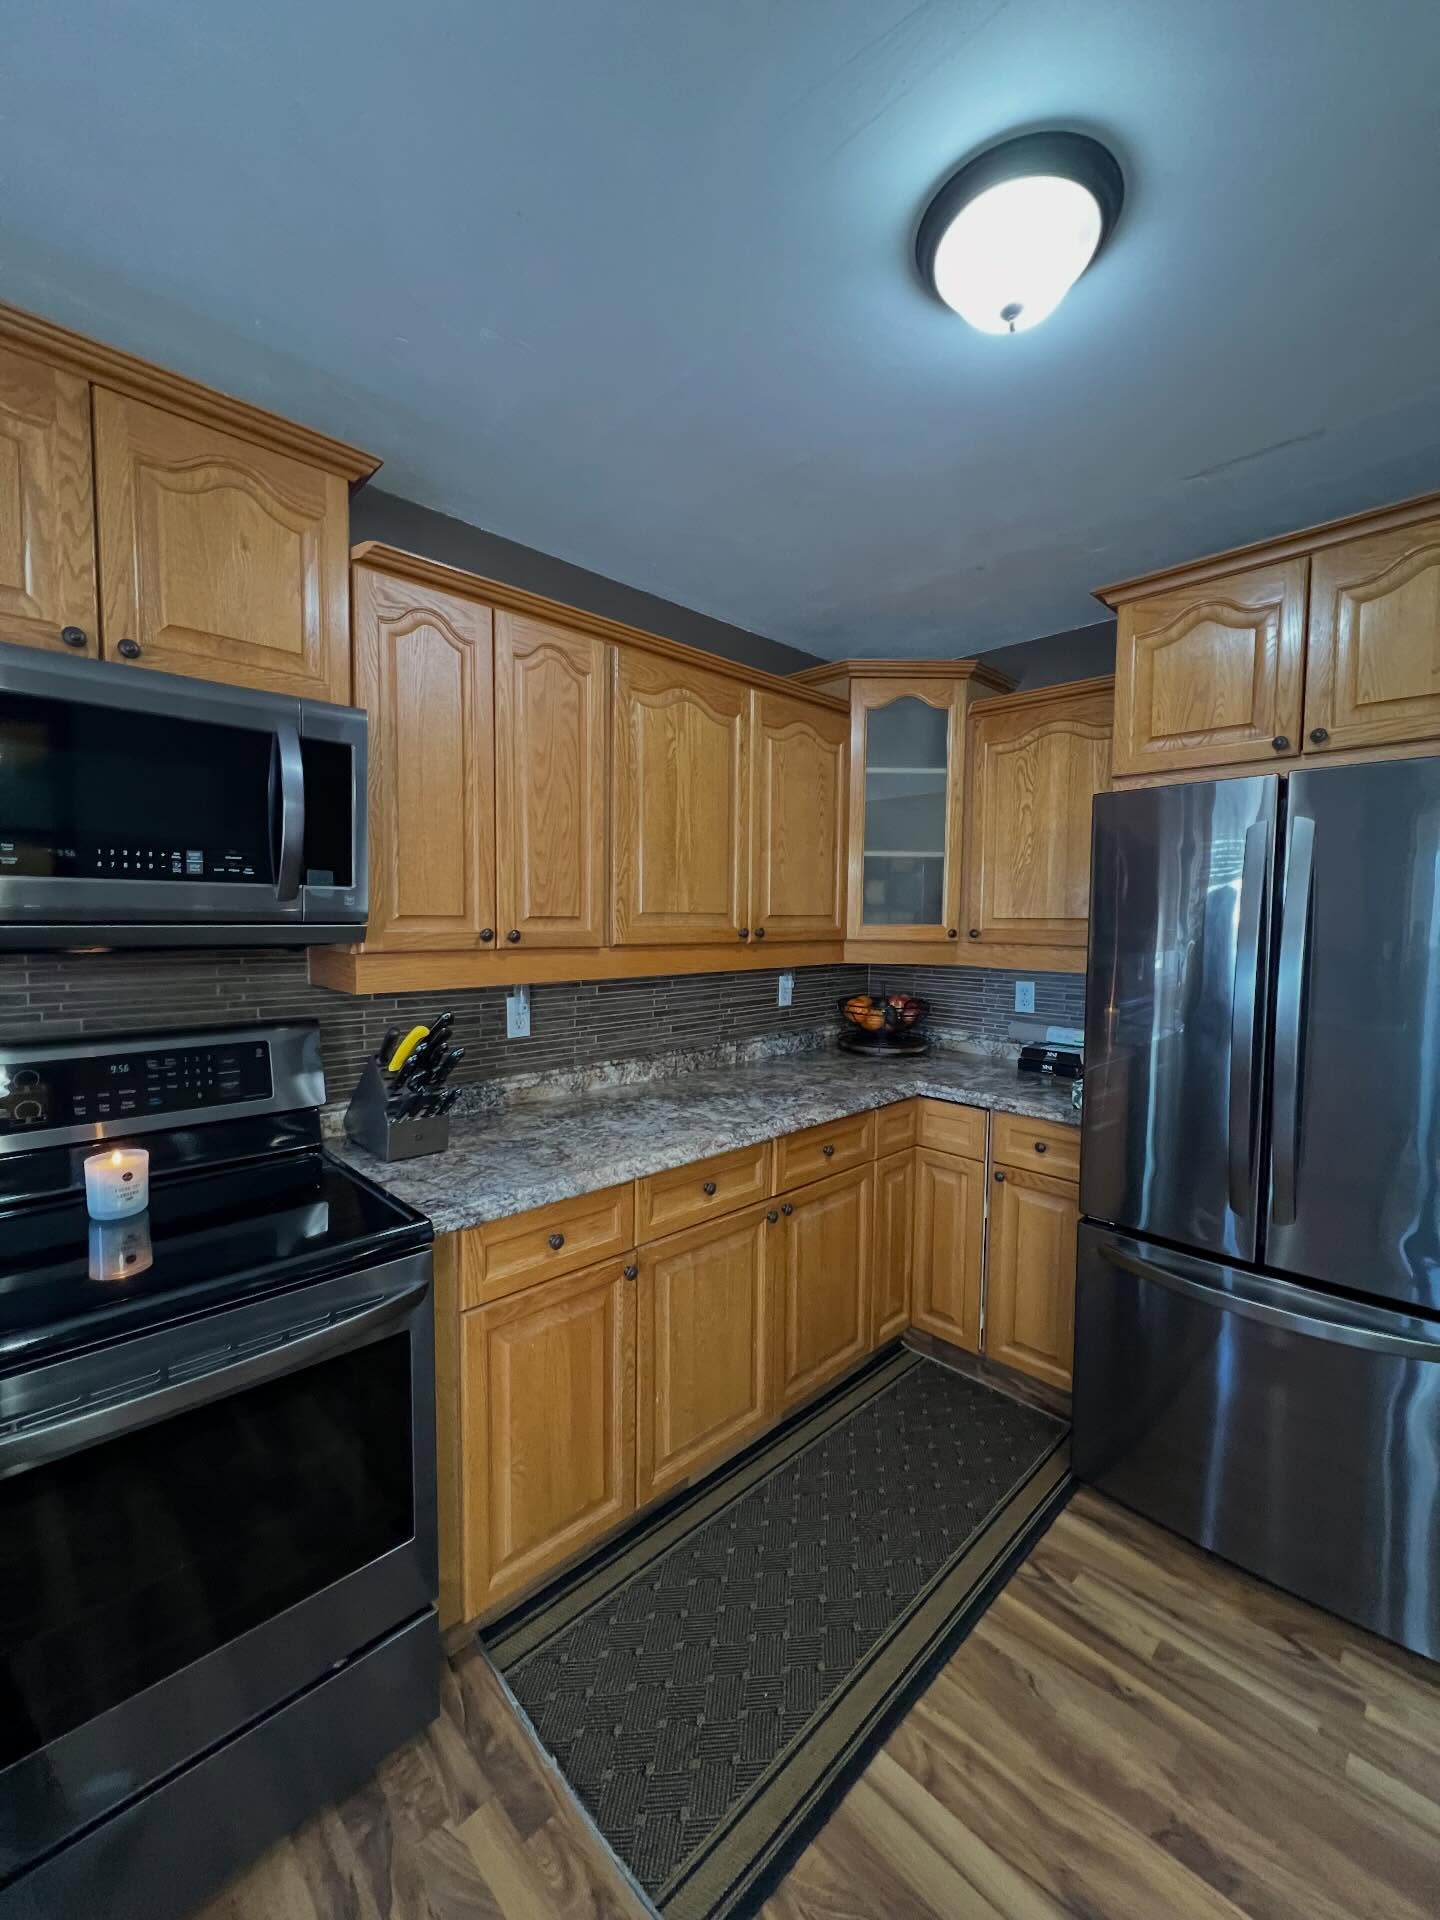
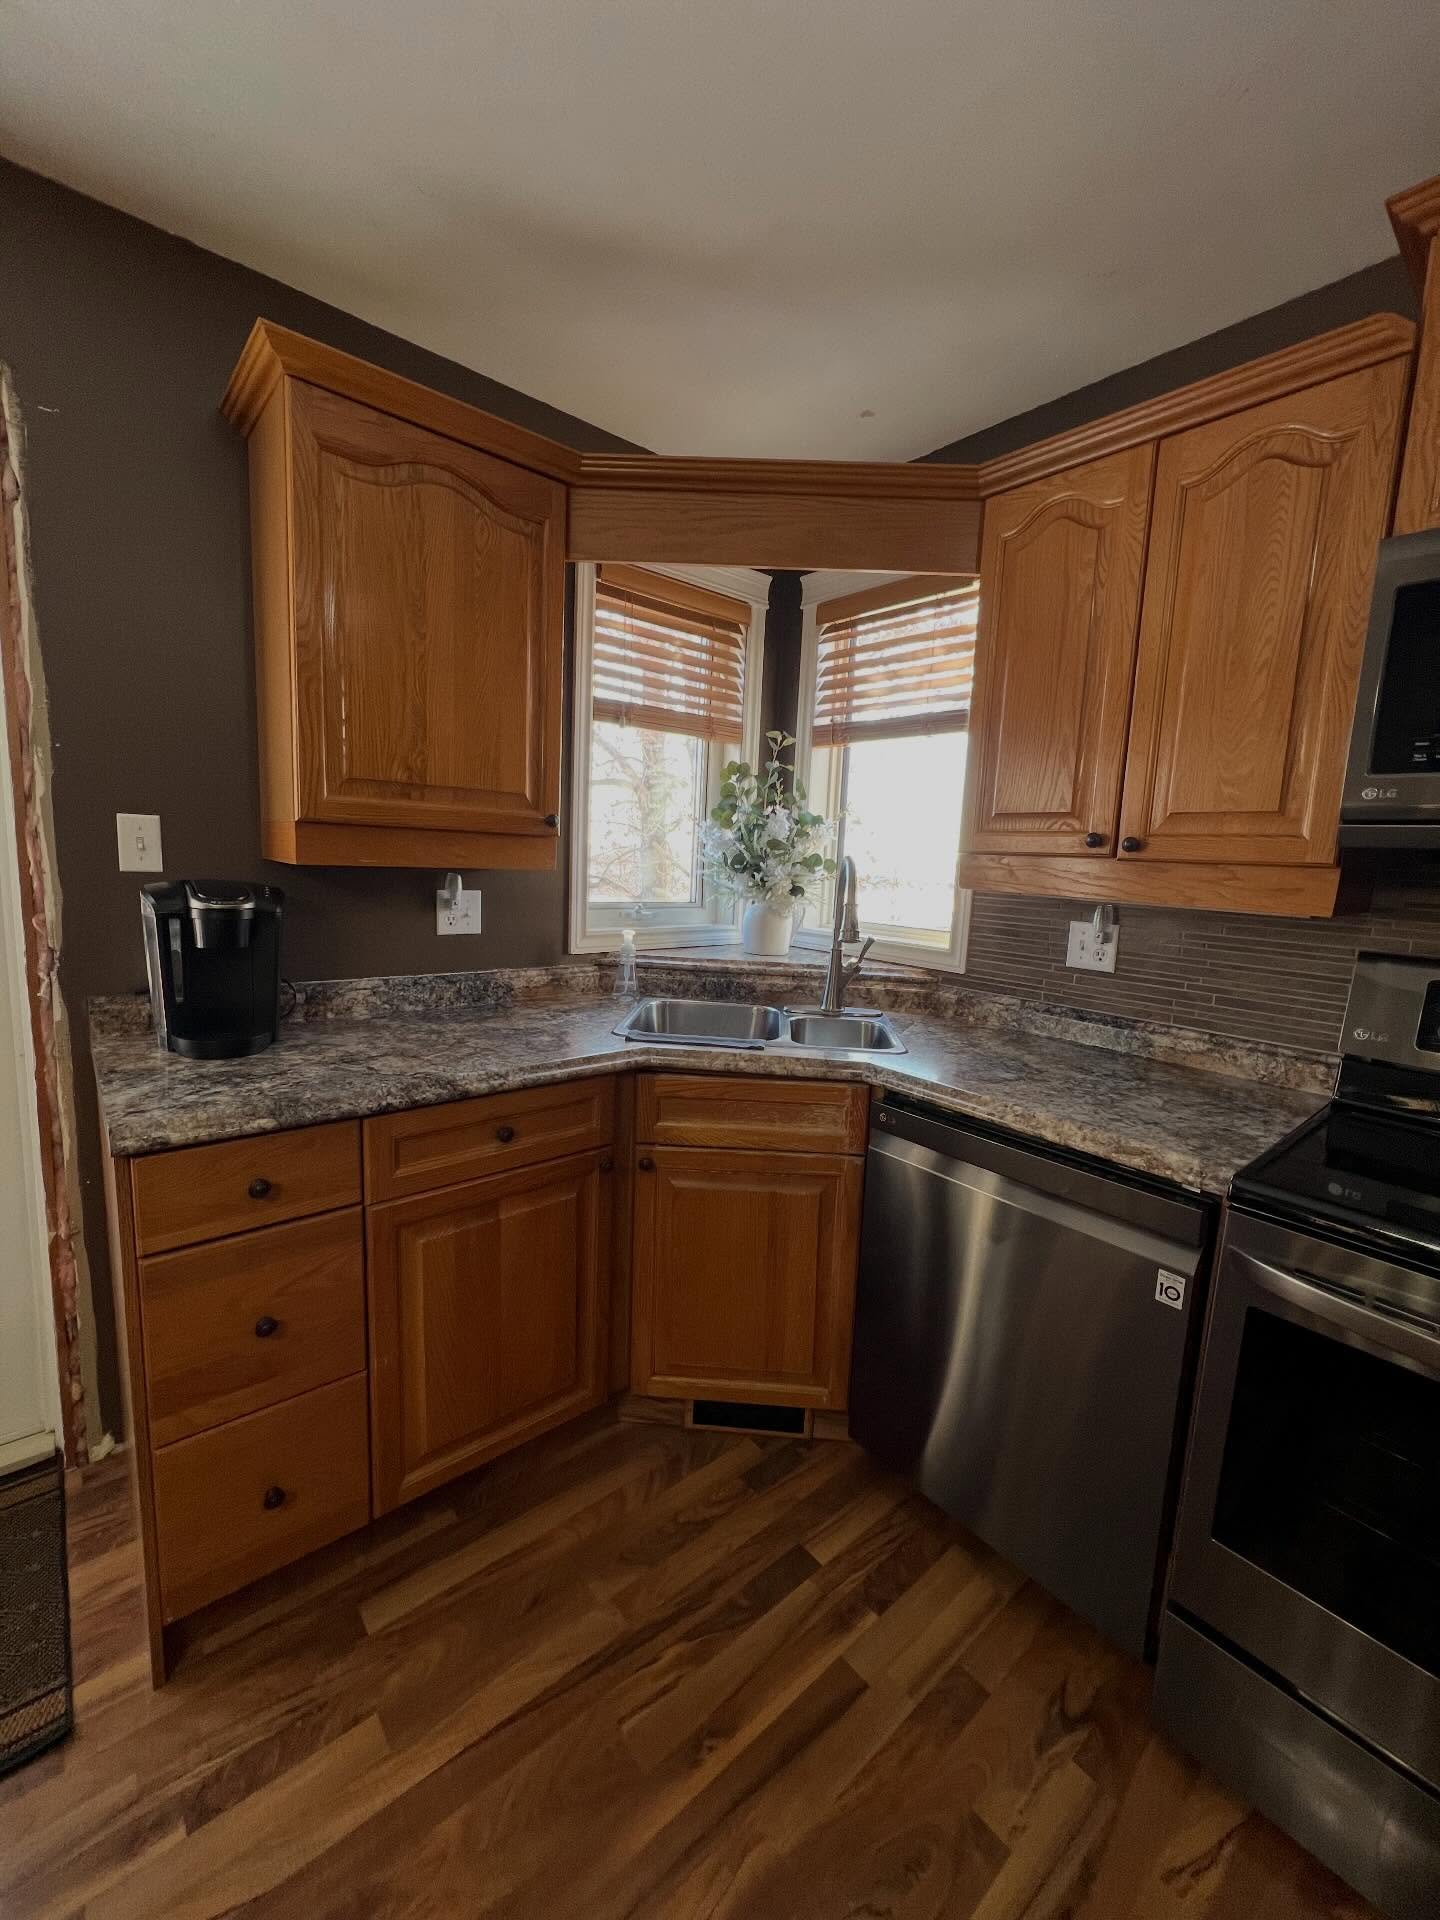
Picture it the way she first saw it. The cabinets were the loudest thing in the room, and not in a fun way. Dark honey oak with that heavy orange-red tone so many of us lived with in the late 90s. Cathedral arches on every upper. Tiny bronze knobs that disappeared into the grain.
The counters were speckled brown laminate. The backsplash was a thin dark mosaic. The walls were chocolate brown. One room, three different browns, all fighting.
The walnut floor stayed. So did the layout, the sink spot, the window bay, and every cabinet she already owned.
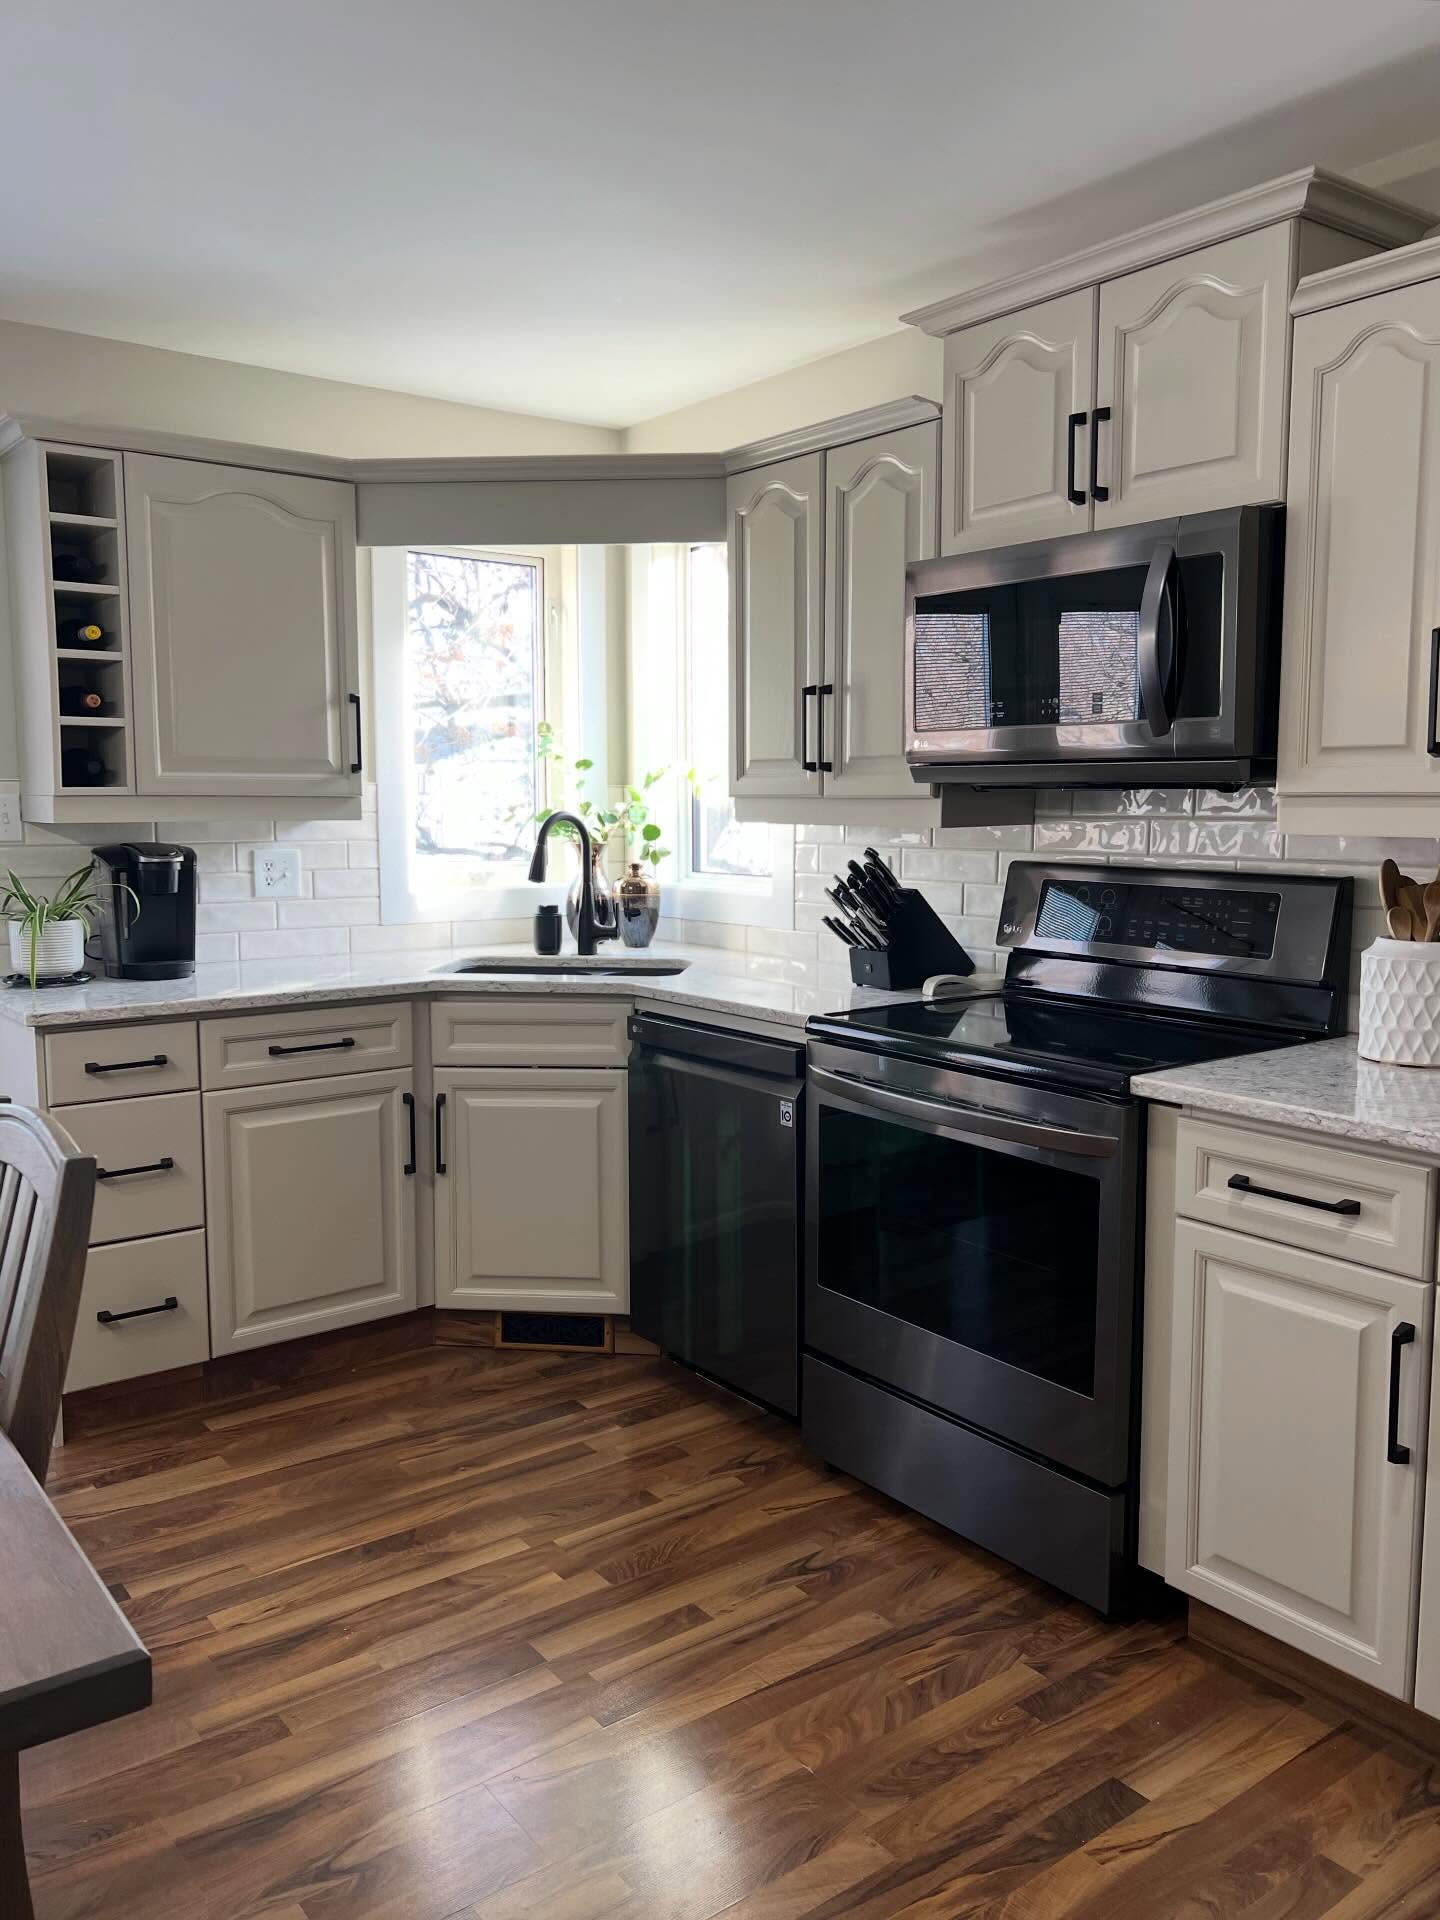
What design advice gets wrong about honey oak
Type “honey oak kitchen” into any search bar. The verdict is always the same. Rip them out. The arches cannot be saved. Replace or live with it.
A full cabinet replacement for a kitchen this size runs $15,000 to $40,000. For most people, that’s a brick wall. So the kitchen sits there, year after year, and a small knot of embarrassment forms every time a glossy reno video rolls by.
Her kitchen is a quiet argument against all of that. The cabinets were never the real problem. The finish, the wall color, the hardware, and the lighting were. Every one of those is pocket change next to a tear-out.
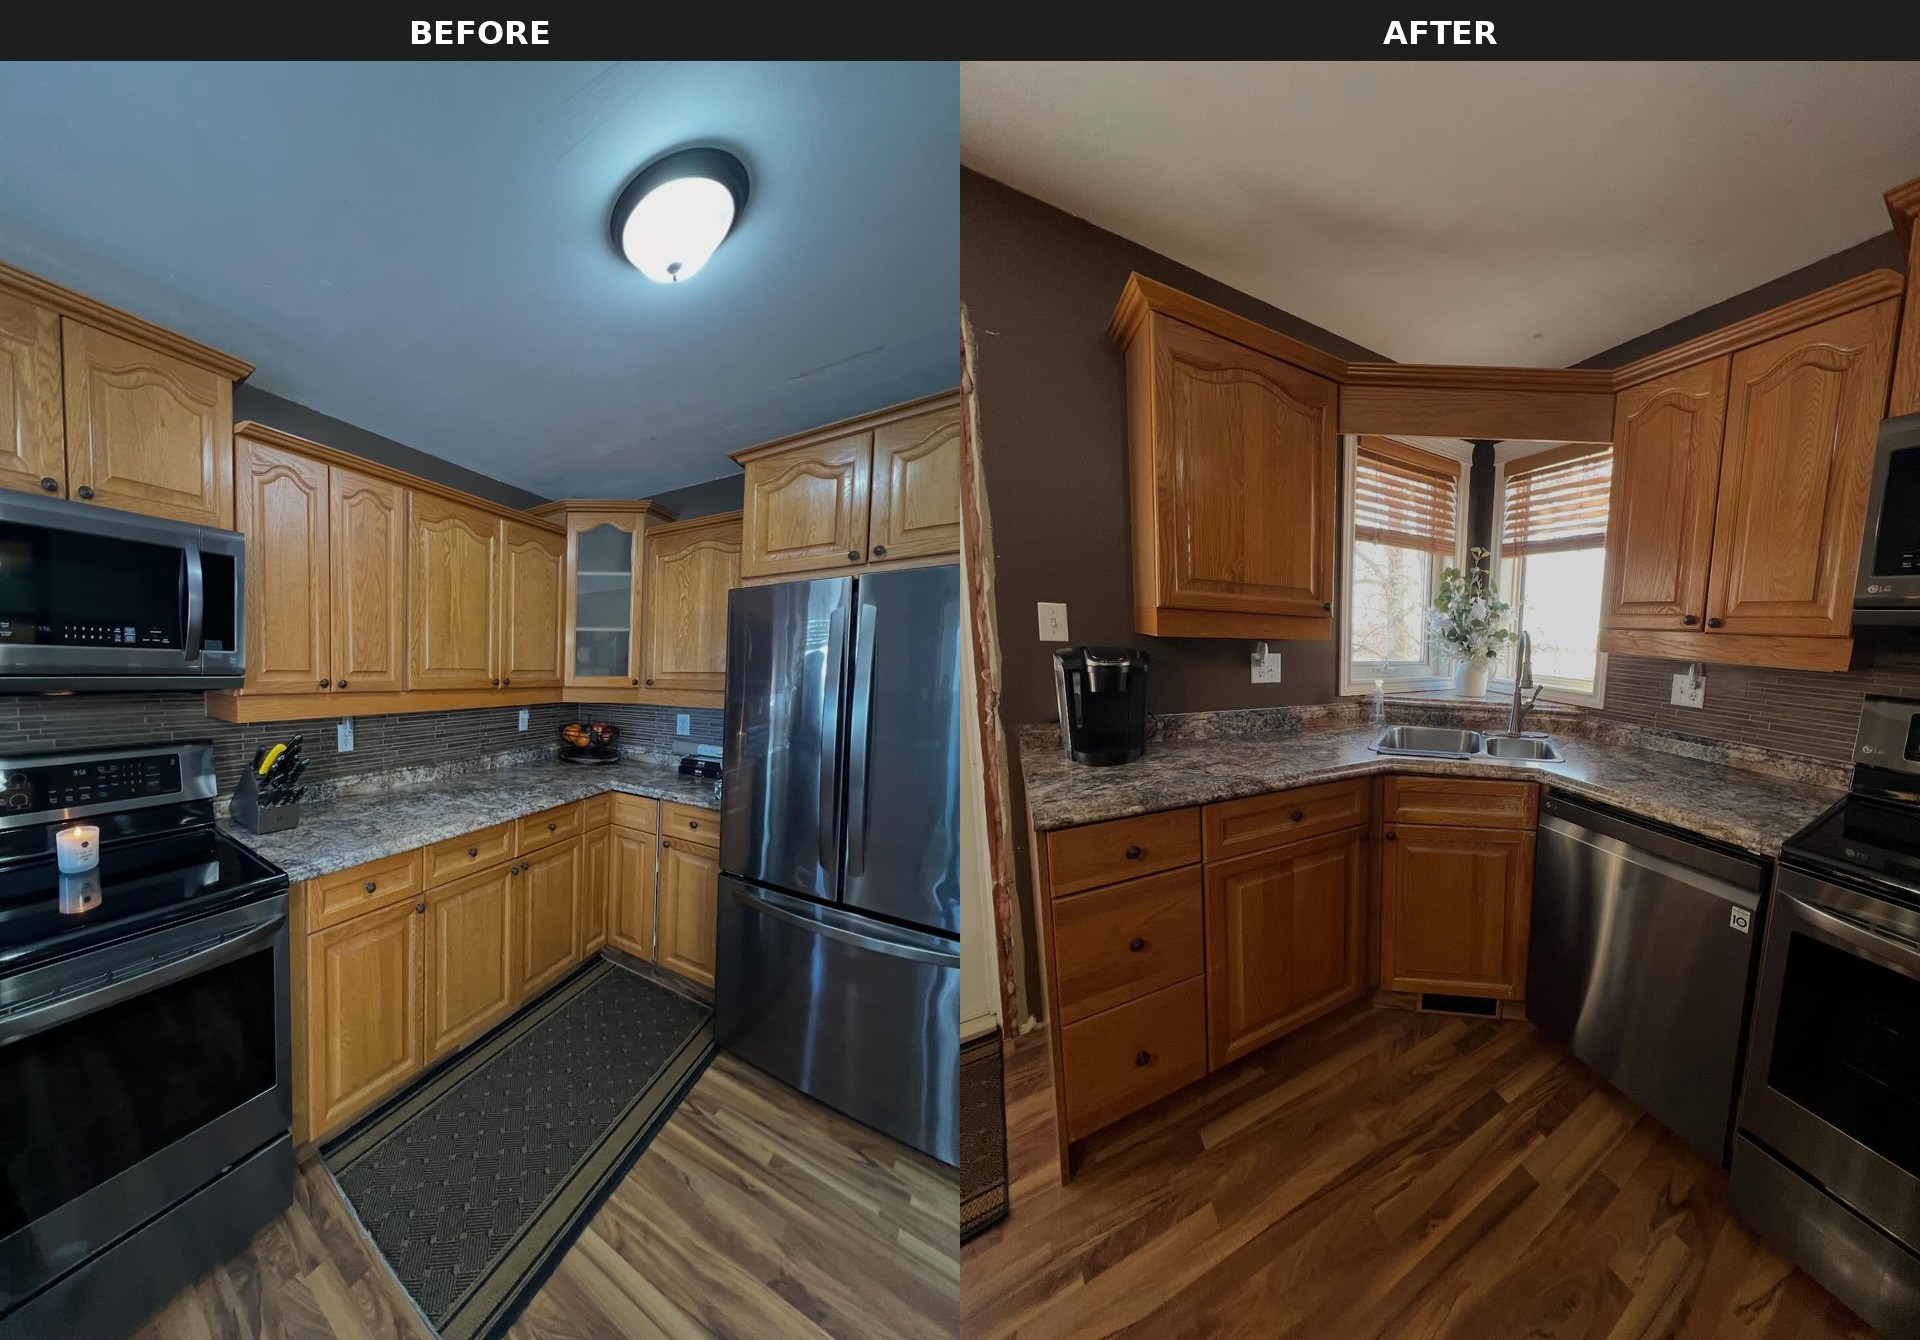
The paint color that did the heavy lifting
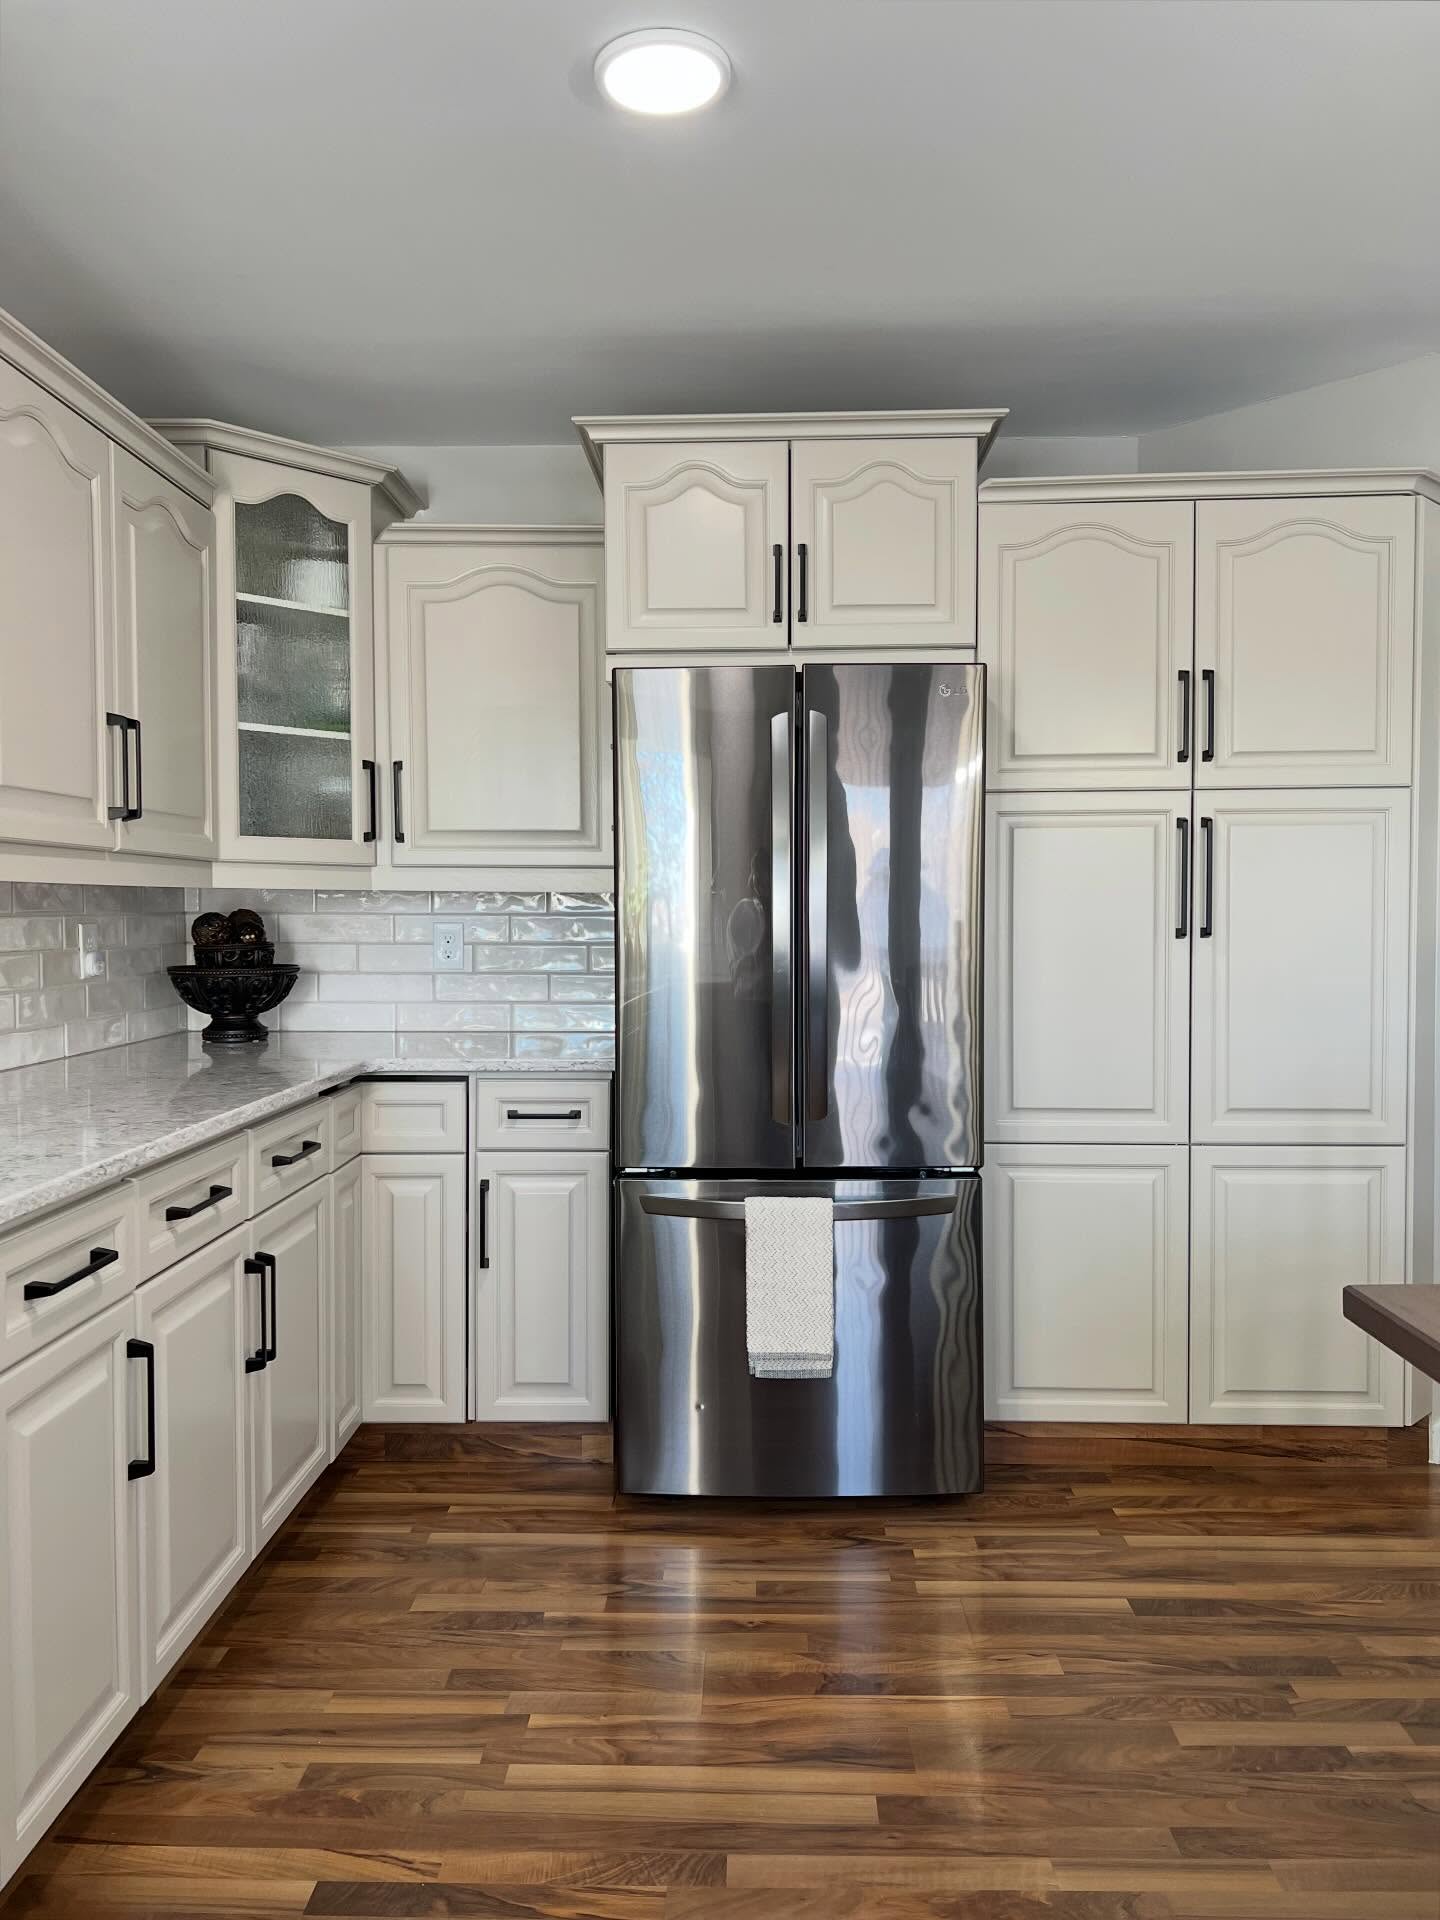
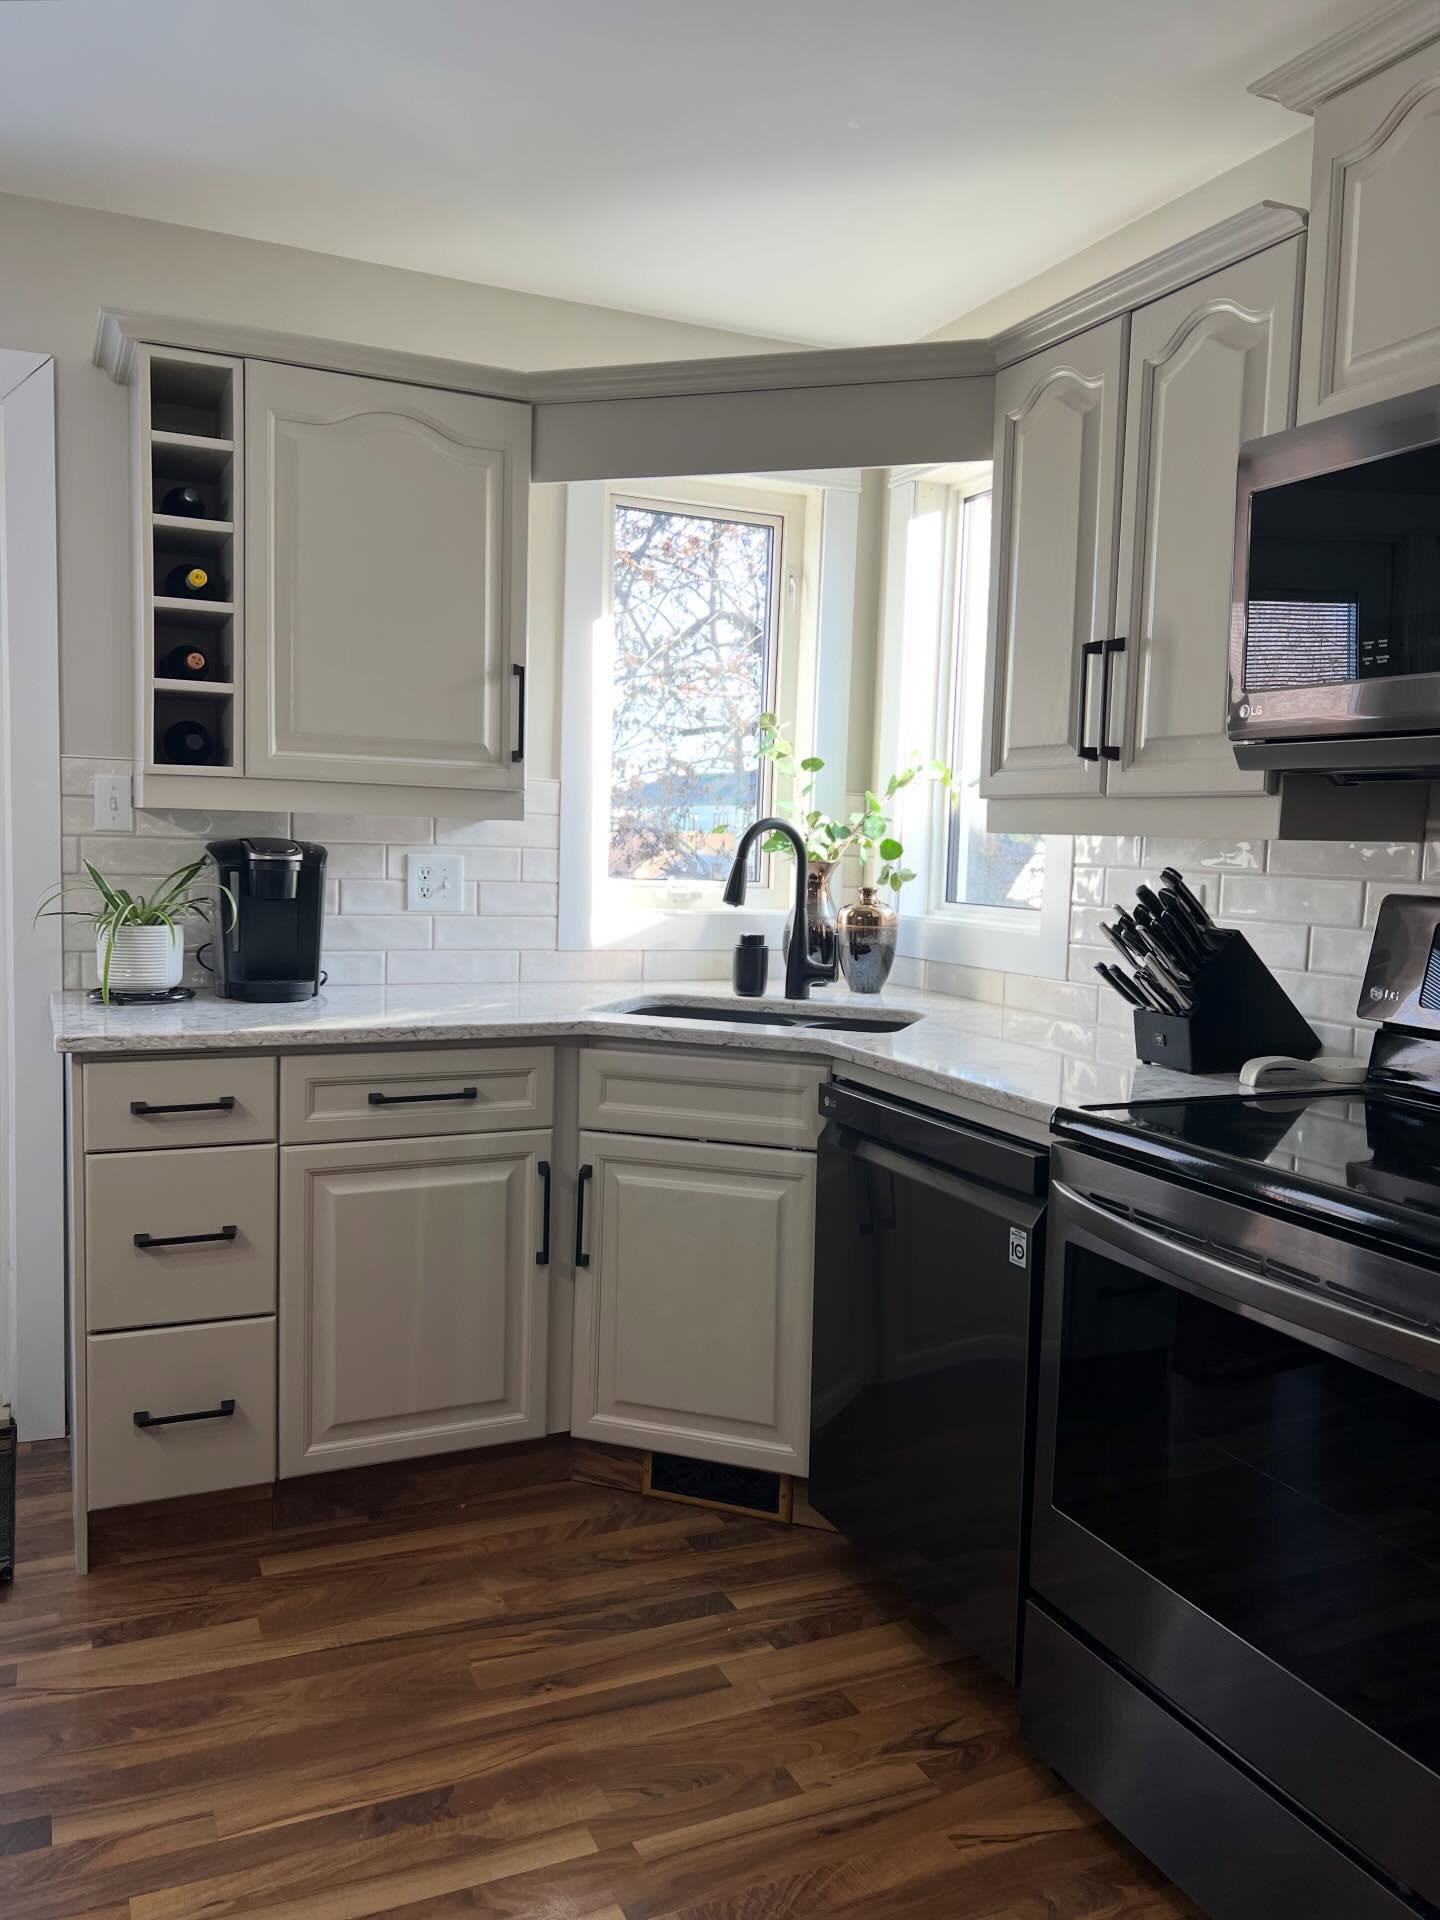
She chose Benjamin Moore Revere Pewter (HC-172). It’s a warm greige that leans just enough beige to stay friendly with the walnut floors. In morning light it reads soft. By evening it reads cozy. It never slides into cold.
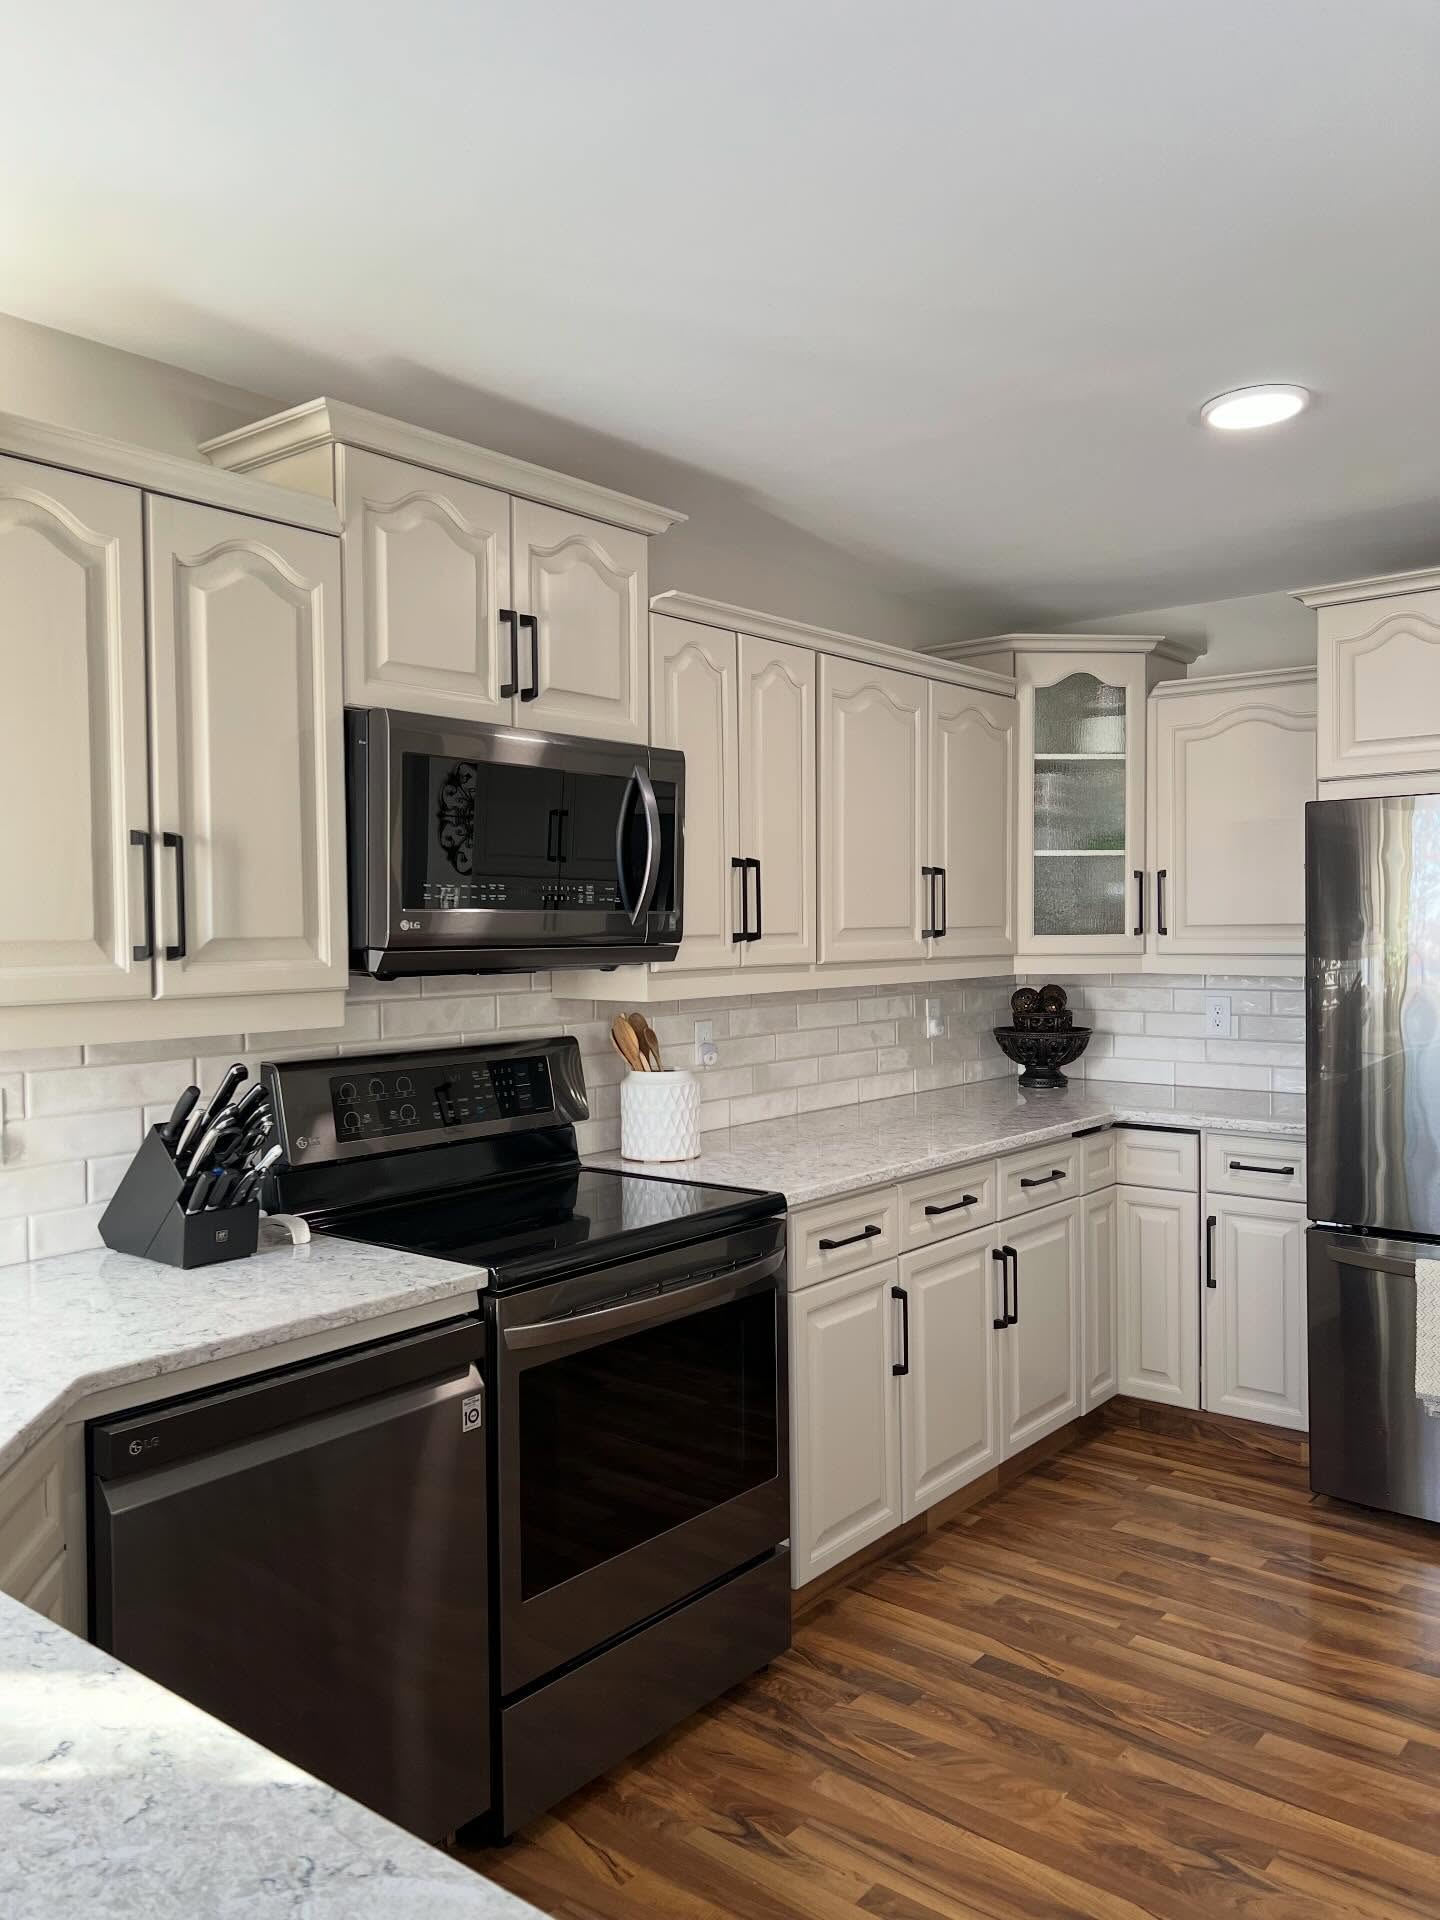
Look closely at the arched tops. Same doors. Same hinges. Same cathedral shape every teardown article says is beyond saving. Painted in Revere Pewter with a long bar pull across the panel, that old curve stops reading as dated and starts reading as a feature.
The small swap that changes the whole door
The old hardware was tiny round knobs sitting in the middle of each door, leaving the arched top floating alone above. Your eye had nothing to grab.
The new pulls are long, matte black, and horizontal. That one straight line cuts across the curve of the cathedral top and resets the shape of the door. Suddenly your eye runs along the pull instead of climbing to the arch.
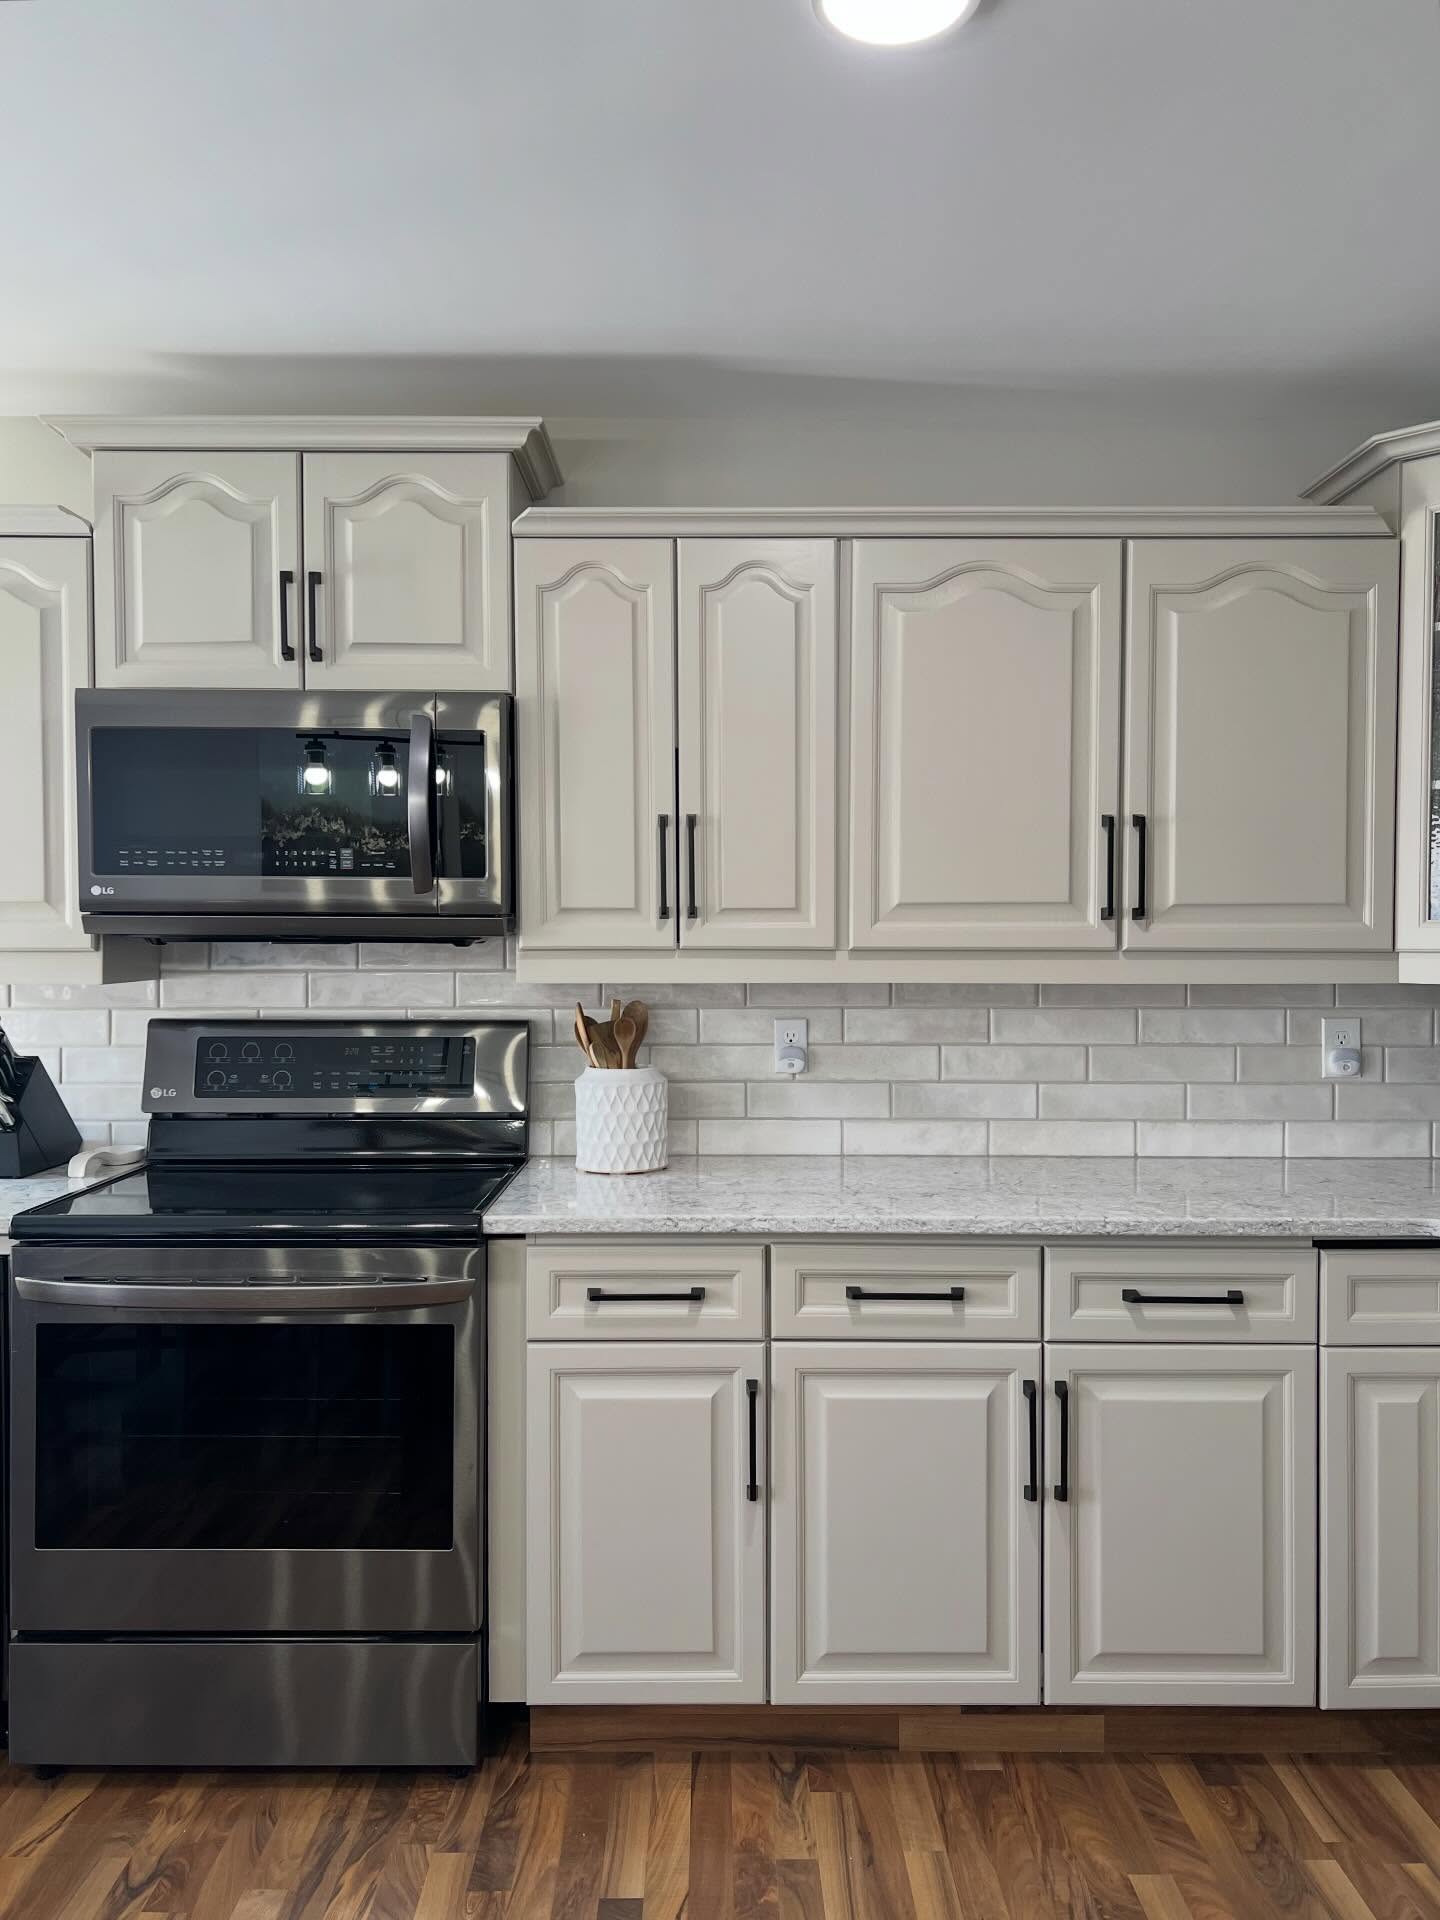
Counters and backsplash: calmer, softer, lighter
The laminate came out. In its place is a cream quartz with soft gray veining. It picks up the gray hiding inside the Revere Pewter and keeps your eye moving instead of parking it on the counter.
The dark mosaic backsplash came out too. The new tile is a hand-glazed off-white brick with a slightly wavy finish. It catches daylight instead of swallowing it, especially around the sink corner where the window pours light in all afternoon.
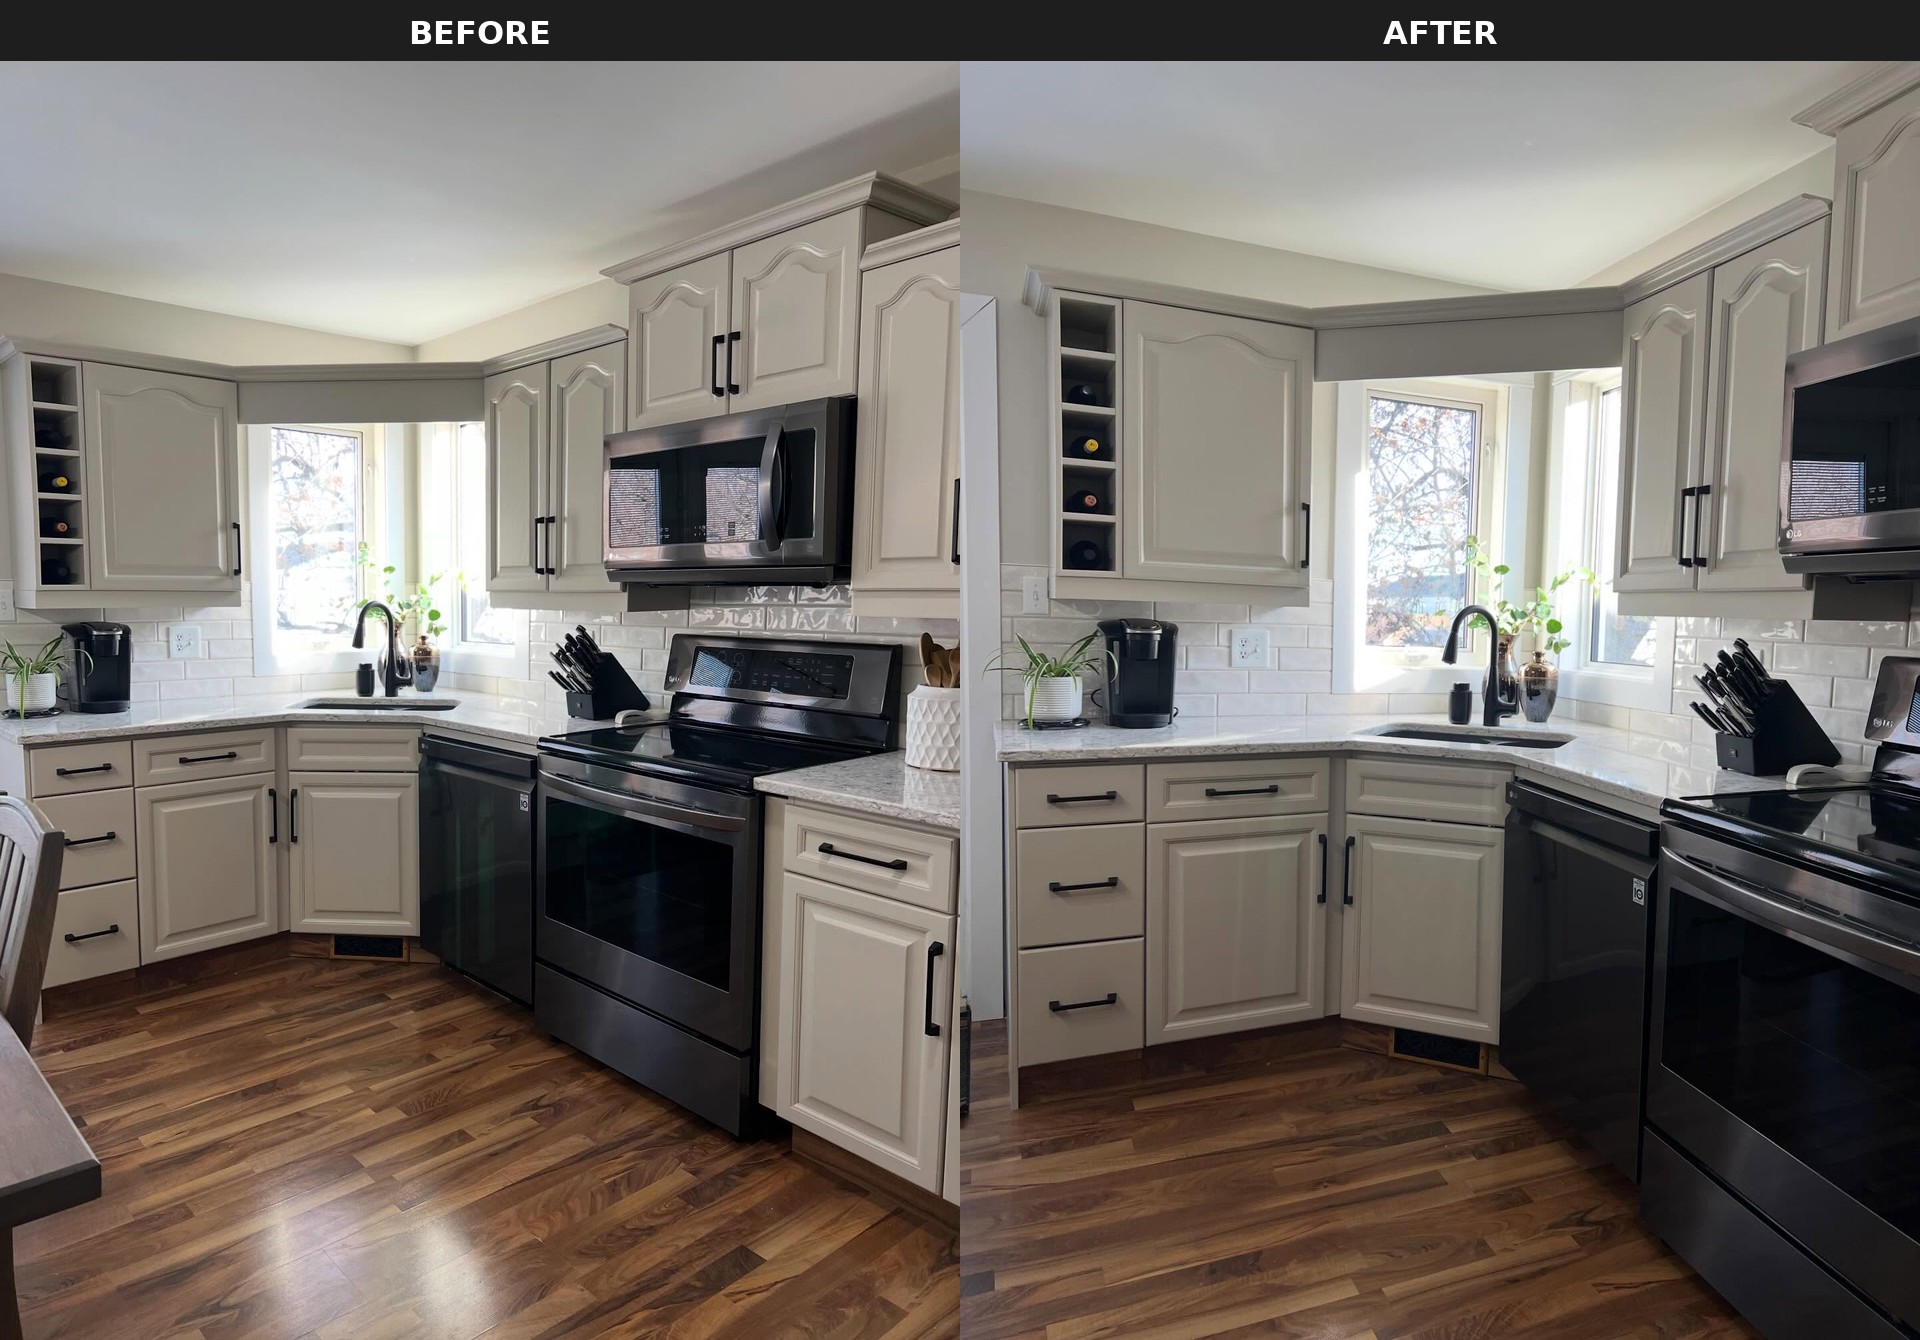
Lighting and wall color opened the ceiling
The old fixture was a dome with a dark trim band. It threw a yellow spotlight straight down and left the ceiling above it in shadow, which is a sneaky reason the whole room used to feel shorter.
The new lights are flat flush-mount LED discs. Clean white, even spread, no dark ring. The ceiling now reads actually white. The wall color above the backsplash is a soft warm neutral that lets the paint on the cabinets be the star.
The two-year timeline is the honest part
This is what makes it feel reachable instead of fantasy. She did not pull the trigger in one weekend. She spread it across two years, and the order she chose is worth copying.
Counters first. Then the backsplash. Then the ceiling lights. Then the wall color. The cabinet paint, the step every design account tells you to do first, was the very last step.
Each earlier change had to hold up against the honey oak still sitting in the room. Only once every other surface was already soft and current did the paint go on. The paint is what pulled the whole room together.
Everything she didn’t touch
Before you tell yourself your own kitchen needs a tear-out, read this list. Cabinet boxes, every door including the arched ones, every hinge, the floor, the layout, the sink spot, the window bay, the appliance footprint. All of it stayed.
That’s almost the entire structural kitchen. Only the surfaces changed. The whole room now reads brand new.
Steal her plan
Four moves, in her order. A cream quartz counter with soft gray veining. A hand-glazed off-white brick backsplash. Flush-mount LED ceiling discs. Then paint the cabinets Revere Pewter and swap every knob for a long matte black bar pull.
Leave the arched doors alone. They were never the problem.
What stopped you longest, the cost or the voice telling you the cabinets had to go?