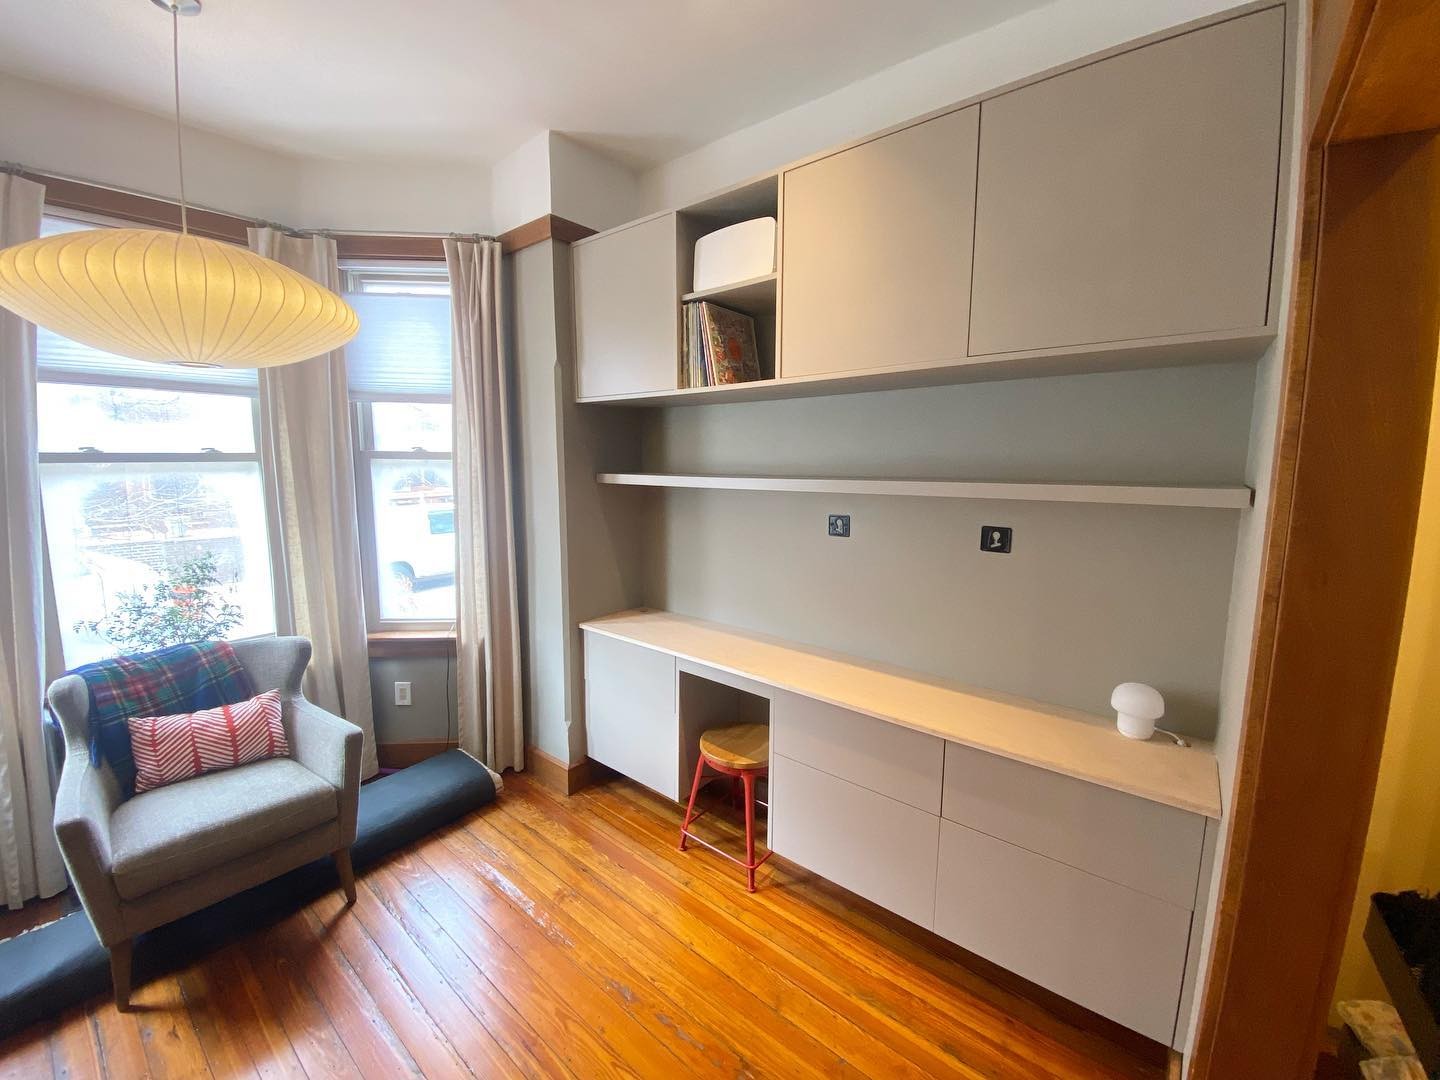
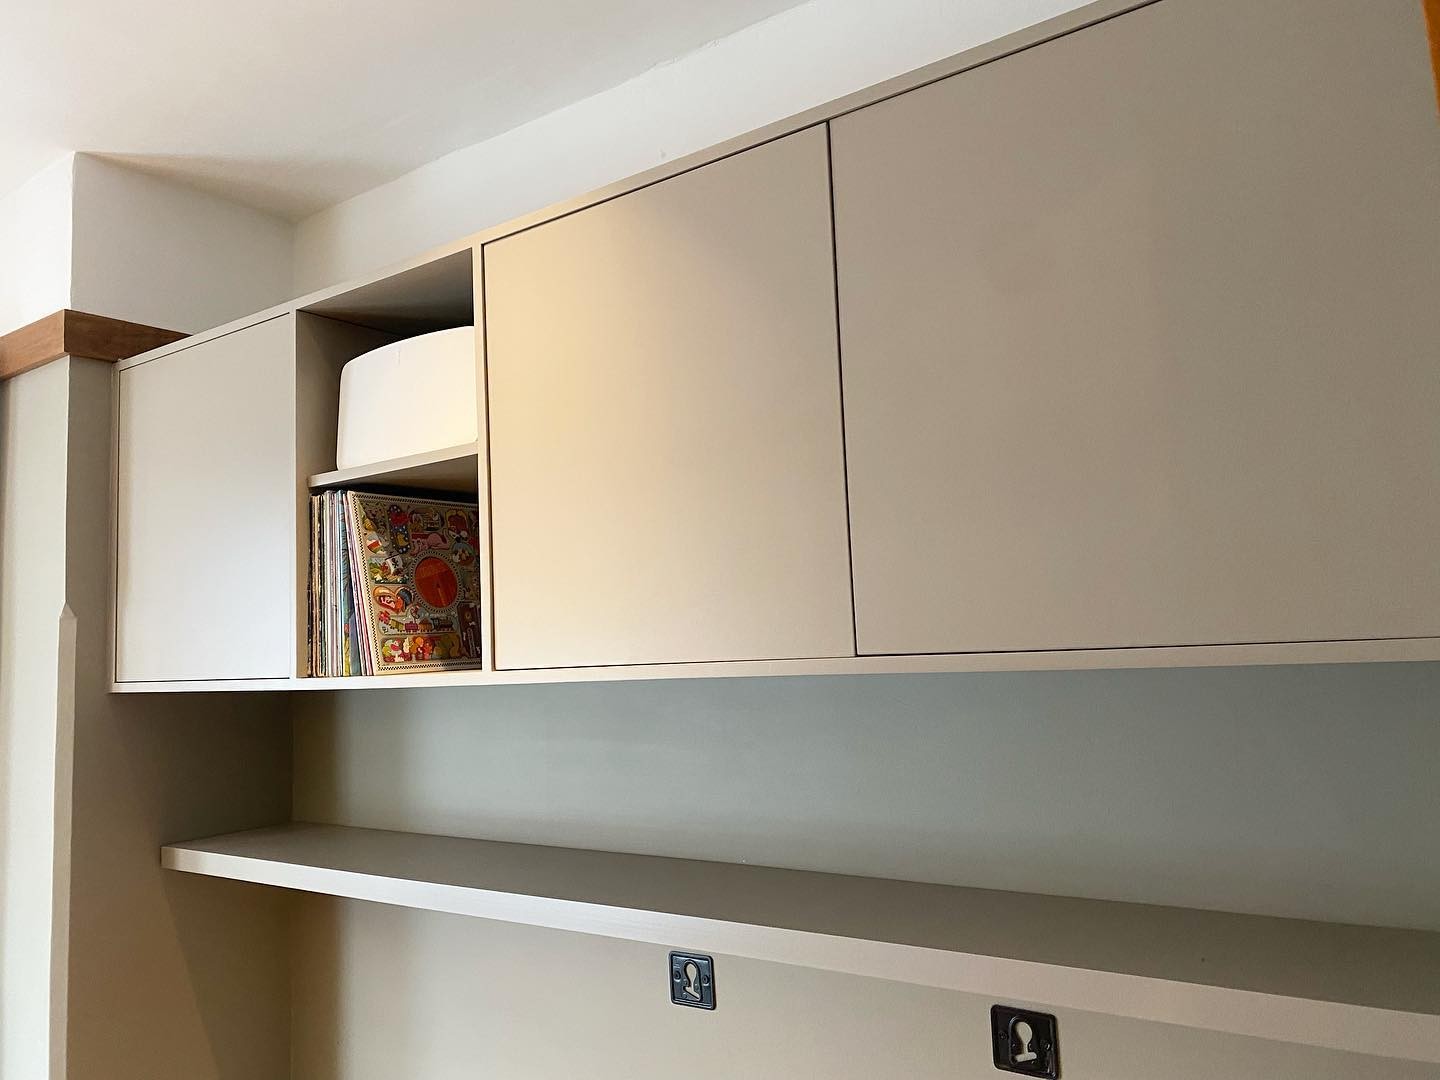
If you scrolled to the finished photo first, your brain probably filled in the story for you. Custom millwork. A real cabinetmaker. Three weeks of install. Somewhere north of fifteen grand.
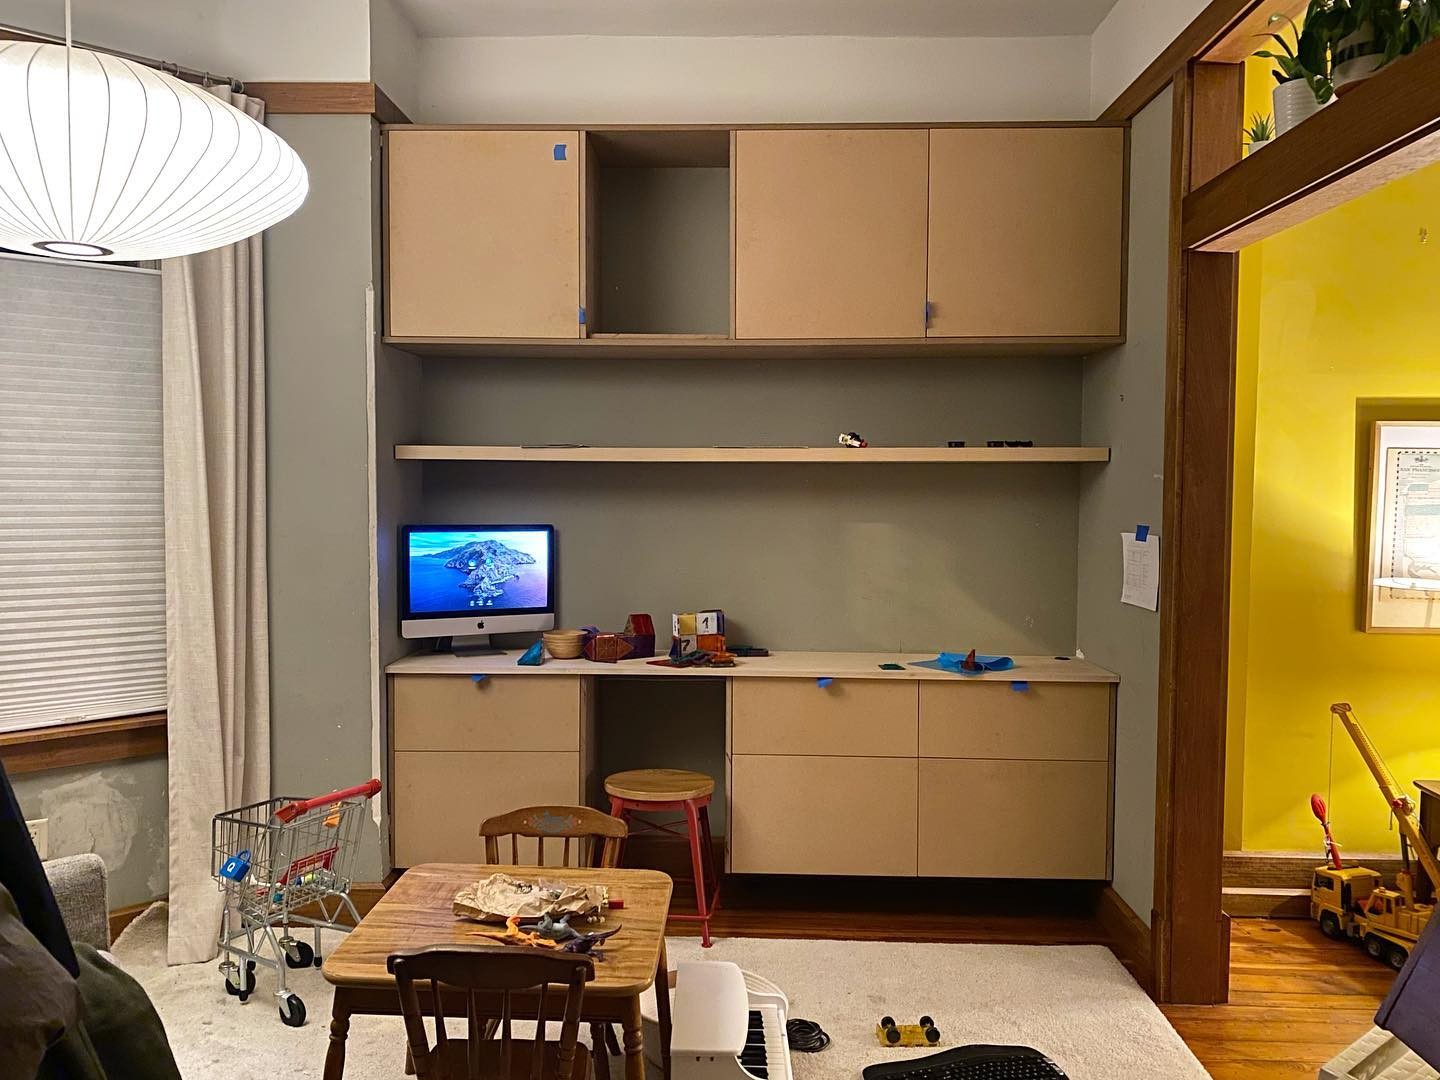
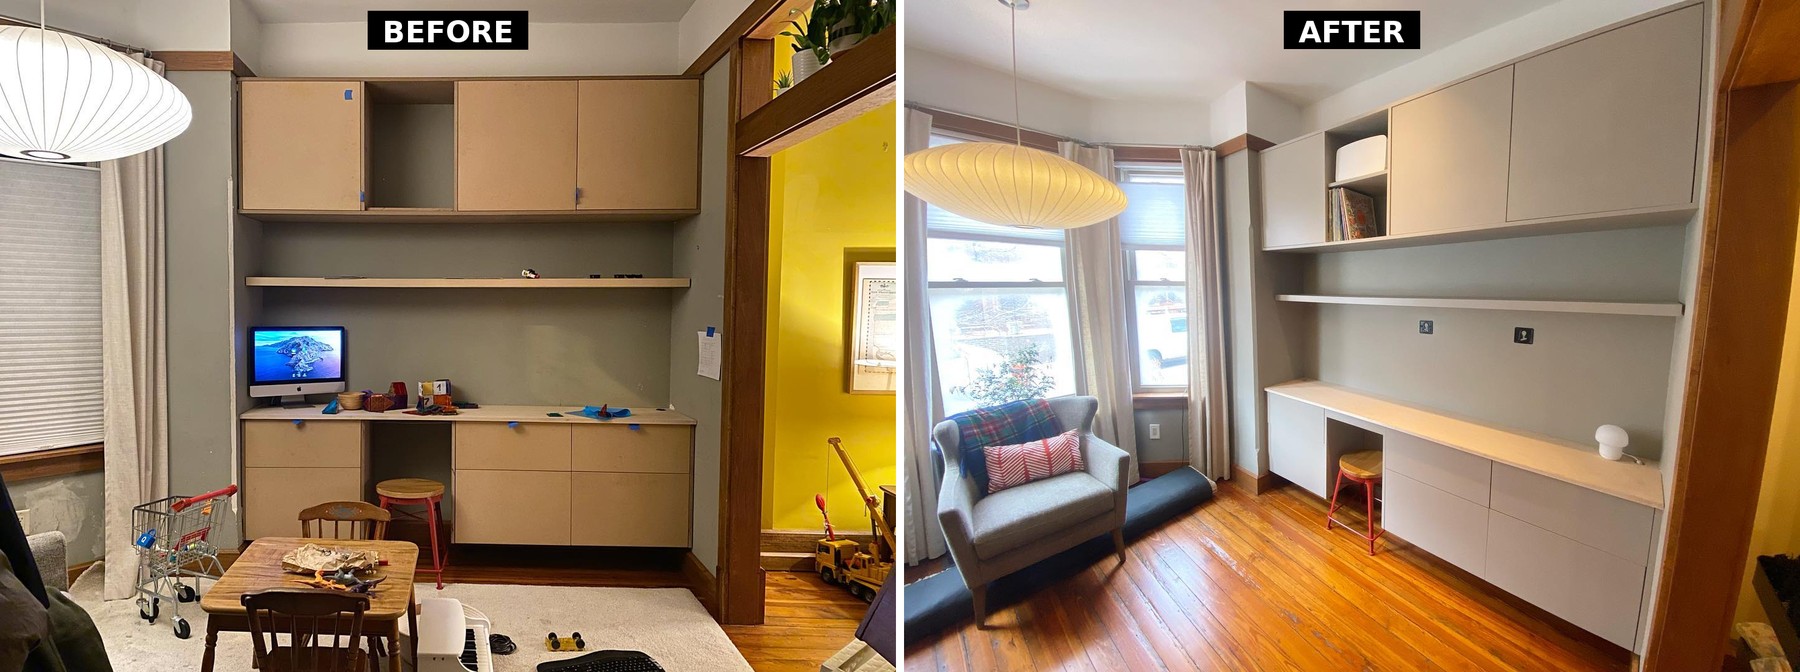
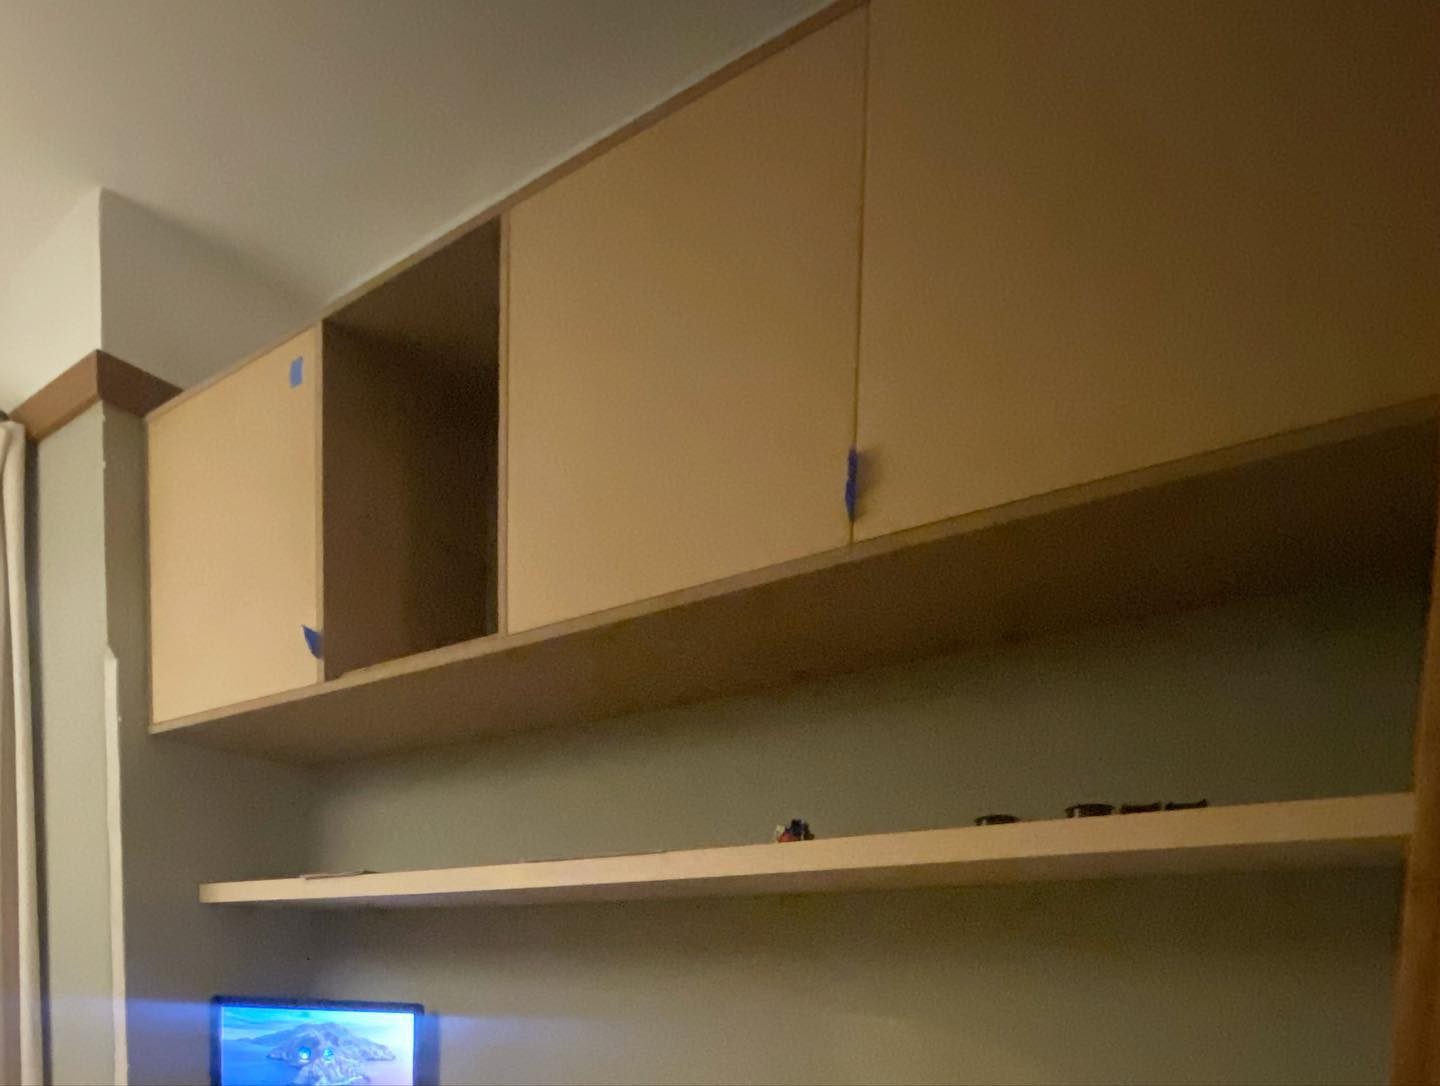
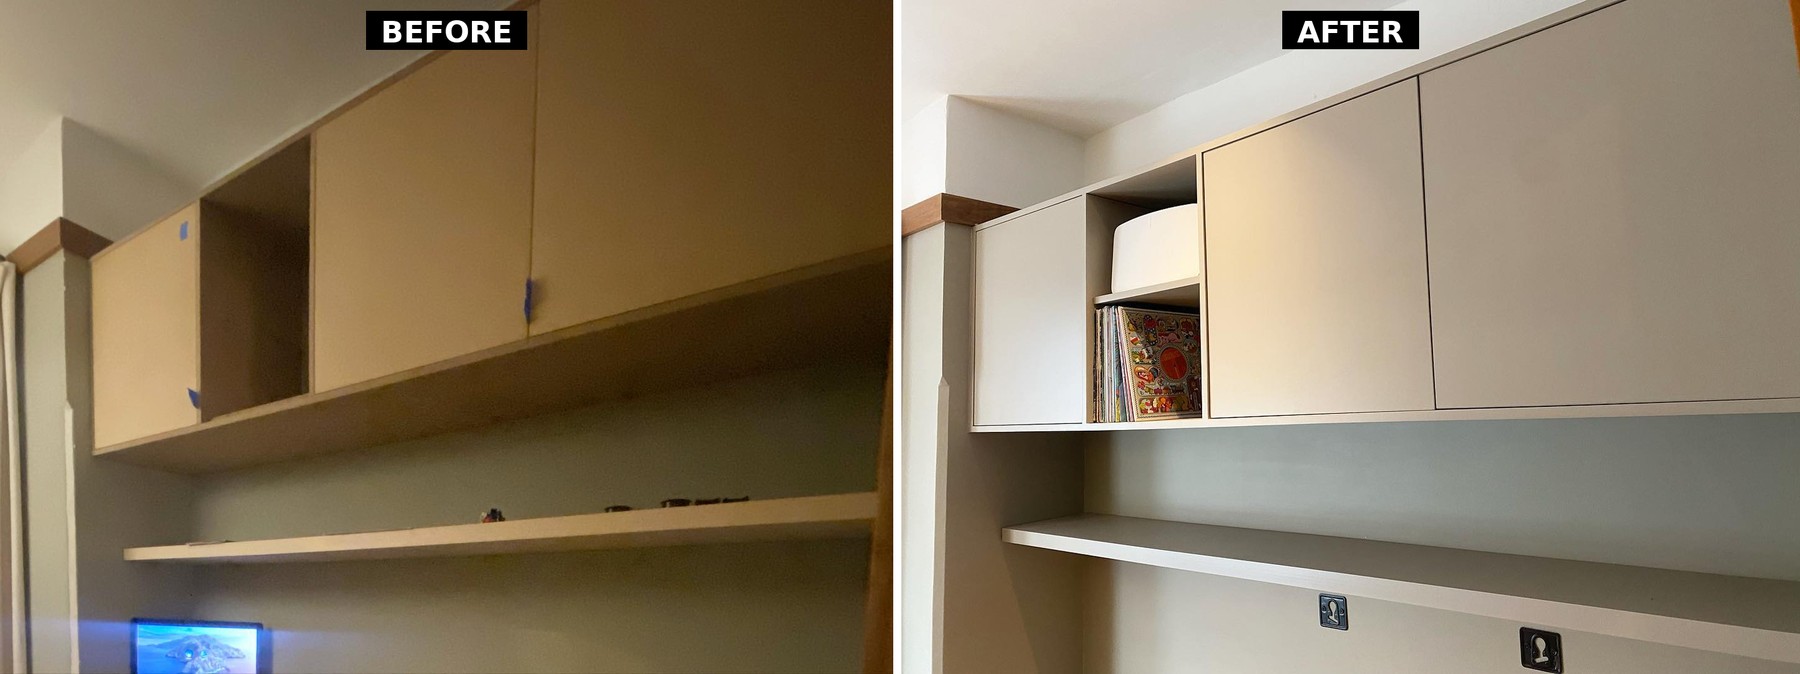
Then you see the shot of this wall before any paint went on and it all falls apart. These are plain flat-front boxes, the kind you can order from a dozen places. Nothing interesting about them.
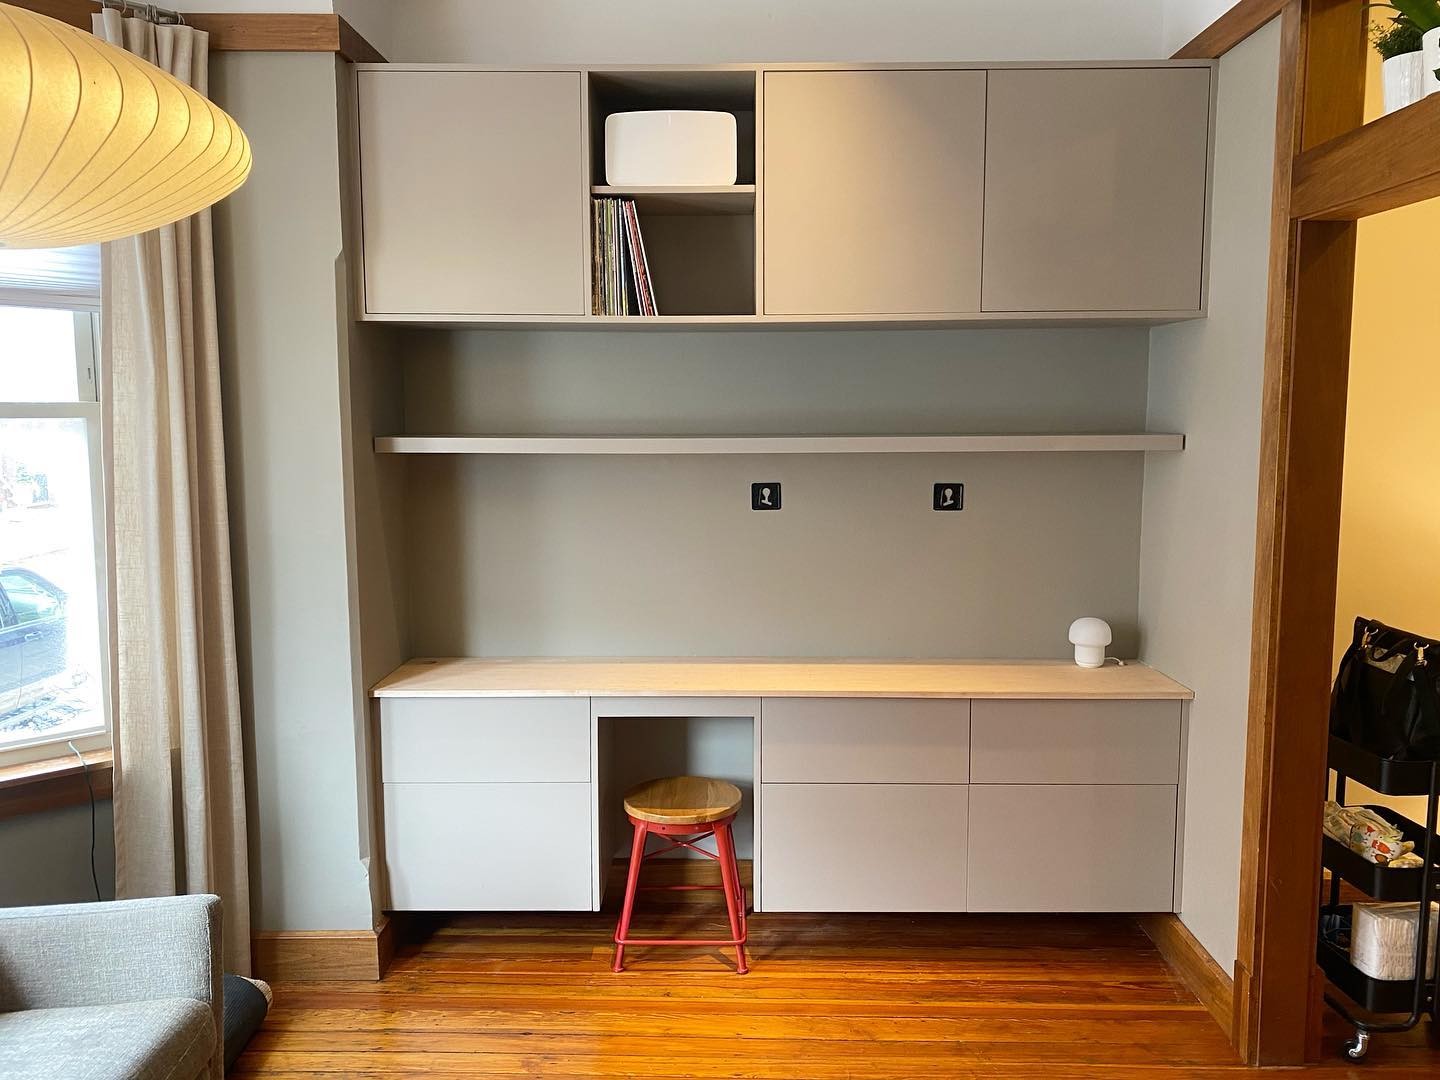
Nothing about the cabinets themselves actually changed between the two photos. The paint did all of it. Specifically, a product called Renner 688 sprayed in Benjamin Moore’s Rockport Gray at a 15 sheen. That combination is why the wall now reads like a magazine spread instead of a Craigslist flip.
The boxes underneath are nothing fancy
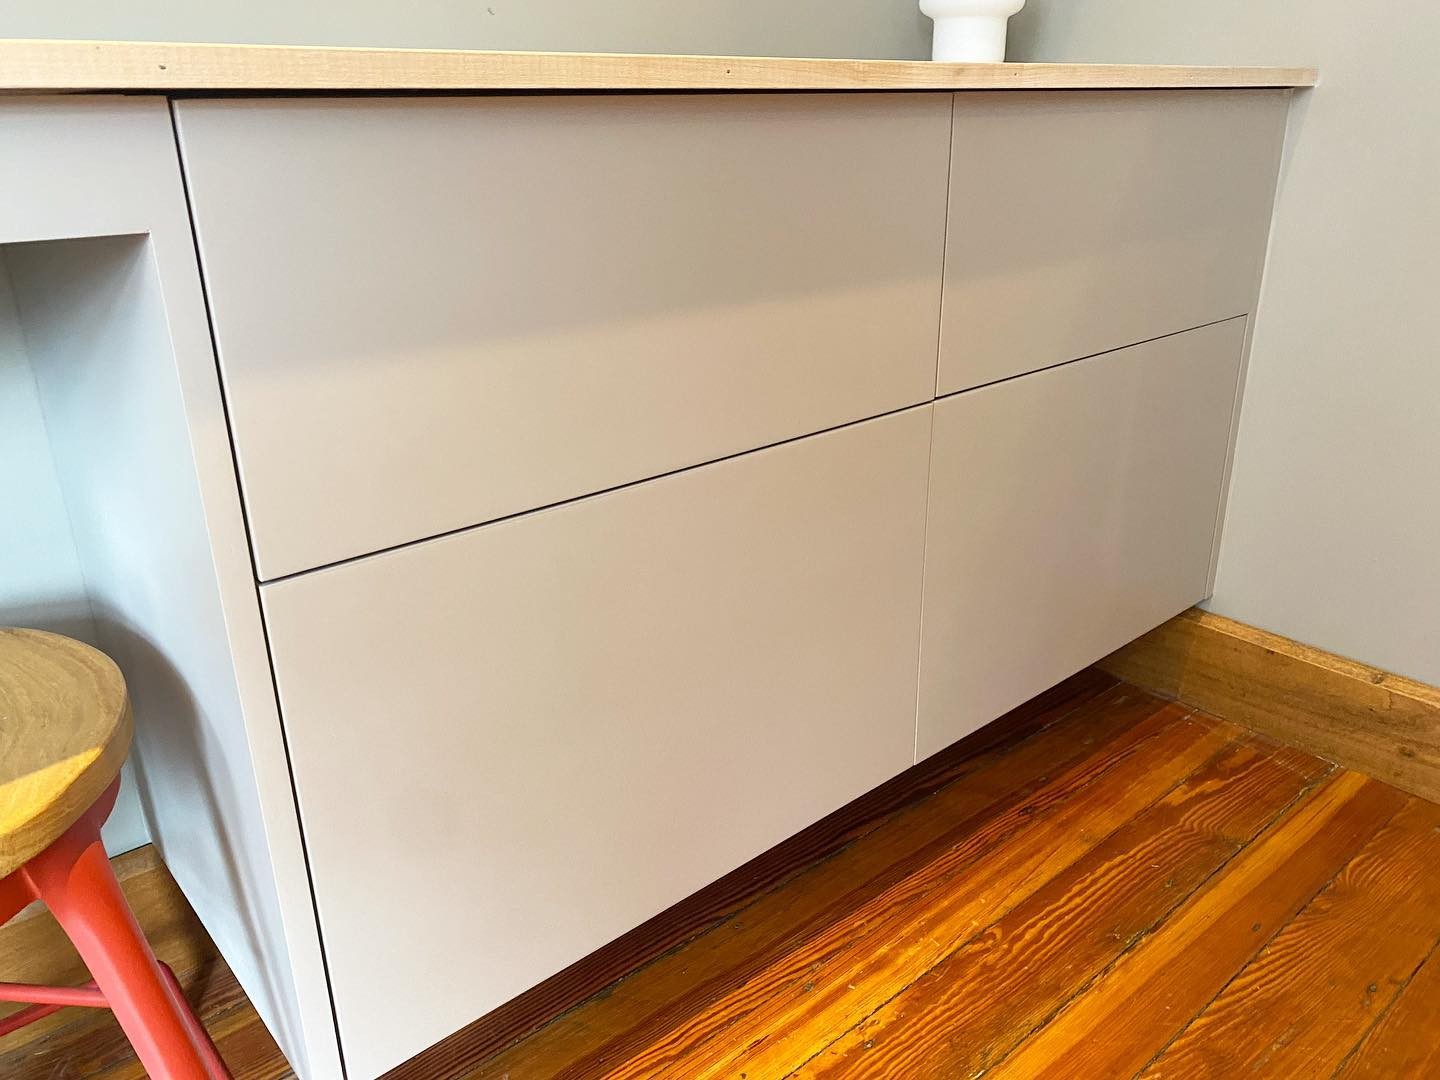
Walk up to the finished wall and the trick is obvious. The doors are flat slabs with no frames and no routed edges. The drawers open with a push, so there’s no hardware to see. Underneath the paint, the boxes are plywood or MDF. The countertop is a single thick plank of light wood. Everything about this setup is off-the-shelf.
That’s actually the smart part. The homeowner skipped the craftsmanship nobody sees and spent the money where it would show every day.
Then they wrapped the whole wall in paper
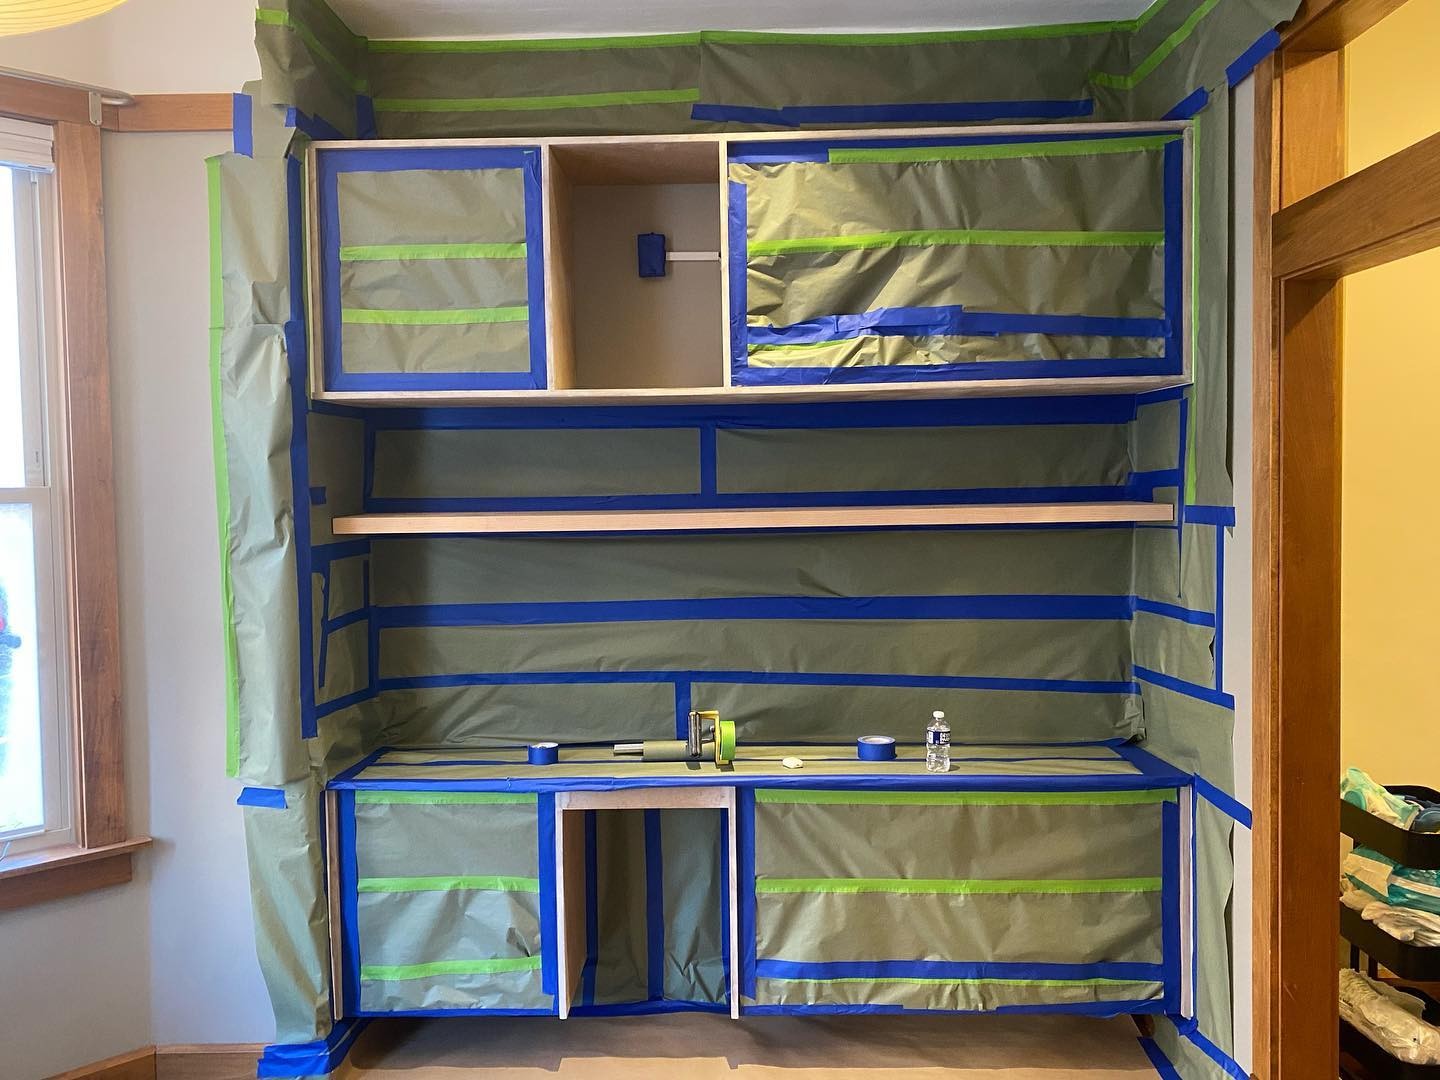
Before a drop of paint went anywhere, the painter buried the room. Walls, trim, baseboards, the floating shelf, the raw countertop, everything in reach. Paper and tape over all of it. Only the cabinet fronts stayed exposed.
This part is where most DIY cabinet jobs fall apart. Overspray travels. It drifts into corners, settles on trim, fogs window glass, turns baseboards fuzzy around the edges. Without serious masking, you’d see cloudy paint everywhere near the cabinets. With masking this tight, the paint lines come out sharp and there’s barely any cleanup after.
Meet Renner 688, the finish doing the work
Renner 688 isn’t a product you’ll find at Home Depot. It’s a 2K polyurethane, sold through pro finishing suppliers, and that limited availability is part of why the finished result is uncommon in homes.
The “2K” means two components. The painter mixes a paint and a hardener together right before spraying. Once mixed, a chemical reaction kicks off and the coating cures into something closer to an automotive finish than a wall paint.
A few things set it apart from the cabinet paint you’ve probably used:
- It self-levels as it sprays, so there are no brush marks, no roller lines, and no orange peel texture
- The cured surface is hard enough to shrug off fingerprints, cleaning sprays, and the small scuffs of daily life
- The sheen stays identical across every panel, which is harder than it sounds
- The color sits rich and dense on the surface, not thin or watery
Even Benjamin Moore Advance, the best DIY cabinet paint most people reach for, can’t match this. Your brush marks will show. The finish will stay soft for weeks. And it’ll pick up its first ding inside a year.
Why Rockport Gray reads this expensive
The color itself does a lot. Rockport Gray (HC-105 in Benjamin Moore’s catalog) is a warm greige. It leans brown underneath instead of blue, which is why it sits so well against the orange pine floors in this room. A cooler gray would’ve fought those floors. This one makes peace with them.
The sheen is 15, which is unusually specific. For reference, flat sits around 0 to 5, satin is closer to 20 or 30, and semi-gloss starts around 50. A 15 catches just enough light to look like a real cabinet surface, but it doesn’t shine like a 90s kitchen. It’s the sheen you see on cabinets in design magazine kitchens, and it’s almost never an accident.
What a job like this actually costs
A custom built-in from a millwork shop, for a wall this size, usually runs between fifteen and twenty-five thousand dollars, plus install. Pre-made boxes plus a pro 2K spray finish usually come in at three to seven thousand total, depending on your market and how many doors there are.
For most eyes, the result looks the same.
So when you plan your own cabinet project, flip the usual order of operations. Spend less on the boxes. Spend real money on the finish. Ask your painter whether they spray 2K polyurethane. If the answer is no, keep asking around until you find someone who does. That one question is the difference between a cabinet wall that looks painted and one that looks built.